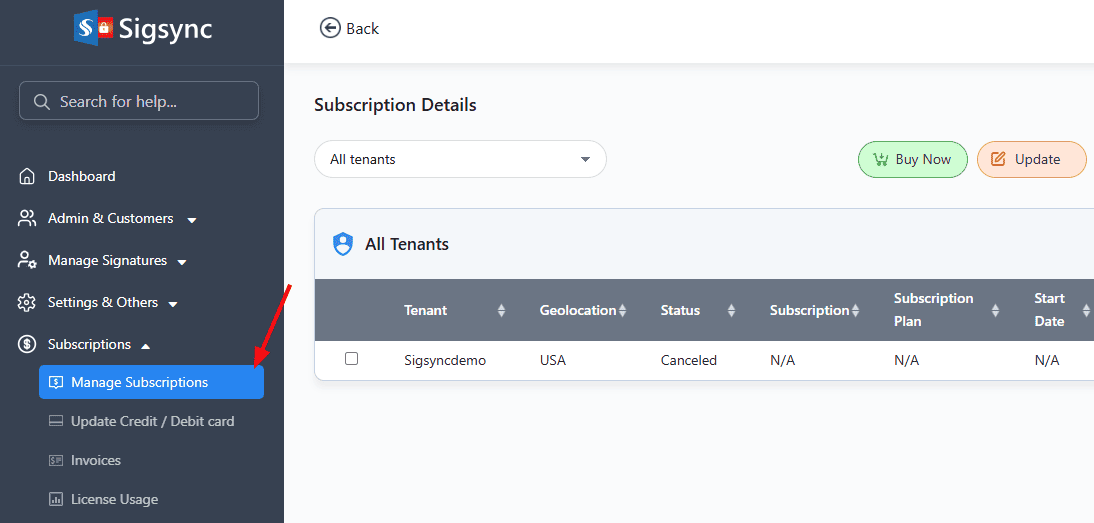
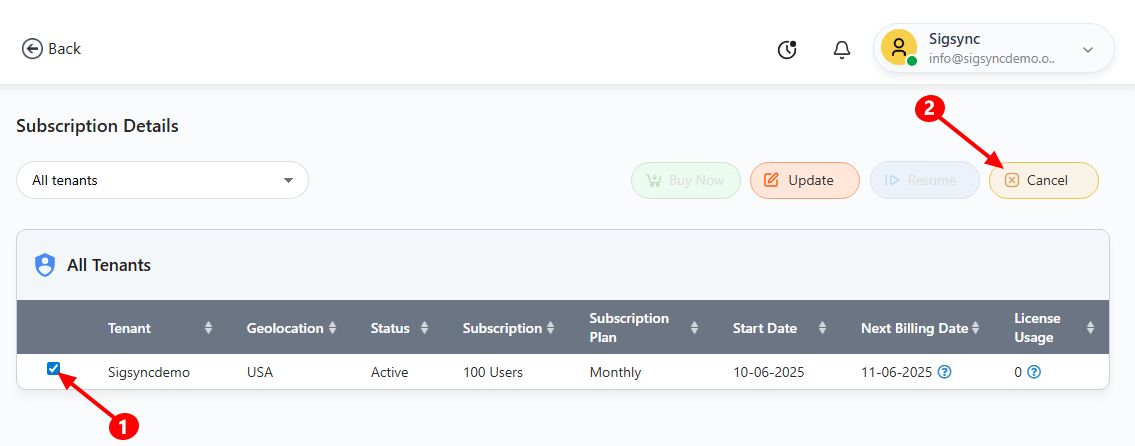
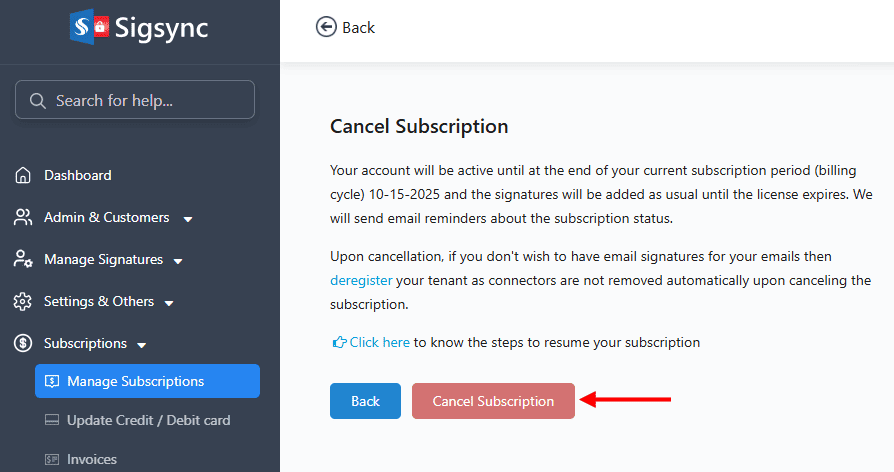
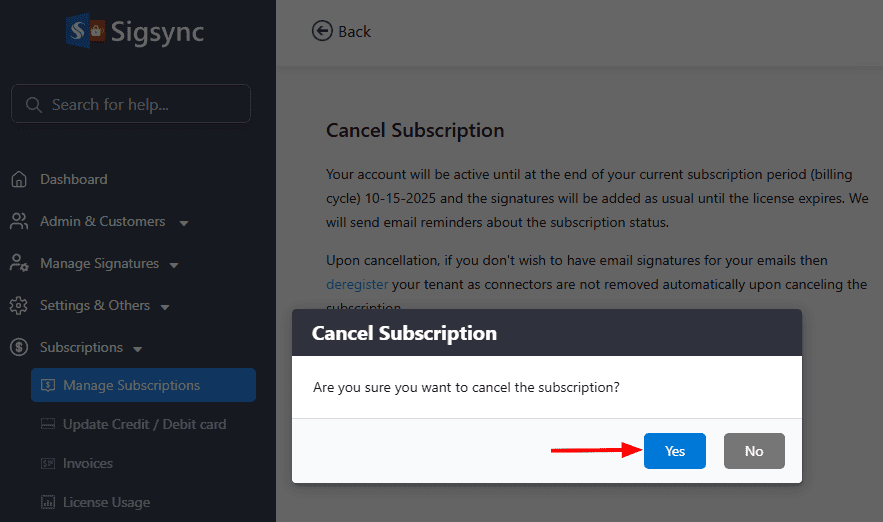
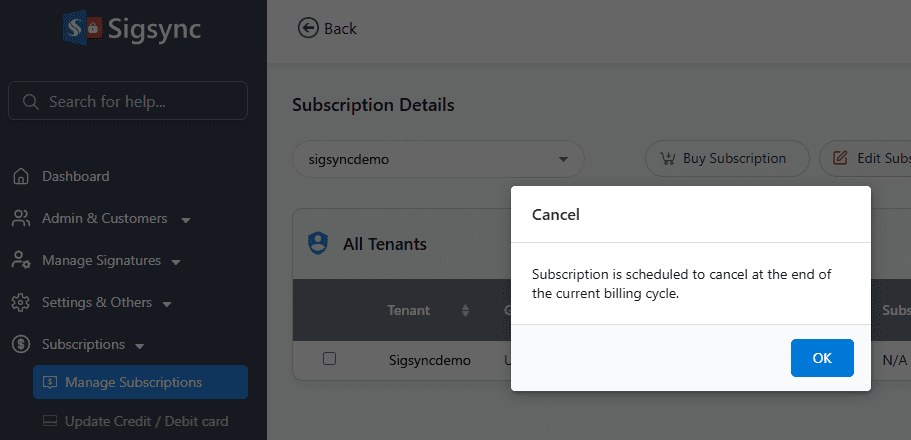
How to cancel subscription

  • If you choose to remove automatically

    If you choose to remove automatically, then you have to click on 'Automatic' button and provide Global Admin credentials to delete 'Sigsync Routing Rules', 'Sigsync Outbound Connector' and 'Sigsync Inbound Connector' automatically.

  • If you choose to remove manually

    1. If you choose to remove manually, then you must Login to your Office 365 tenant's Admin center. Then, navigate to 'Exchange' shortcut as shown in below screenshot to open Exchange Admin center in new tab.

      exchange

    2. Select 'mail flow' in the navigation menu on left side of screen and select 'Rules' tab and then select the 'Sigsync Routing Rules', click delete button as shown below.

      delete-rules

    3. Now, click on 'Connectors' tab and select 'Sigsync Outbound Connector', click delete button as shown below. Select 'Sigsync Inbound Connector', click delete button again.

      delete-connectors

  • Remove Other Components

    1. Then, open Azure Active Directory Admin center by logging in to your Office 365 Admin center and navigating to Azure Active Directory as shown below. In this page, click on 'All services' and then choose 'Enterprise applications'. Now search for Sigsync Login, Sigsync Users list and Sigsync Verify apps in the applications list. Open the app page by clicking the app name. Now, click 'Delete' as shown below. Make sure you have deleted all 3 apps mentioned above.

      azure-active azure-services azure-delete

    2. Go to your DNS registrar and remove the 'include:mail.sigsync.com' in your SPF record.

Streamline Email Signature Management with a Free On-demand Demo from Sigsync

Sigsync email signature service provides effortless, centralized signature management for Office 365 and Exchange. Our team can assist you in quickly setting up company-wide signatures. Request a free on-demand demo to see how Sigsync can simplify your email signature management process.

SCHEDULE A DEMO

Demo sitemap