How to check Azure Active Directory group membership using Graph Explorer?
You set up a rule to add a signature to emails sent by members of a particular group in Azure Active Directory (AAD). It turns out that when you add a new member to the same group, the email does not come with the signature.
Resolution:
Verify the newly added user membership using Graph Explorer.
Follow the methods below to verify the membership:
Check the members of the group using group’s Object ID:
- Sign in to Azure Active Directory admin center.
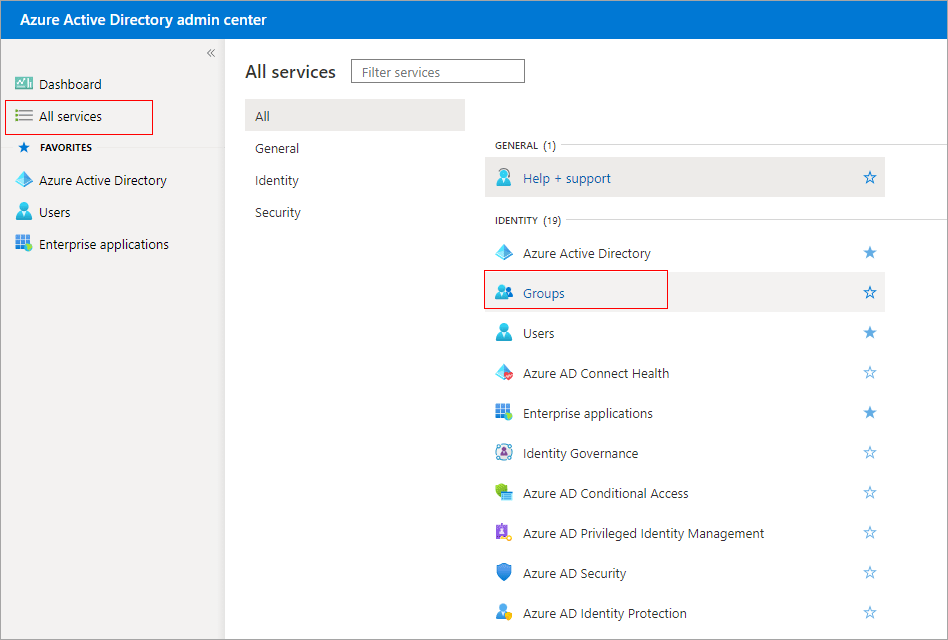
- Click All services in the left navigation menu, then select Groups on the subsequent page
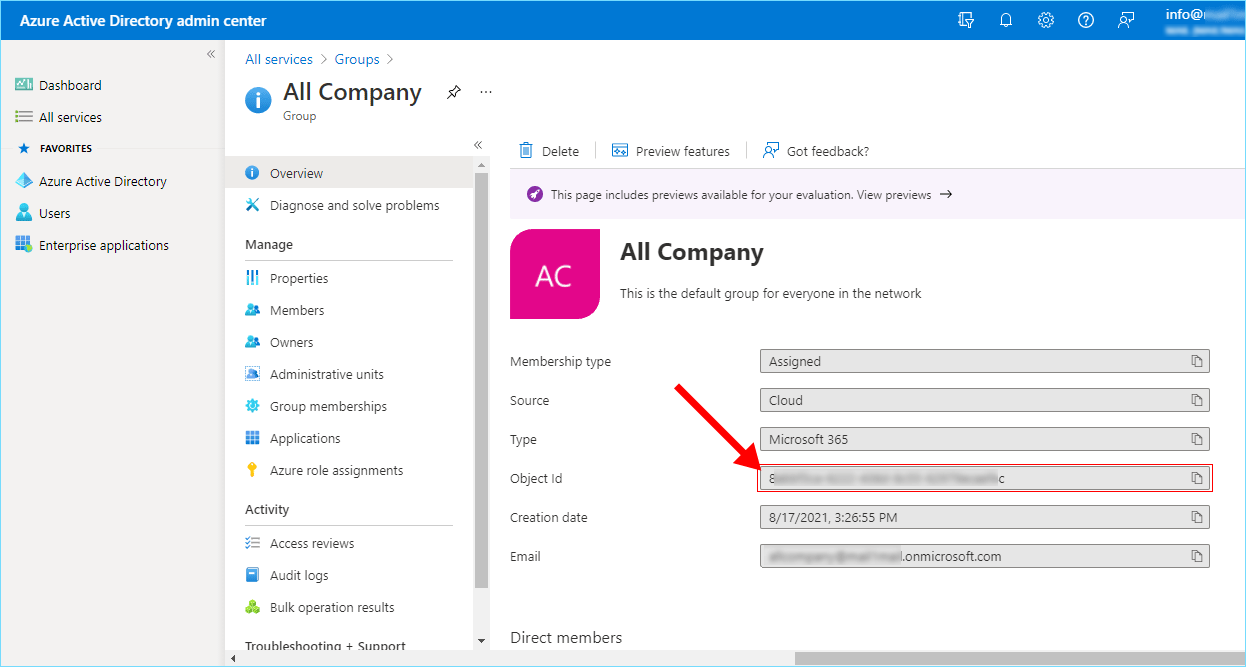
- Click the group that consists of newly added users. Click the copy button next to the Object Id as shown, to copy the Object ID value under the Overview settings page
- Open Microsoft Graph Explorer in your browser
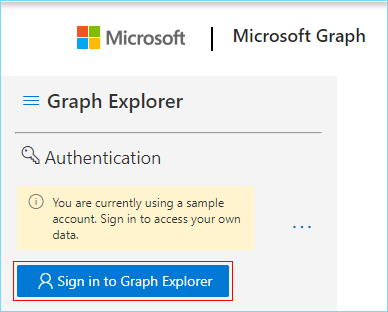
- Click the Sign in to Graph Explorer button. Sign in with your global admin credentials.
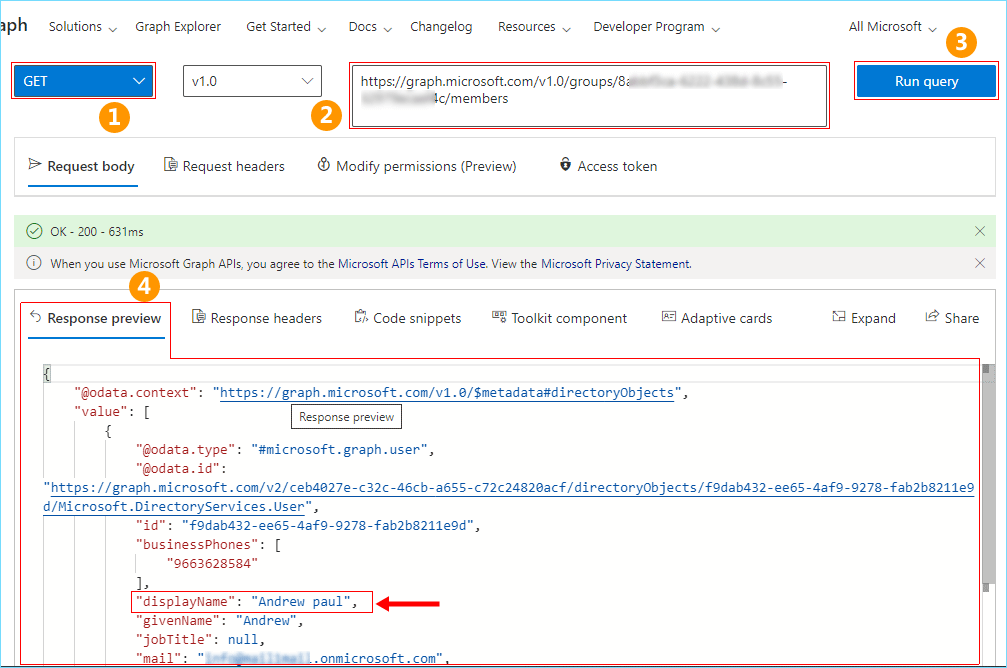
- Select GET from the drop-down menu on top of the window as shown. Enter https://graph.microsoft.com/v1.0/groups/{ID}/members in the URL field where {ID} is the group’s Object ID value as you’ve previously copied in Step 3. Now click the Run query button in the top right corner of the window.
- On execution of the query, if it prompts errors such as 'Request_ResourceNotFound', then it may indicate that you have not used Admin account credentials for login or AAD group Object value is invalid. Ensure that your login credentials and the AAD group Object ID value is valid.
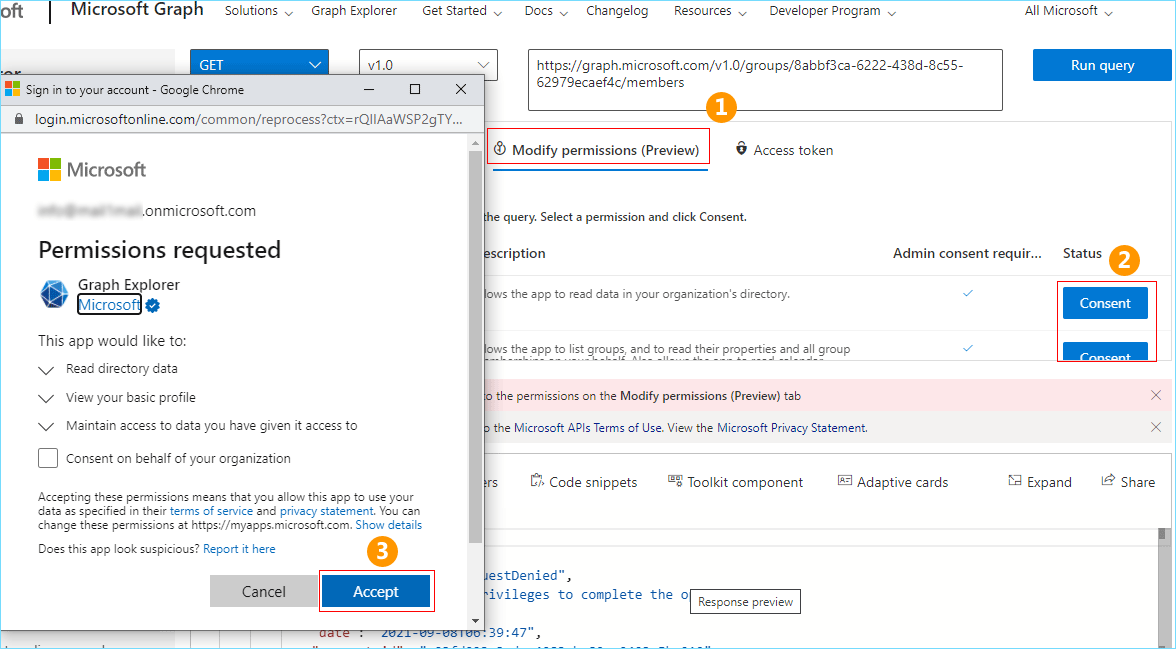
- If it prompts the error: Forbidden – 403, then you need to consent to the permissions on the Modify permissions (Preview) tab. Now, click on the Modify permissions (Preview) tab as shown in the screenshot. Click the Consent button and then Accept in the pop-up window that appears. Repeat the same procedure for all the listed permissions. Once it is done, enter your query again and click the Run query button.
- If there are no other errors, an OK message is displayed and you can see the list of users in the group (in the JSON format) on the Response preview tab at the bottom of the window. You can find the user by the displayName property or any other field value.
If the newly added user to which the signature is not appended:
- is NOT in this list, it may indicate an issue with Microsoft services. In this case, add the user again or wait for the updates to reflect;
- is on this list, it may indicate an issue with Sigsync service. In this case, verify the rules you applied. Also, you can contact Sigsync support
Check the Groups that user belongs using user’s Object ID
- Sign in to Azure Active Directory admin center.
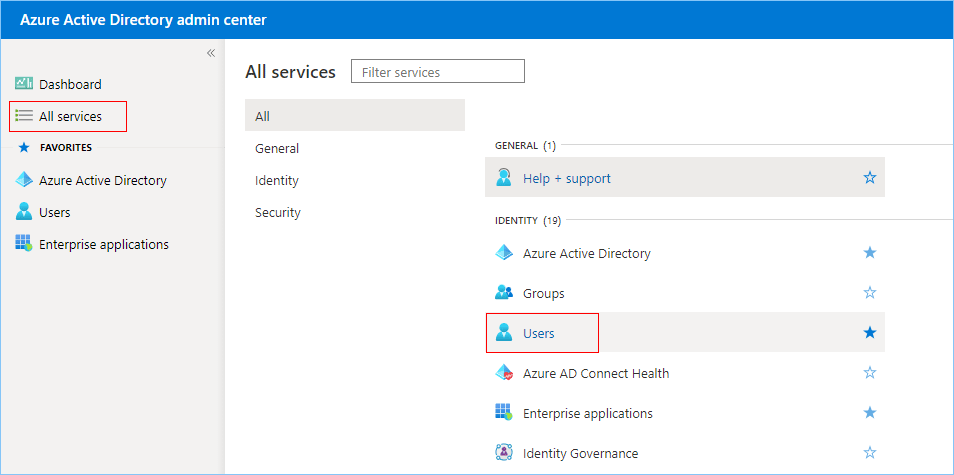
- Click All services in the left navigation menu, then select Users on the subsequent page.
- Click the preferred user on the list. If you have a large user base, you can use the search box at the top of the list to find the desired user.
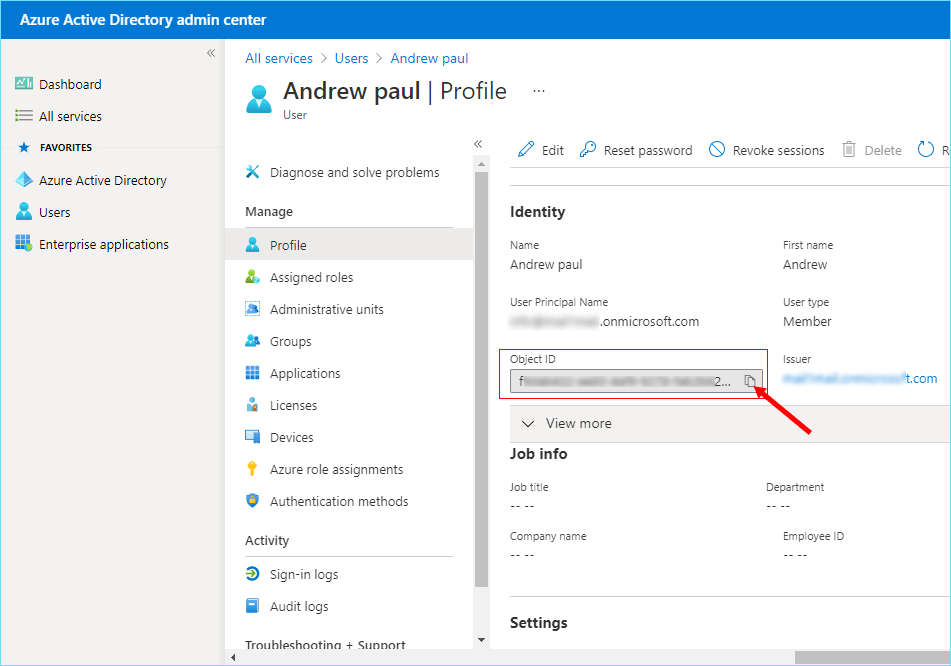
- Use the button on the right side of the field to copy the Object ID value from the Object Profile page once it has been displayed.
- Open Microsoft Graph Explorer in your browser
- Click the Sign in to Graph Explorer button on the left and Sign in to Graph Explorer using your global admin credentials. Now you can add your query to retrieve information about the groups a given user belongs to.
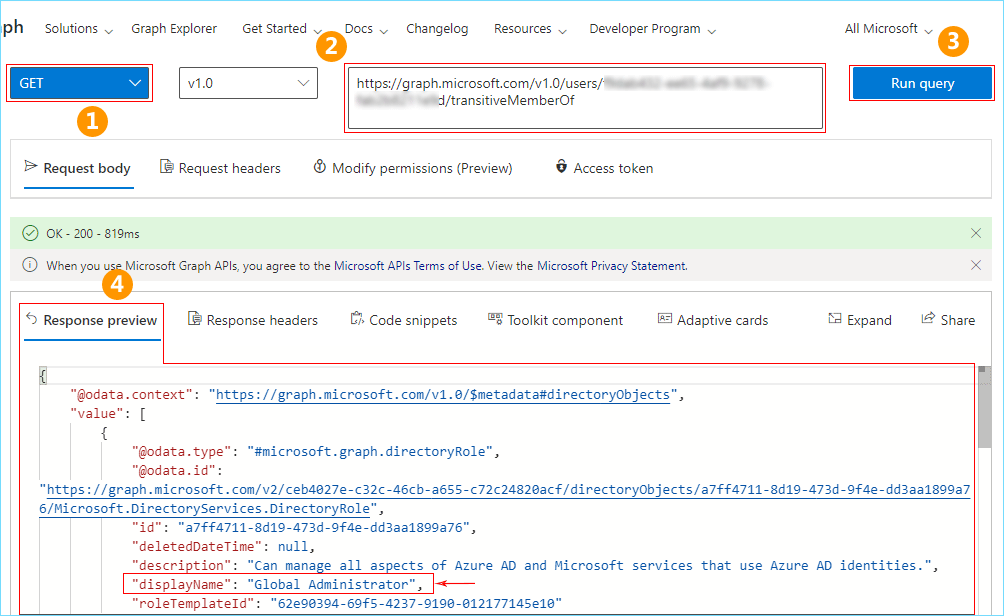
- Select GET from the drop-down menu at the left side, top of the window. Enter https://graph.microsoft.com/v1.0/users/ {ID}/transitiveMemberOf in the URL field where {ID} is the user’s Object ID value as you’ve copied in Step 4 of this method. Now click the Run query button in the top right corner of the window.
- On execution of the query, if it prompts errors such as 'Request_ResourceNotFound', then it may indicate that you have not used Admin account credentials for login or AAD user object value is invalid. Ensure that your login credentials and the user Object ID value is valid.
- If it prompts the error: Forbidden – 403, you need to consent to the permissions on the Modify permissions (Preview) tab. Follow the procedure under the Modify permissions (Preview) tab as explained in the ‘Check the Groups that user belongs using user’s Object ID’ section
- If there are no other errors, an OK message is displayed and you can see the list of users in the group (in the JSON format) on the Response preview tab at the bottom of the window. You can find the user by the displayName property or any other field value.
If the newly added user to which the signature is not appended:
- is NOT in the list, it may indicate an issue with Microsoft services. In such a case, add the user again or wait for the updates to reflect;
- is on the list, it may indicate an issue with Sigsync service. In such a case, verify the rules you applied. Also, you can contact Sigsync support
Streamline Email Signature Management with a Free On-demand Demo from Sigsync
Sigsync email signature service provides effortless, centralized signature management for Office 365 and Exchange. Our team can assist you in quickly setting up company-wide signatures. Request a free on-demand demo to see how Sigsync can simplify your email signature management process.
