How to set the proper image size in your email signature for different email clients and devices?
When an image is inserted into the signature template, it should appear in the correct size across all the email clients and devices.
Resolution:
Insert an image of required size which avoids additional CSS or HTML changes. However, if you have inserted a large image and want to change its size, follow the steps below:
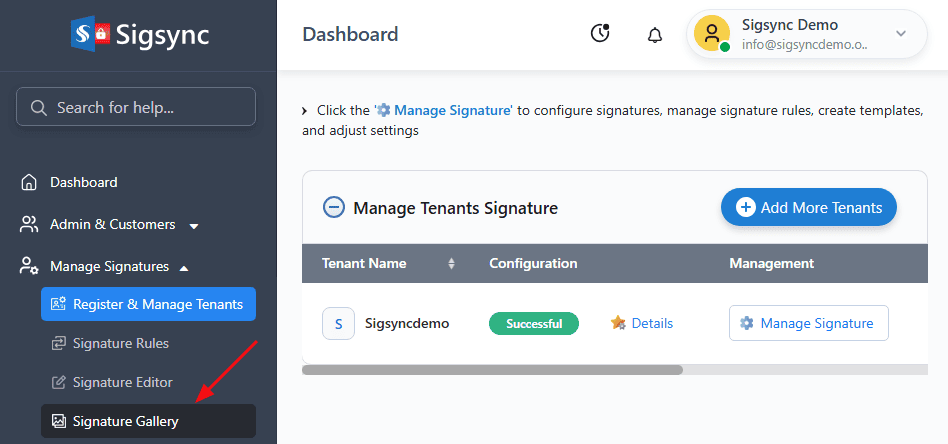
- Log into the Sigsync dashboard
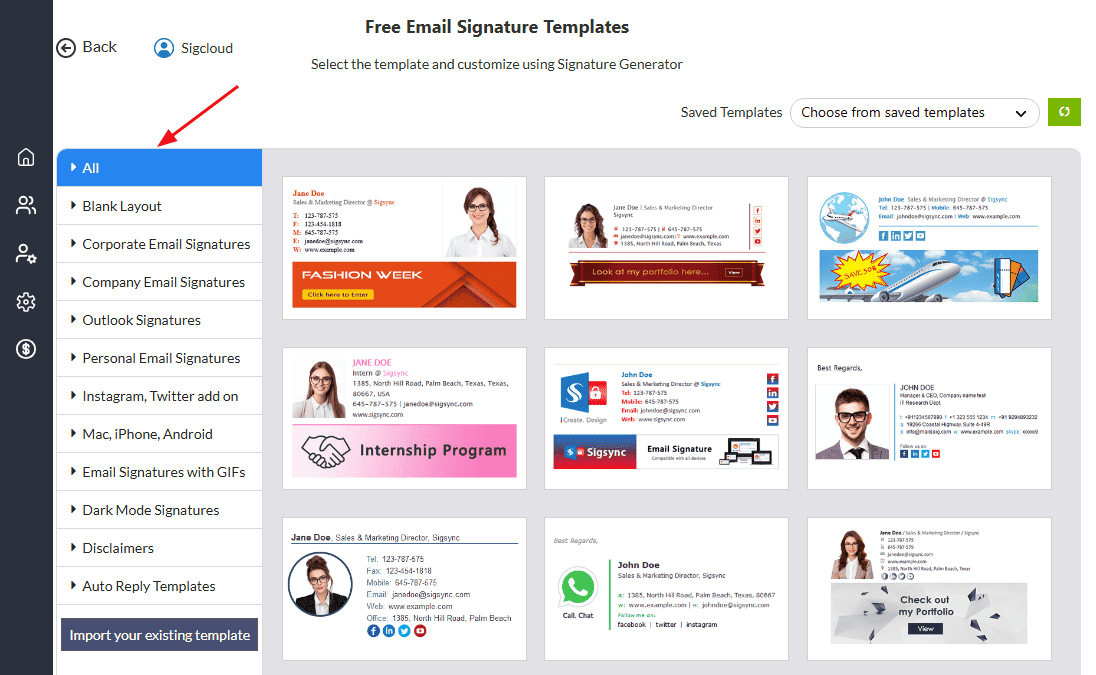
- Select the 'Manage Signatures' < 'Signature Gallery' tab
- Now choose the required signature template or select the templates from the saved list.
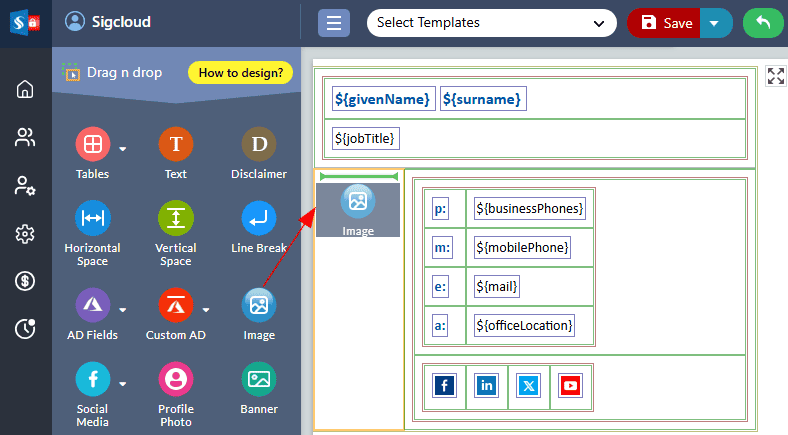
- Drag and drop the 'Image' component into the signature design area.
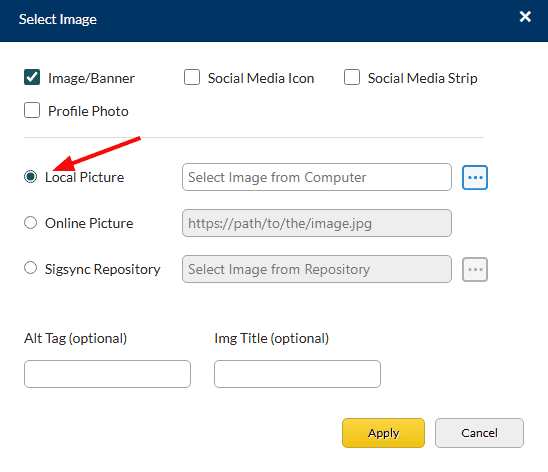
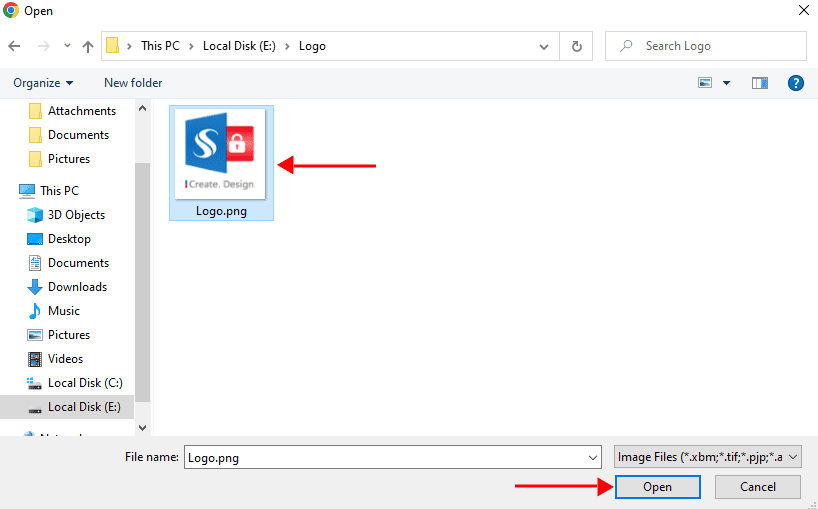
- You can either load required images from your local drive, online URL or Sigsync repository.
- Choose the required image
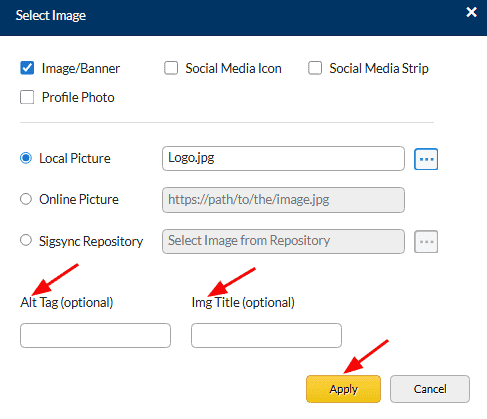
- Assign the logo image an Alt Tag and Image Title, then click the 'Apply' button
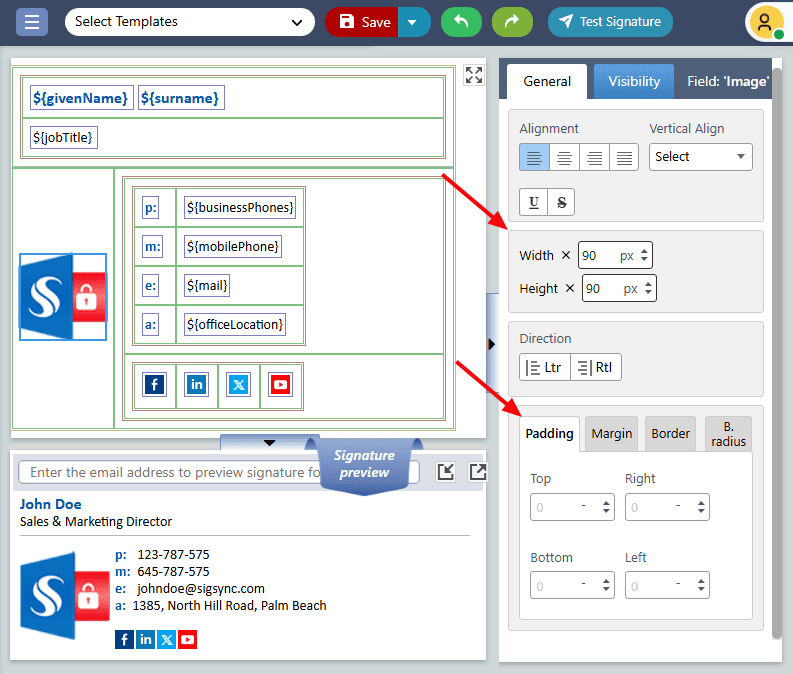
- Select the image, then adjust its ‘Height, Width, and Padding’ from the 'General' tab on the right side of the editor.
Streamline Email Signature Management with a Free On-demand Demo from Sigsync
Sigsync email signature service provides effortless, centralized signature management for Office 365 and Exchange. Our team can assist you in quickly setting up company-wide signatures. Request a free on-demand demo to see how Sigsync can simplify your email signature management process.

