Steps to set up Sigsync signatures for Shared mailboxes
Issue:
Setting up dynamic Sigsync signatures for Shared mailboxes
Requirement:
Configuring Sigsync signatures for Shared mailboxes
Problem Description:
We have successfully configured Sigsync signatures for regular mailboxes by utilizing the Active Directory properties to dynamically load data into the email signature. However, Shared mailboxes do not possess Active Directory properties by default, which presents a challenge in setting up dynamic signature templates that rely on the Active Directory attributes specific to each Shared mailbox.
Explanation:
While regular mailboxes have associated Active Directory properties, Shared mailboxes do not have these properties by default. This limitation makes it difficult to create dynamic signature templates that utilize the Active Directory attributes of Shared mailboxes. However, there are few simple steps detailed below to address this issue:
Step 1: Set delegate rights (‘Send As’ / ‘Send On Behalf’ permissions)
Grant delegate rights, including 'Send As' or 'Send On Behalf’ permissions, to enable authorized users to effectively manage and send emails from the shared mailboxes.
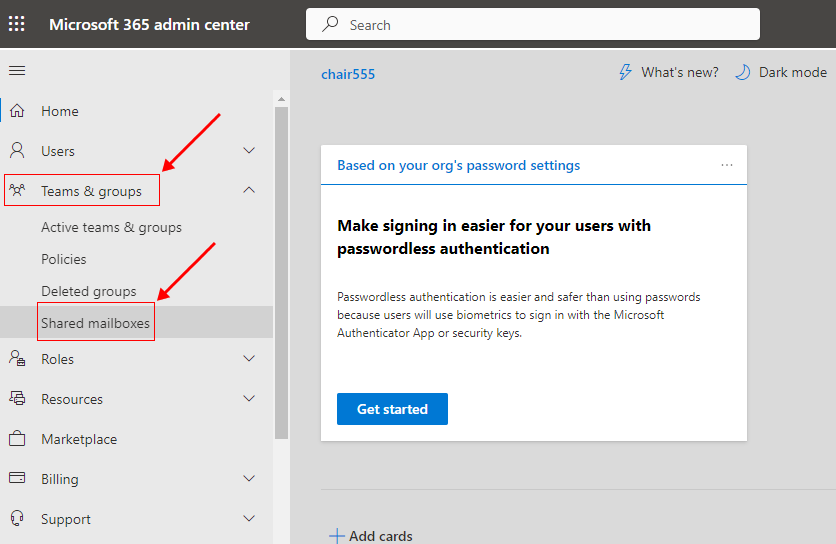
- Log in to Office 365 admin center
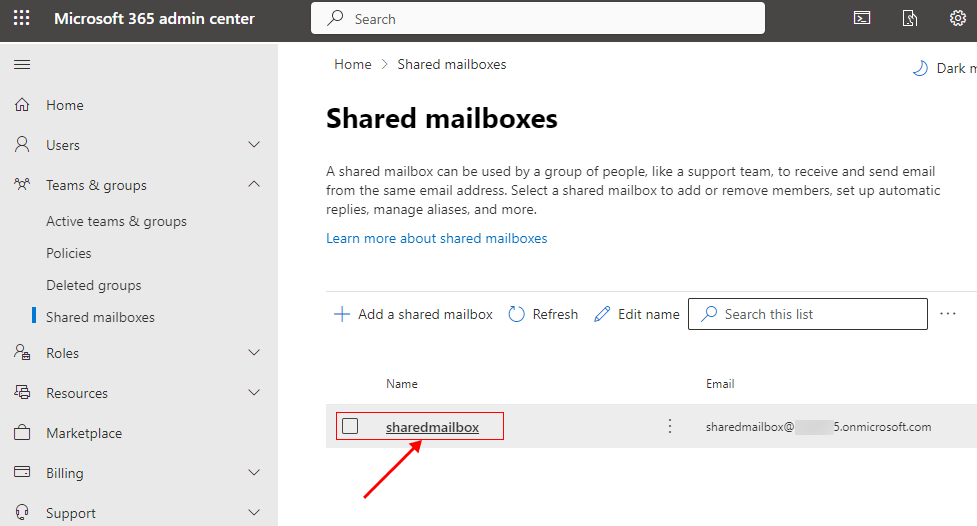
- Navigate to ‘Teams & groups’ > ‘Shared mailboxes’
- Select the shared mailbox you want to set delegate rights
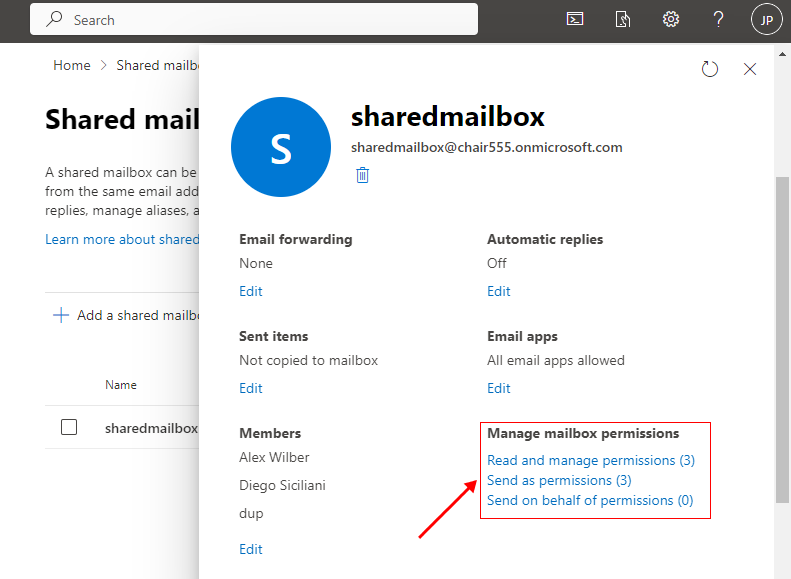
- Click the required permission you wish to set under ‘Manage mailbox permissions’
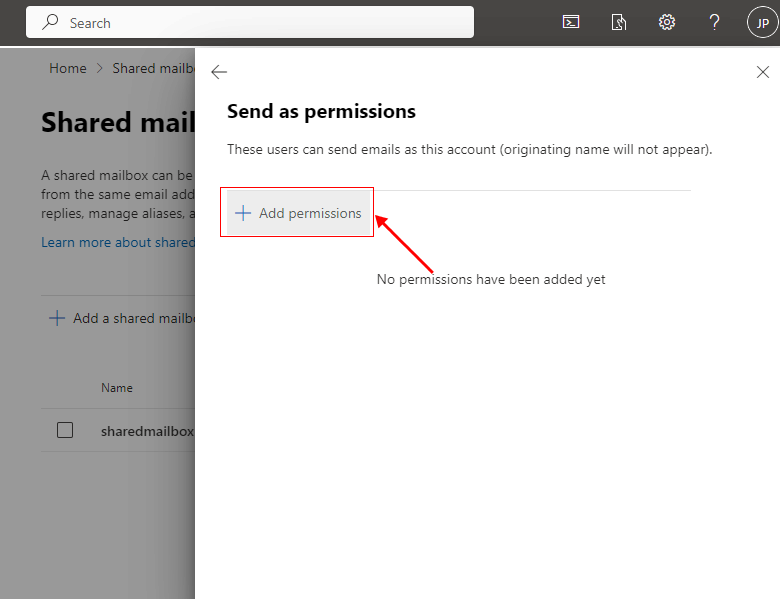
- Click the ‘Add Permissions’ button
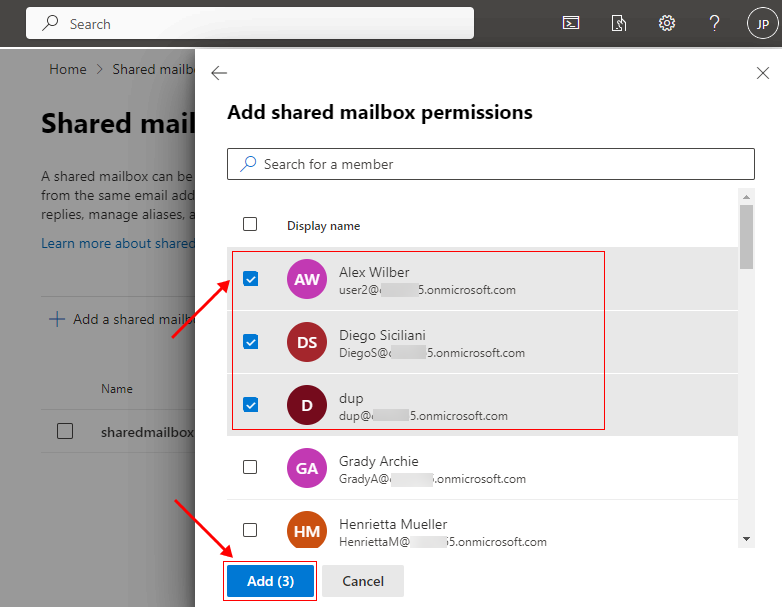
- Select the members you want to set the delegate rights and click the ‘Add’ button
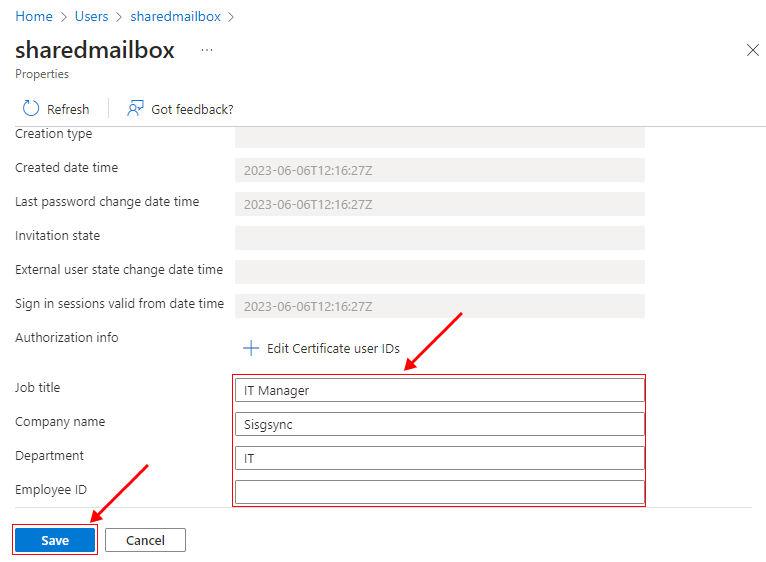
Step 2: Add or edit Active Directory properties (profile) for Shared mailboxes
After setting delegate rights, create a new Active Directory profile for the Shared mailbox if it is not already available in your Azure Active Directory.
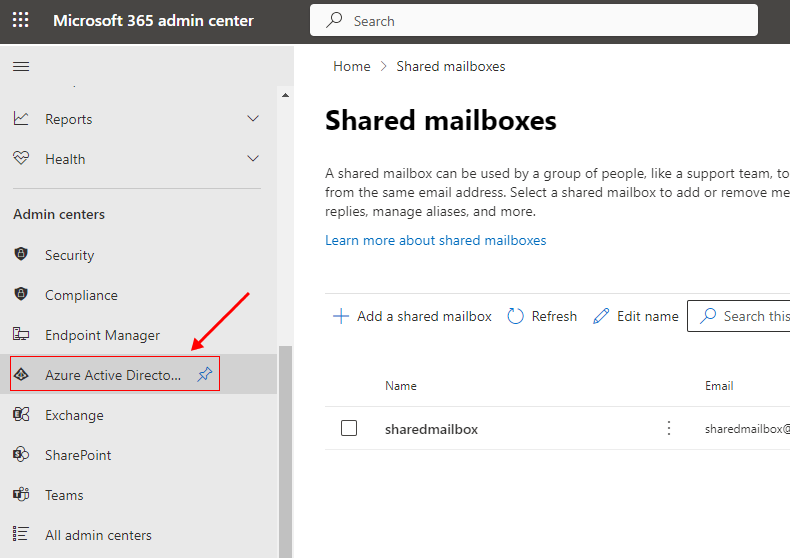
- Select the ‘Azure Active Directory’ tab on the left side panel
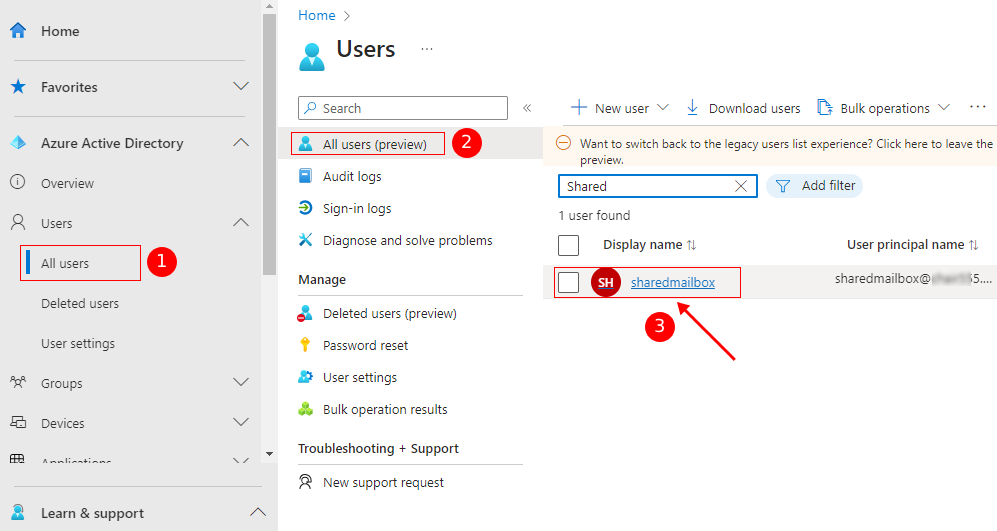
- Search and select the shared mailbox
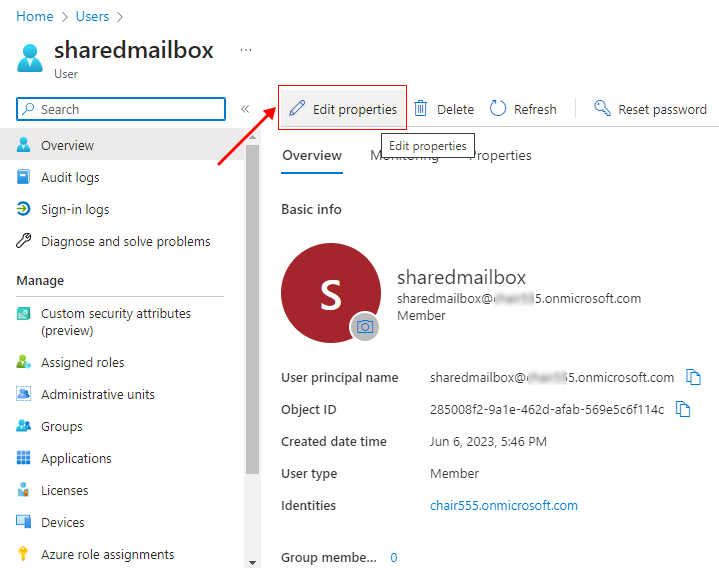
- Click the ‘Edit properties’ tab
- Fill the required fields and click the ‘Save’ button
Step 3: Sync AD changes with Sigsync
Once you have updated the Active Directory profile for the shared mailbox, ensure to sync the AD changes with Sigsync.
Click here to know the steps to sync AD changes with Sigsync.
Step 4: Working of Shared mailboxes in Sigsync Server-side and Client-side (Outlook Add-in) mode signature
Click here to know the working of Shared mailboxes in Server-side and Client-side mode signature
Once you have completed the aforementioned steps, you will find that the details of your Shared Mailboxes are now easily accessible, similar to your user mailboxes. This allows you to manage the signature of your Shared Mailboxes in Sigsync effortlessly, just as you would set up for user mailboxes.
Experience Smarter Email Signatures with a
Free Sigsync Demo
Sigsync email signature service provides effortless, centralized signature management for Office 365 and Exchange.
Our team can assist you in quickly setting up company-wide signatures. Request a free on-demand demo to see
how Sigsync can simplify your email signature management process.


