Signatures to emails with ‘Send as / Send on behalf’ permissions
This article explains how signatures will be attached in Sigsync for the emails sent with 'Send as / Send on behalf' permissions.
Click here for the steps to set 'Send as / Send On Behalf' Delegate rights in Microsoft (Office) 365.
Working of Sigsync signatures with 'Send On Behalf' delegate permissions
Under Server side mode:
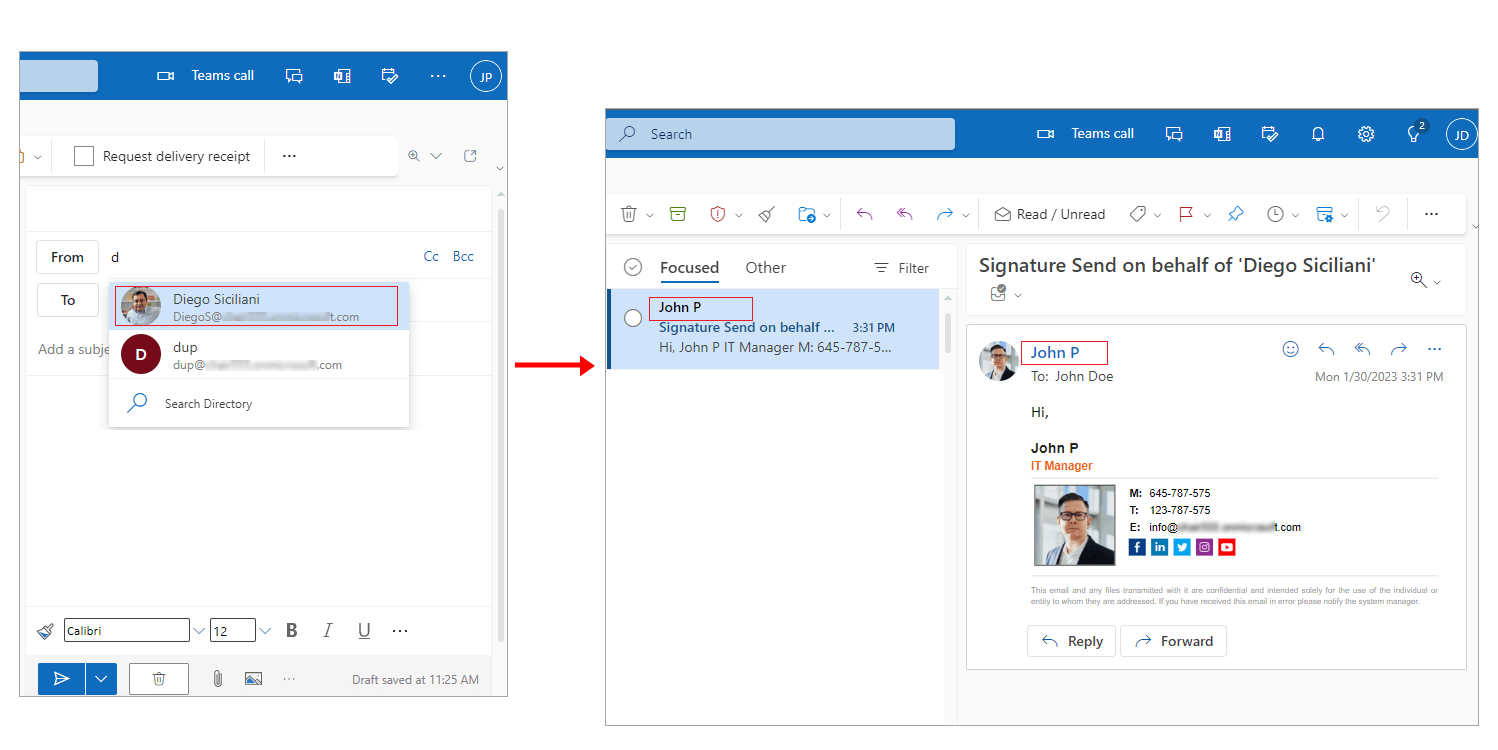
If the user (John P) wants to send email on behalf of another user (Diego Siciliani):
For instance: The user (John P) has 'Send on behalf' permission and wants to send emails as another user (Diego Siciliani). While writing an email, John P chooses Diego Siciliani address in the From field, the signature John P signature gets applied. Hence the signature will be updated in the John P’s Sent Items folder if enabled in Sigsync.
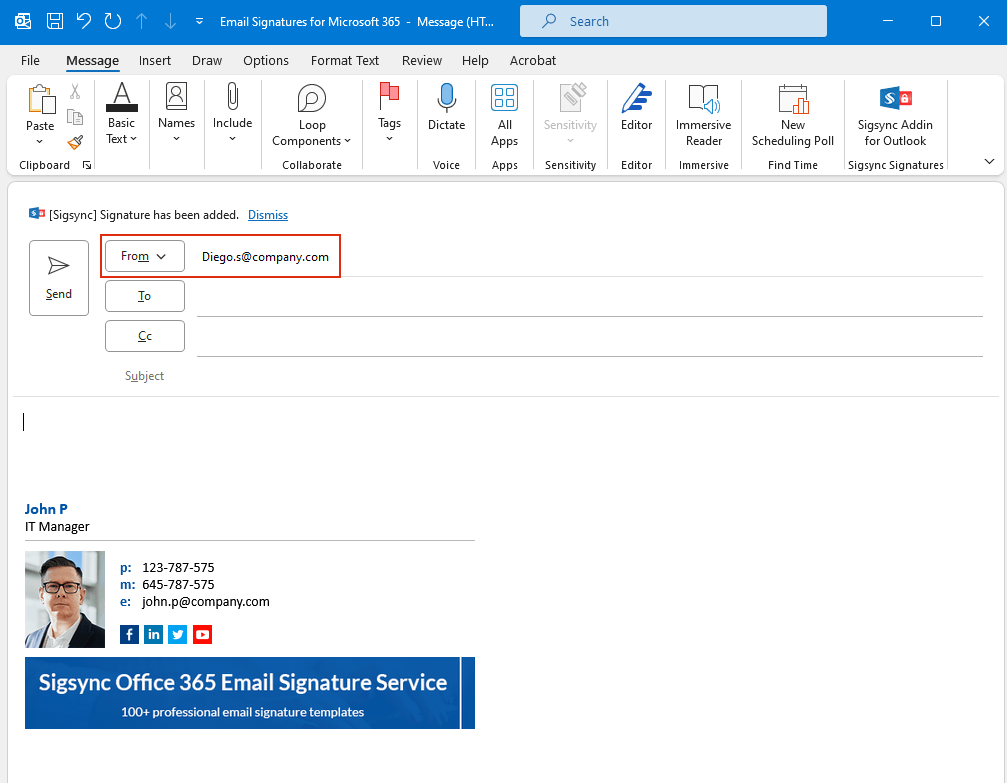
Under client-side mode (Outlook Add-in):
For instance: The user (John P) has ‘Send on behalf’ permission and wants to send emails as another user (Diego Siciliani). While writing an email, John P chooses Diego Siciliani address in the From field, the John P signature gets automatically inserted.
Working of Sigsync signatures with ‘Send as’ delegate permissions
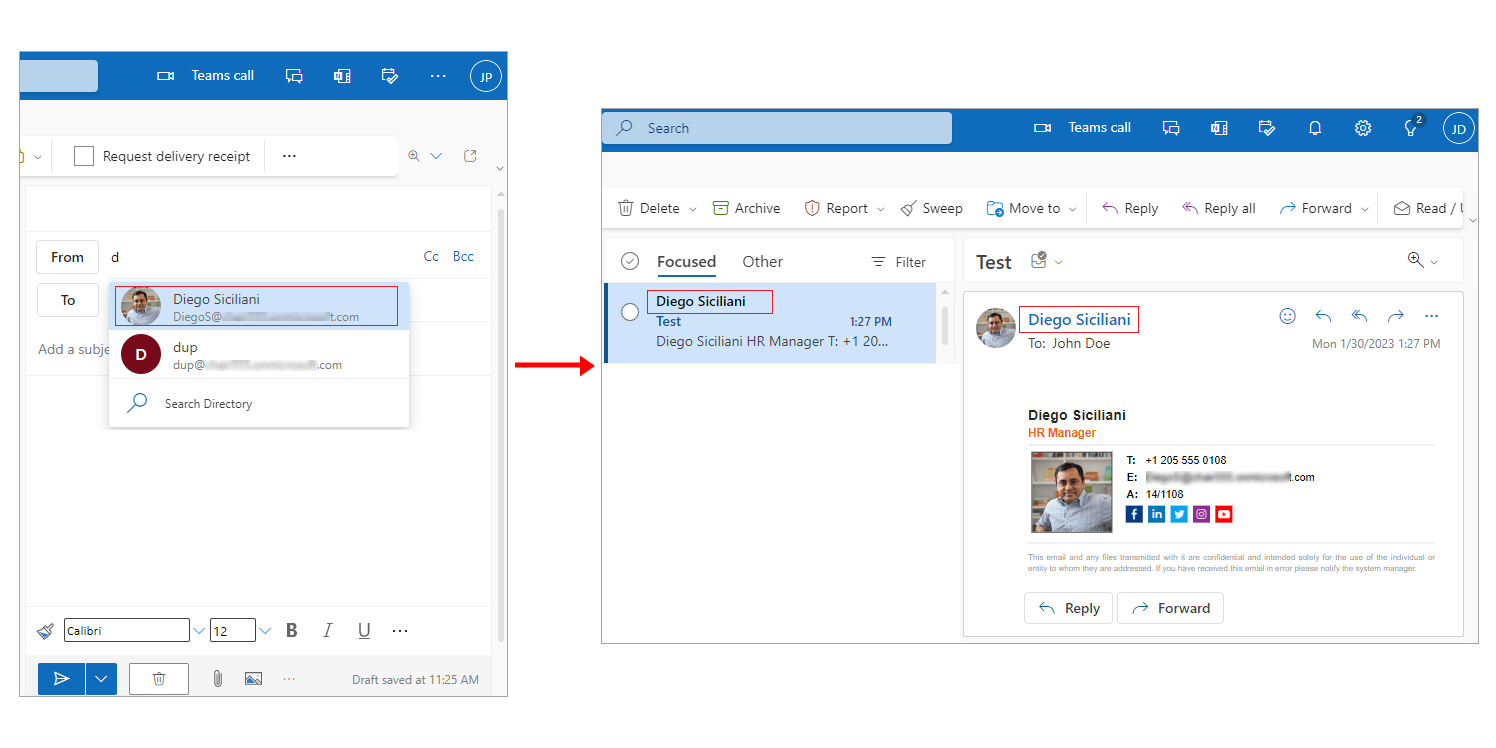
Under server side mode:
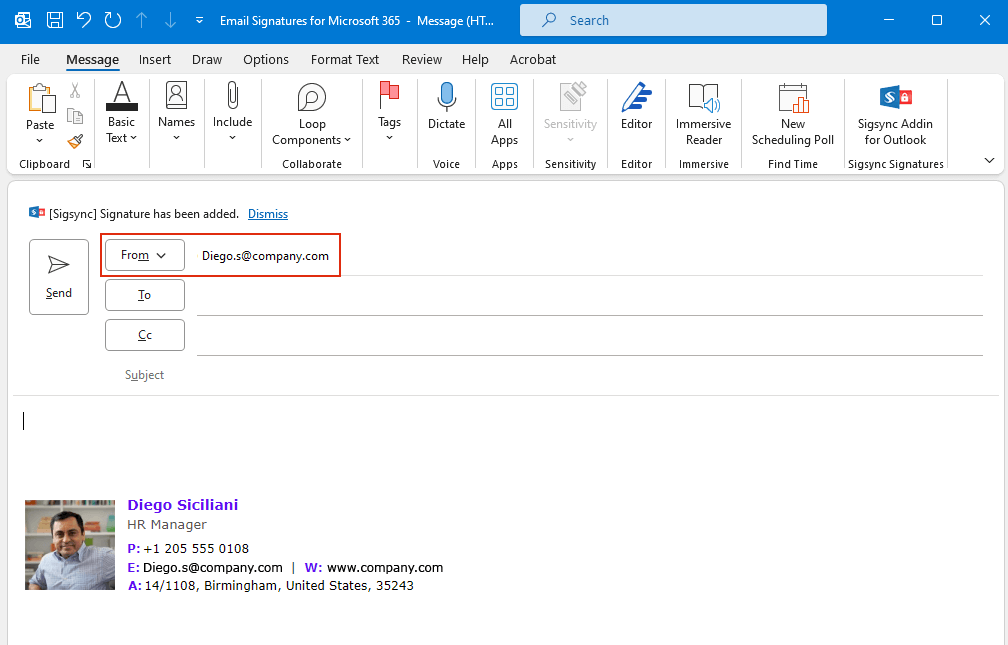
For instance: The user (John P) has ‘Send as’ permission and wants to send emails as another user (Diego Siciliani). While writing an email, John P chooses Diego Siciliani address in the From field, with ‘Send as’ delegate rights the Diego Siciliani signature will get applied.
Under Client side mode:
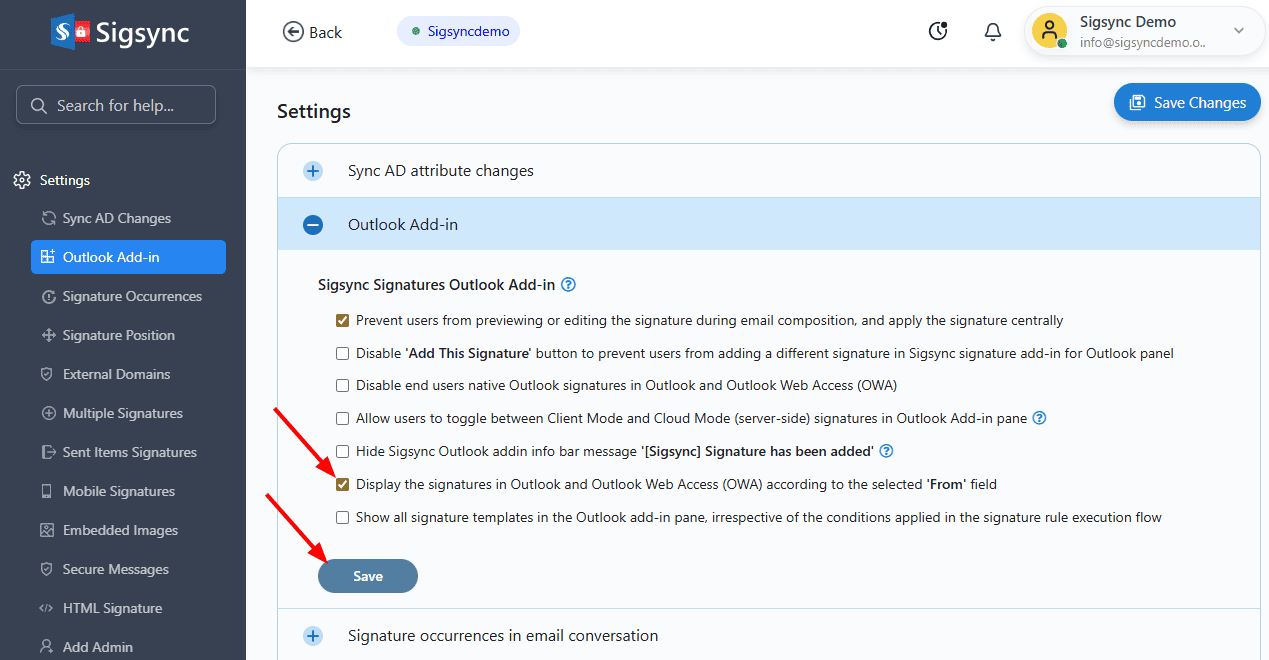
With 'Send As' permissions enabled, to change the signature based on the selected 'From' field address, follow these steps:
- From the dashboard, navigate to Sigsync 'Settings & Others' > 'Settings' tab
- Select 'Outlook Add-in' tab.
- Enable the below option:
'Display the signatures in Outlook and Outlook Web Access (OWA) based on the selected 'From' field'. - 'Save' the changes.
For instance: The user (John P) has ‘Send as’ permission and wants to send emails as another user (Diego Siciliani). While writing an email, John P chooses Diego Siciliani address in the From field, with ‘Send as’ delegate rights the Diego Siciliani signature will automatically get applied.
Click here to know the steps to manage email signatures for Shared mailboxes
Streamline Email Signature Management with a Free On-demand Demo from Sigsync
Sigsync email signature service provides effortless, centralized signature management for Office 365 and Exchange. Our team can assist you in quickly setting up company-wide signatures. Request a free on-demand demo to see how Sigsync can simplify your email signature management process.

