Centralized Mode Signature Configuration
If you have registered your tenant in Sigsync and the signature configuration is still pending, follow the steps below to set up the Centralized Mode (Recommended Mode) signature. Sigsync allows you to first apply signatures to a Test Group of users to verify templates, rules, and formatting. Once everything is confirmed, signatures can be deployed to specific groups such as departments or teams, or rolled out organization-wide to ensure consistent branding.
Steps to configure Centralized Mode signature:
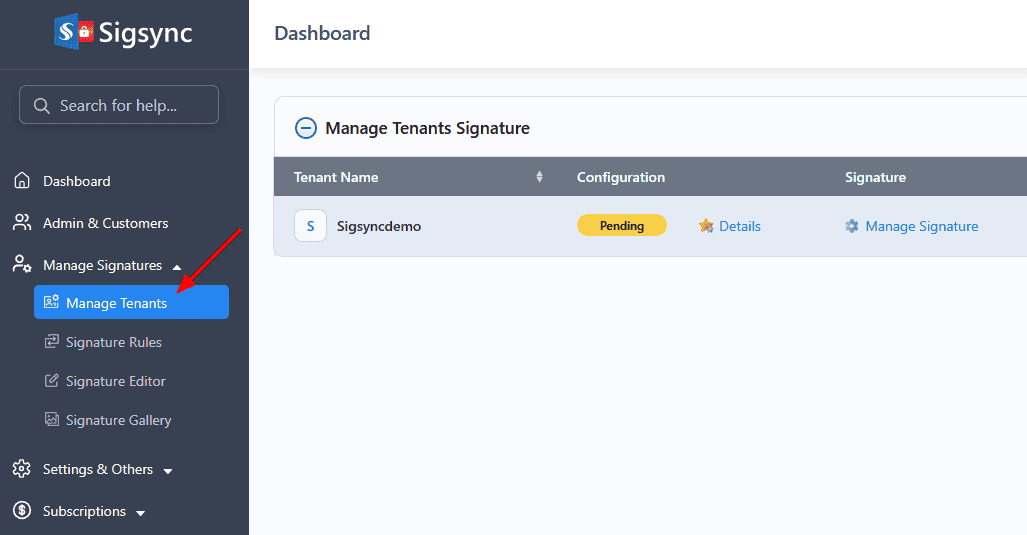
- Login to the Sigsync Dashboard and navigate to the ‘Manage Signatures’ > ‘Manage Tenants’ tab.
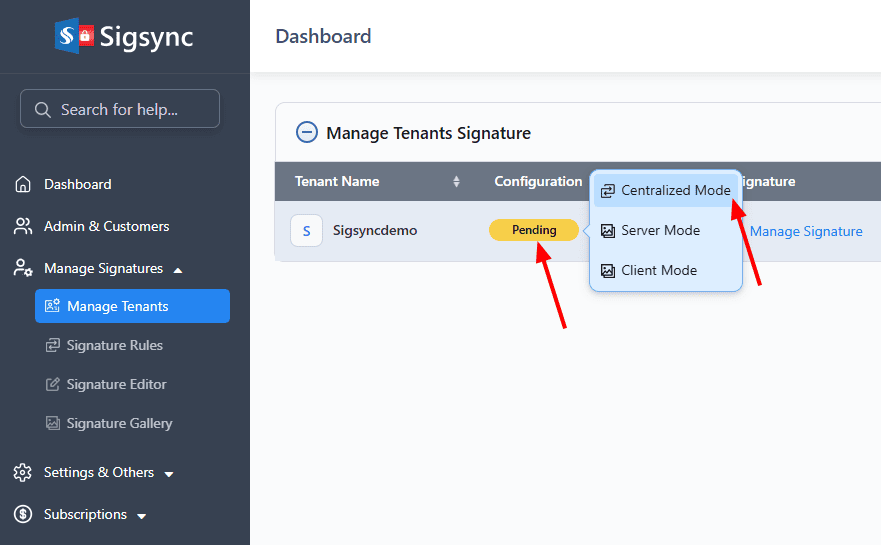
- Click on ‘Pending’ under the Configuration column and select the Centralized mode.
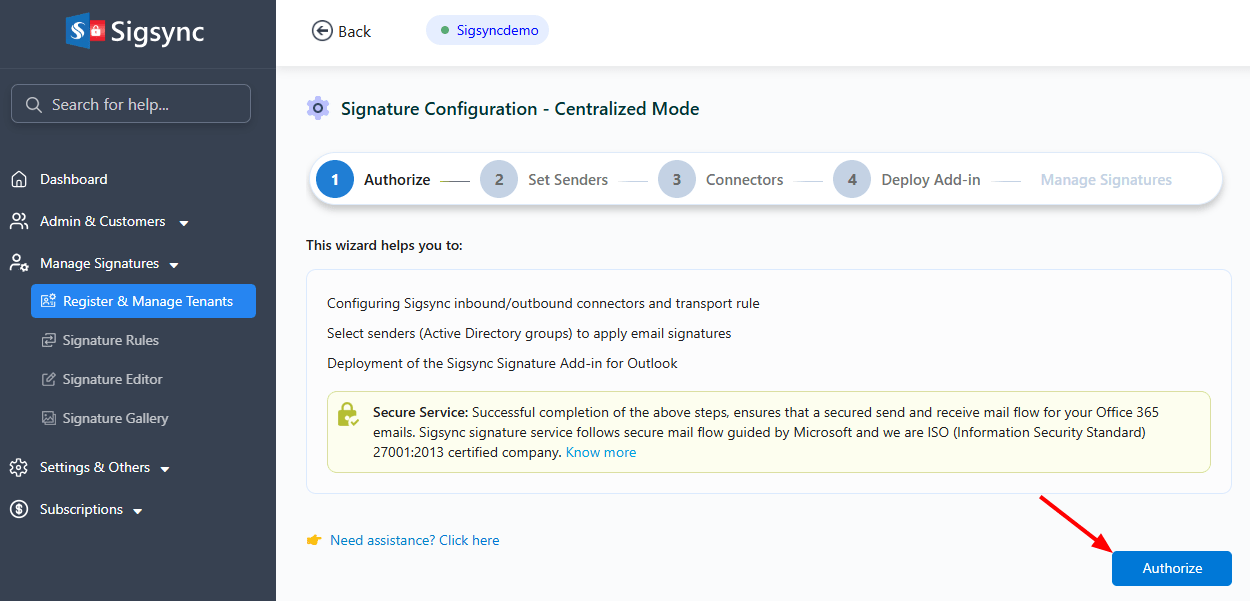
- Click ‘Authorize’ to proceed.
- Authenticate using your Office 365 Global admin account.
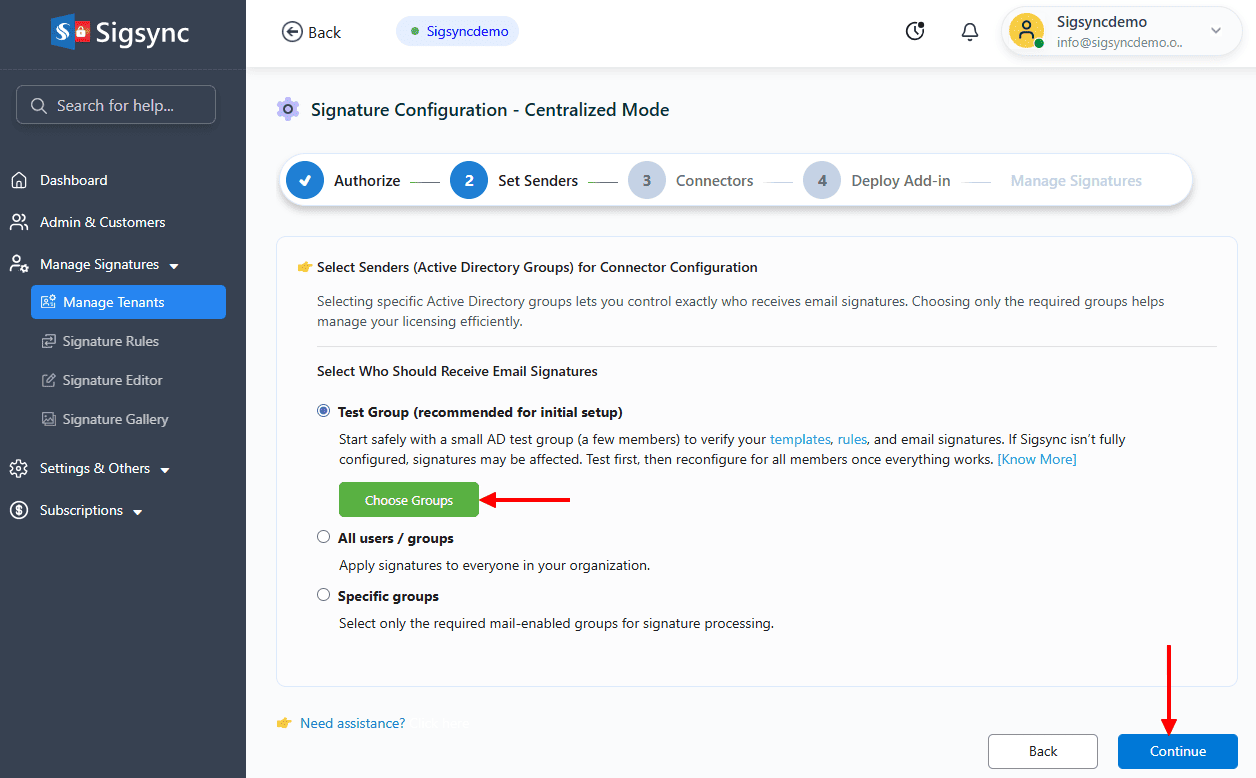
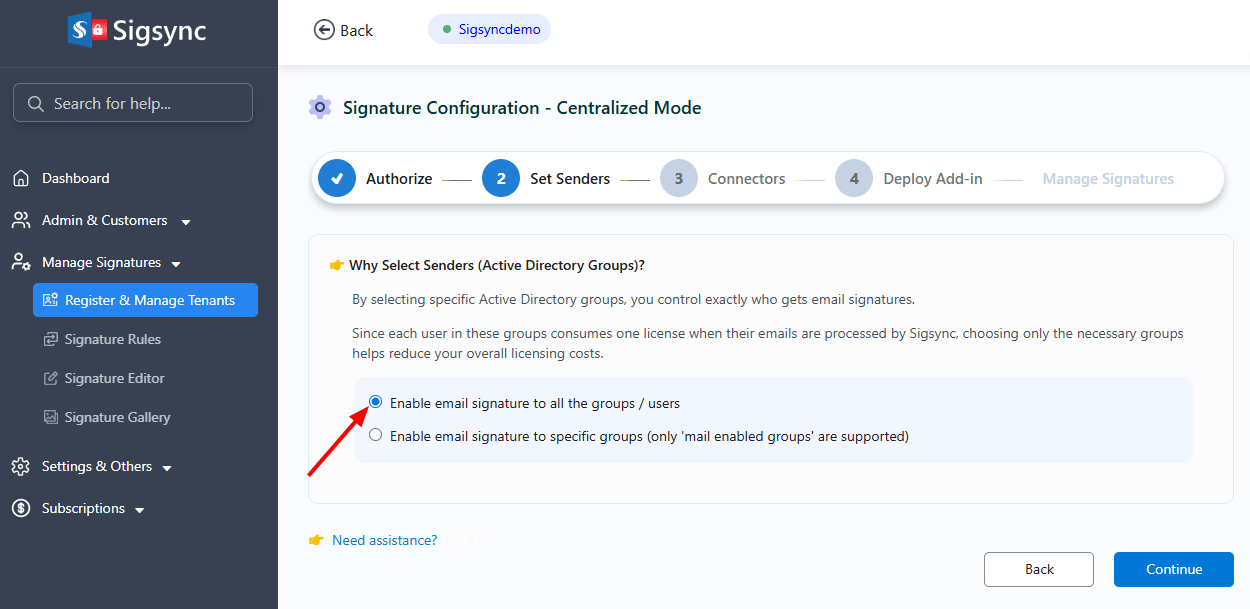
- Select the senders for signature configuration. You can choose from the following options:
- Test Group (recommended for initial setup):
This allows you to configure signatures for a few users before applying them organization-wide.
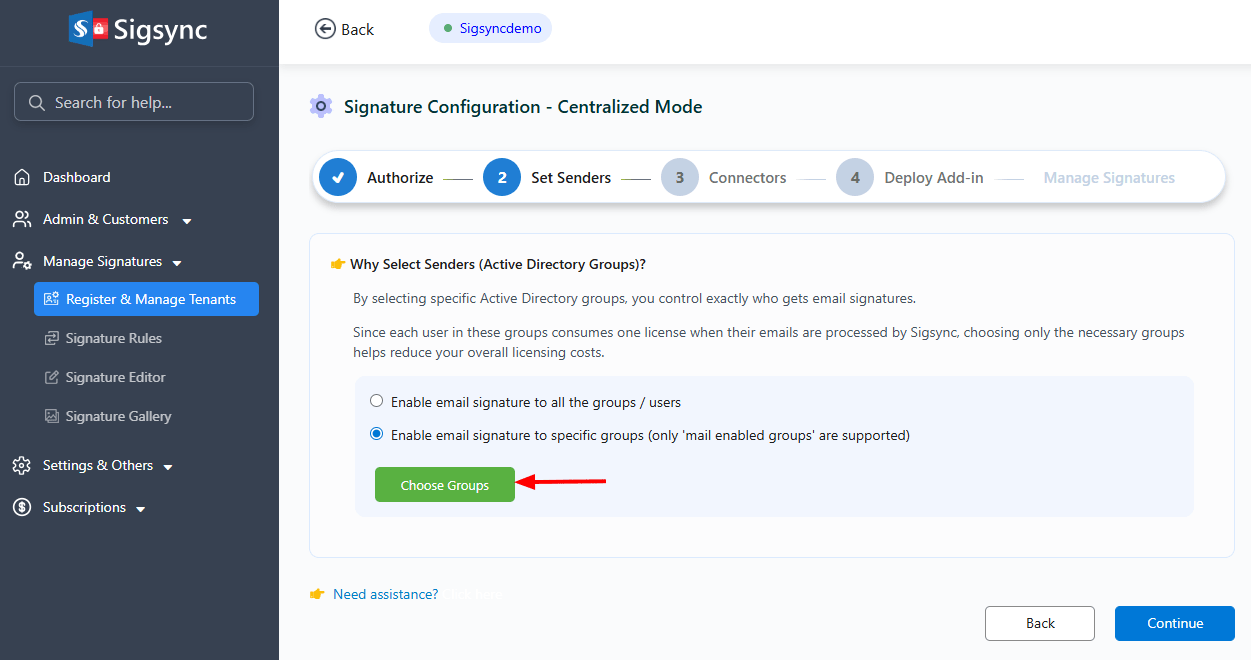
- Click ‘Choose Groups’.
- All users / groups
This option lets you apply signatures to every user in your Microsoft 365 tenant.
- Specific groups:
This option lets you apply only to the members of your Office 365 Azure Active Directory groups (Example: ‘Sales’, ‘HR’, or ‘Support’ etc.)
- Click ‘Choose Groups’.
- Test Group (recommended for initial setup):
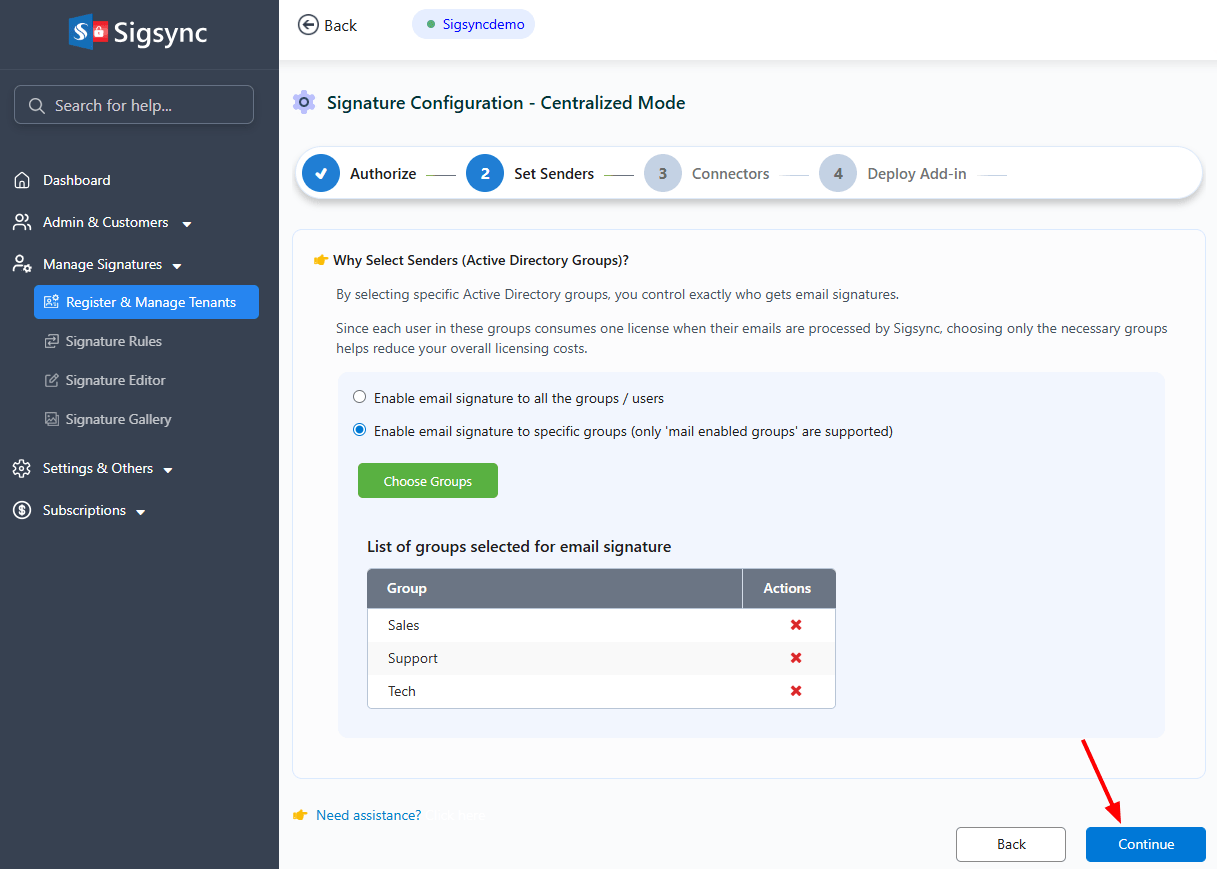
- Select the required group and click ‘Ok’ to proceed
- The selected AD groups will appear in the list. To remove a group, click the ‘x’ icon next to it, then click ‘Continue’ to proceed.
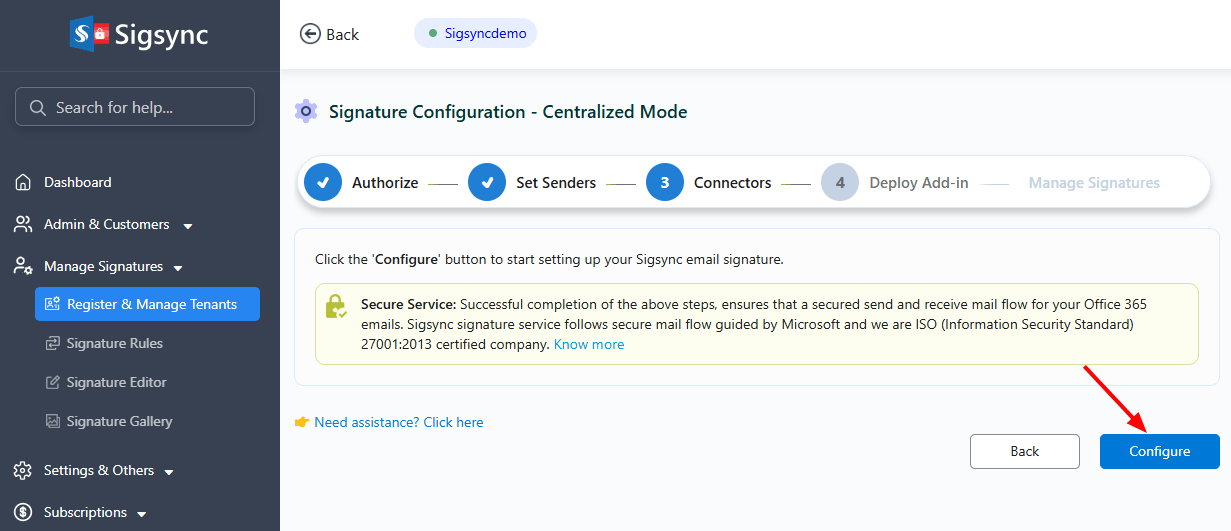
- Click the ‘Configure’ button to proceed with signature configuration.
- Signature configuration takes a couple of minutes to complete.
Once this is done, the Server Mode configuration is complete. Signatures will be applied in Server Mode, meaning they are added after the email is sent from your Outlook client. To have signatures appear automatically while composing emails in Outlook, proceed with the Sigsync Signatures Outlook Add-in deployment.
Add-in Deployment:
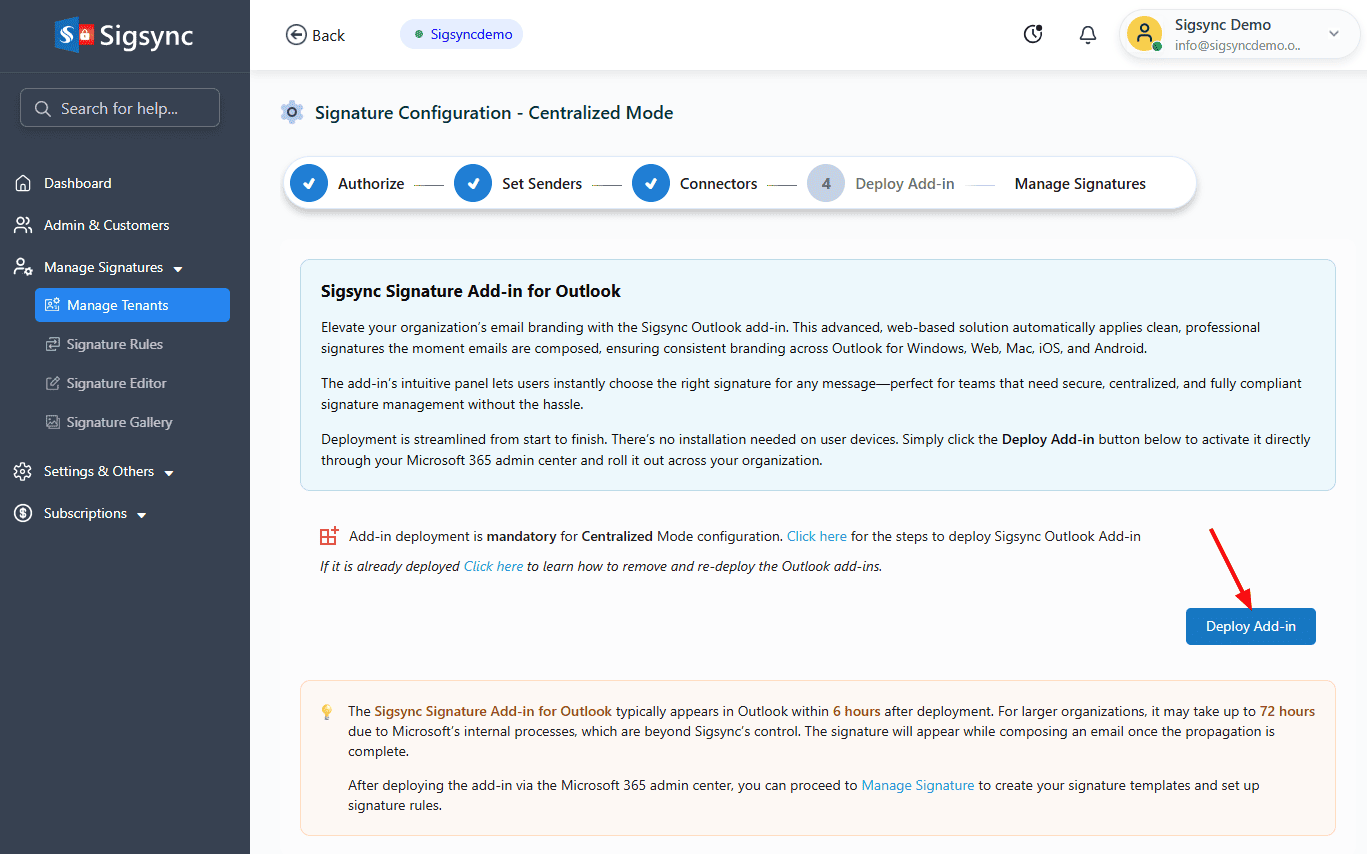
- Click the ‘Deploy Add-in’ button in the Sigsync dashboard and complete the deployment process in the Office 365 Admin Center.
Note: To proceed with the Add-in deployment, you must be signed in with an account that has both Office 365 Global Admin and Exchange Admin roles. If these roles are not assigned, create a new admin account with the required permissions and try again.
Assign Users:
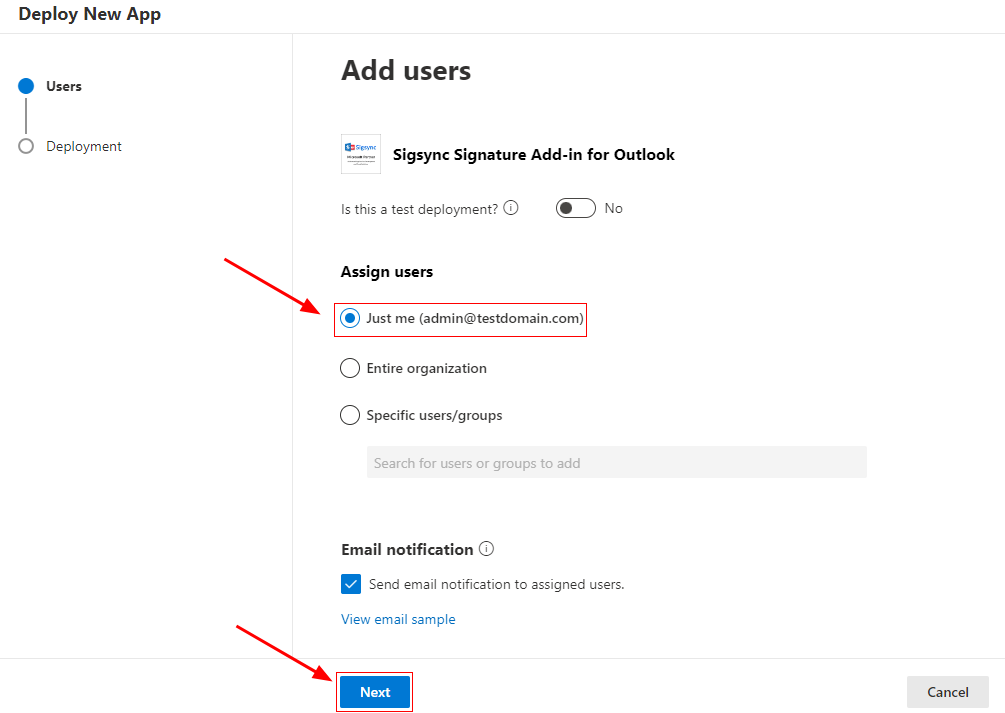
Just me:
- Select ‘Just me’ to deploy the Sigsync Signatures Outlook Add-in only to your (Office 365 Global Admin User)
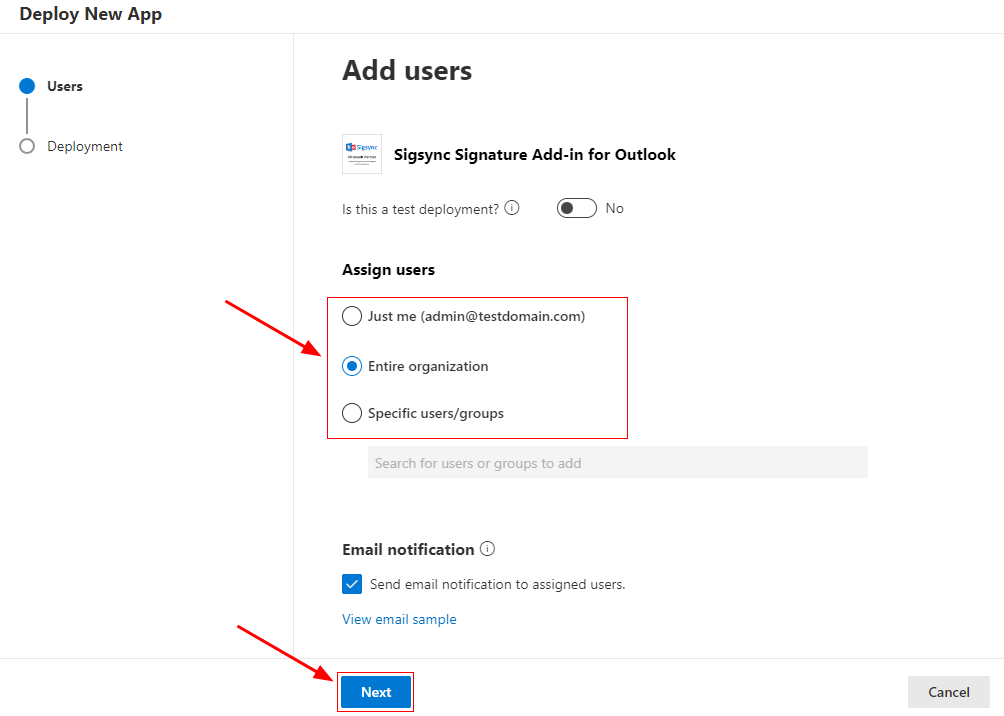
Entire Organization:
- Select the option ‘Entire Organization’ to centrally deploy the add-in for all users
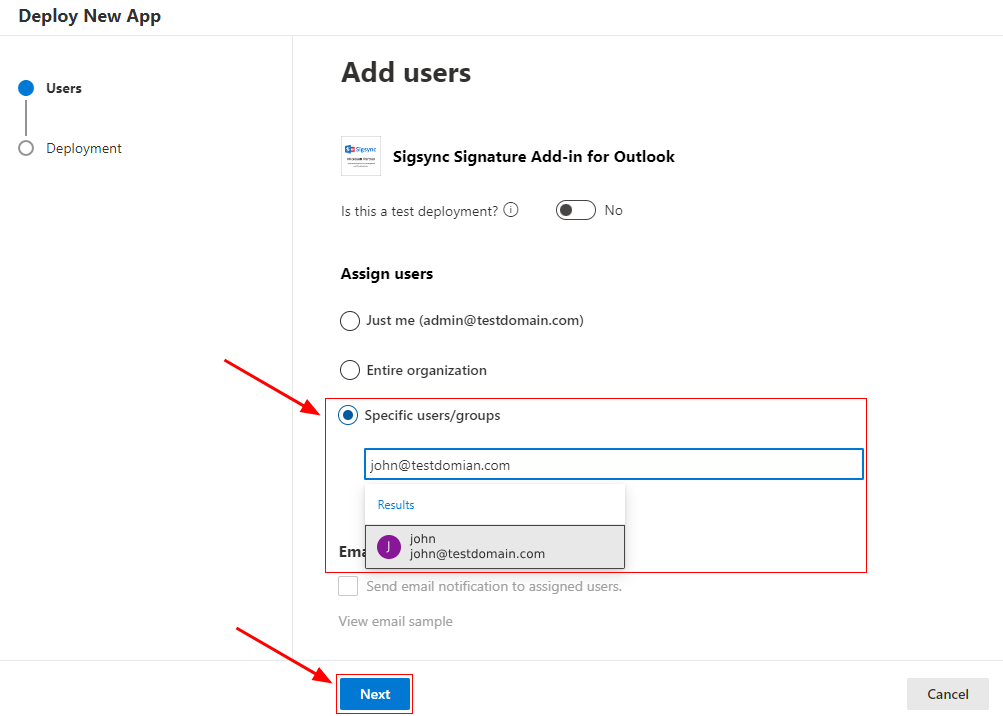
Specific users / groups:
- If you want to deploy the add-in for specific users / groups, select the option ‘Specific users / groups’ option and search and select the required users / groups from the list.
- Click the ‘Accept Permissions’ button.
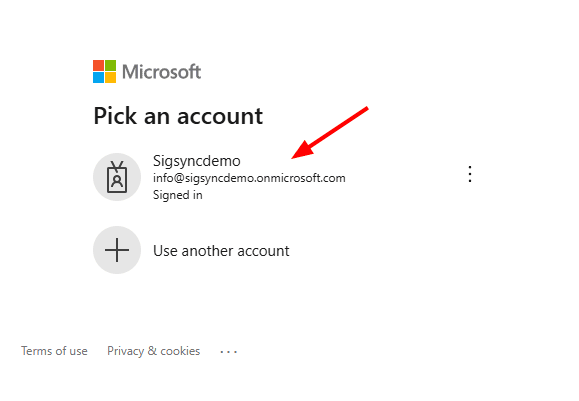
- Authenticate using your Office 365 Global admin account.
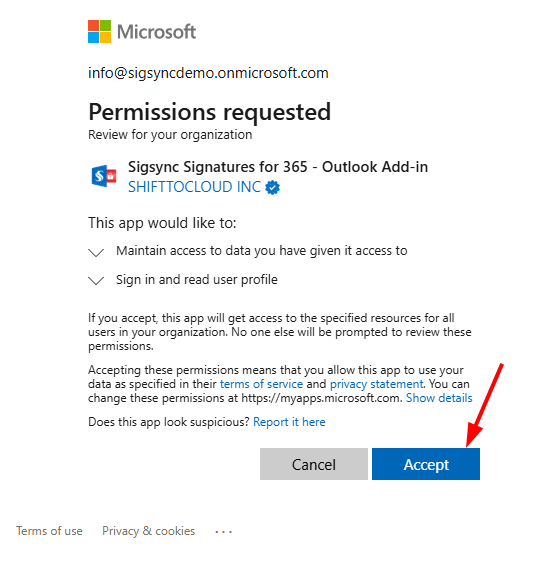
- Accept the required permissions.
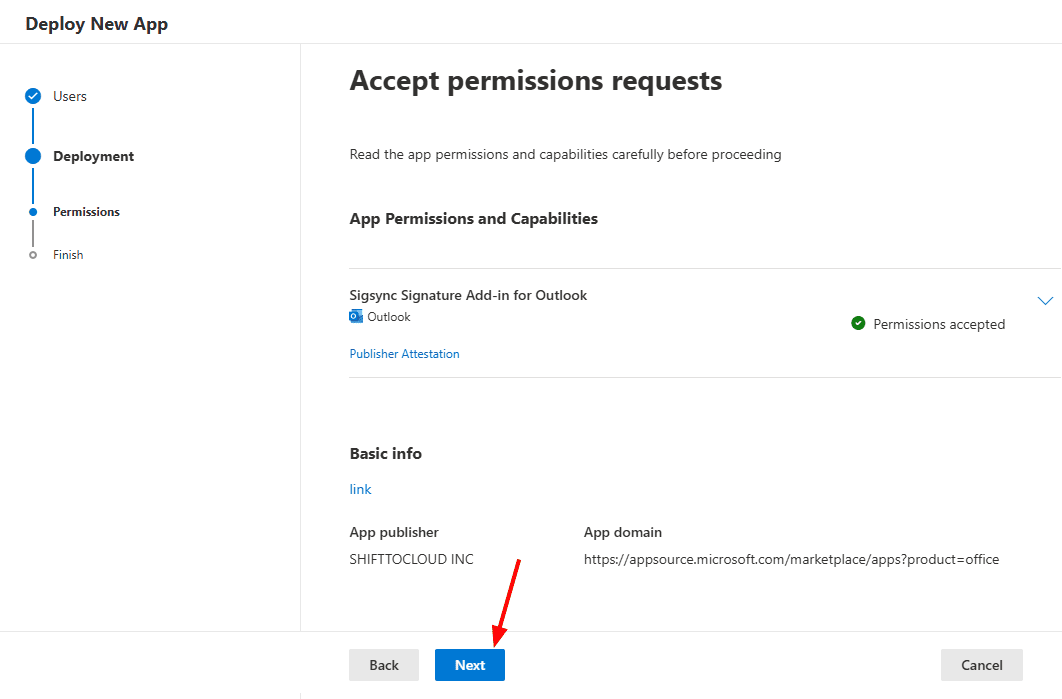
- Click the ‘Next’ button to proceed.
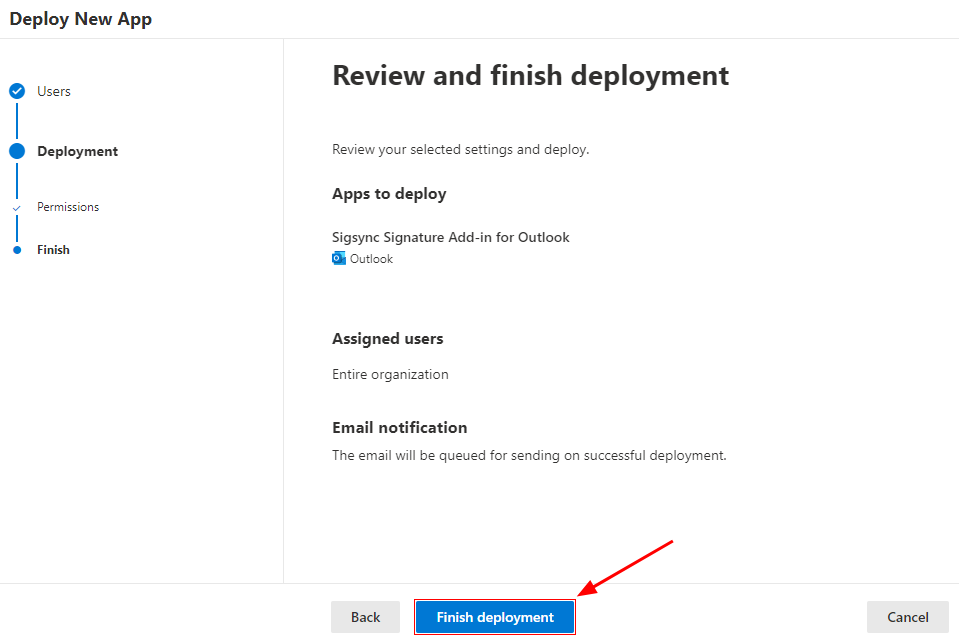
- Review the settings and click the ‘Finish deployment’ button:
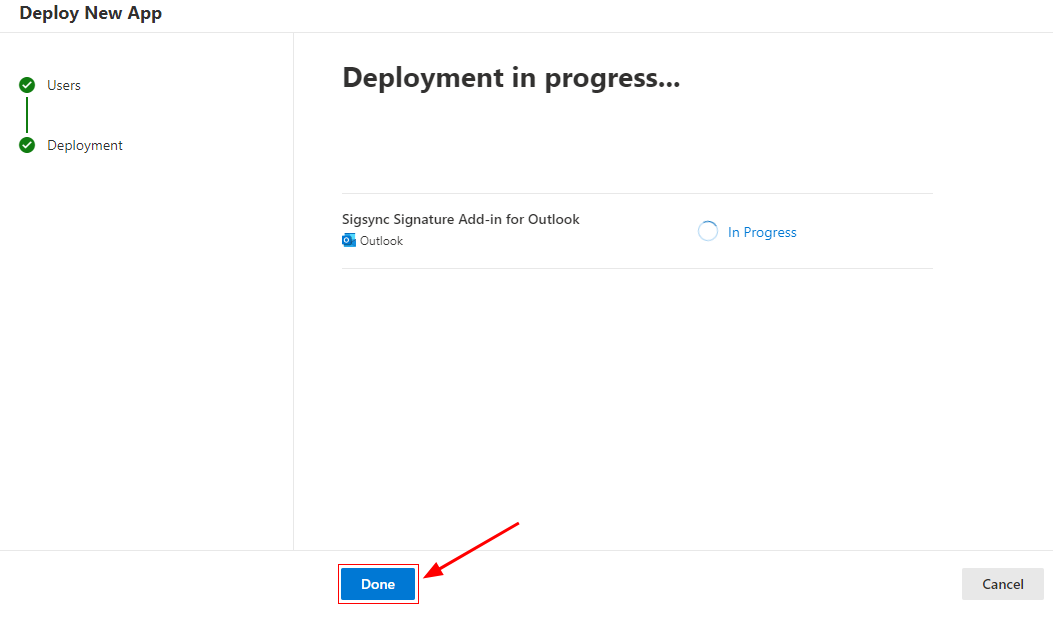
- Once the deployment is complete, click ‘Done’.
Note: Sigsync Signatures Outlook Add-in typically appears within 6 hours after deployment. For larger organizations, it may take up to 72 hours due to Microsoft’s internal processes, which are beyond Sigsync’s control. The signature will appear while composing an email once the propagation is complete.
Streamline Email Signature Management with a Free On-demand Demo from Sigsync
Sigsync email signature service provides effortless, centralized signature management for Office 365 and Exchange. Our team can assist you in quickly setting up company-wide signatures. Request a free on-demand demo to see how Sigsync can simplify your email signature management process.

