-
- Reseller
- Products
Email Signature for Exchange and Office 365
Sigsync is an all-in-one email signature and disclaimer solution for Office 365 and Exchange. Add consistent web-based signatures to all your emails and manage them from a centralized dashboard.
- Dashboard
- Features
- Pricing
-
User Manual
Exchange & Office 365 Email Signature
Manual Menu
- Overview
- Supported platforms and requirements
- Steps to set up email signature
- Dashboard
- Manage Tenant Signatures
- Manage Tenants
- Create Signature Templates
- Assign Signature Template
- Signature Rules
- Sigsync signature modes
- Set SPF record
- MX Record
- Deregister tenant
- Settings
- Sync AD Changes
- Signature Occurences in email conversation
- Apply signature to every email
- Apply signature to the first email only
- Apply signature to first email, remove it from the conversation
- Apply signature to every email, remove its previous occurrences
- Assign signature template
- Assign subsequent email template
- Signature position in email conversation
- Enable Email Signature in Sent Items Folder
- Enable Outlook Signatures Add-in
- Remove Signature added by mobile
- Add linked or embedded images to signature
- Processing Secure Messages
- HTML Signature
- Add tenant admin
- Add Global Admin
- Sigsync Outlook signatures Add-in
- Introduction
- System requirements
- Deploying add-in for all the users (centralized deployment)
- Deploying on Desktop Outlook
- Deploying on Outlook Web Access
- Deploying add-in for individual user
- Adding Sigsync Signature from Panel
- Enable 'Preview Only' mode for Sigsync Signatures Add-in
- Directly add signatures while composing an email
- Set Outlook Add-in to 'Preview Only' mode
- Remove add-in from all the users (centralized deployment)
- Removing from Desktop Outlook
- Removing from Outlook Web Access
- Remove add-in from individual user
- Processing Secure Messages
- Signature Generator
- License
- Reseller
- Reseller FAQ's
- Register as Reseller
- Reseller Dashboard Login
- Add Customers
- Set up & Manage Customers Signatures
- Reseller Subscription
How to set custom attributes in Office 365
Office 365 has certain default Azure Directory (AD) attributes like city, companyName, department, displayName, jobTitle, email etc. These attributes are used to add personal and company information directly into your email signature. But there are certain fields that users might wish to add for instance, a custom phone number, employee ID, one click survey links, additional contact details or even an alternate email address for which there isn’t an existing attribute in the AD field. There are 15 custom attribute fields available in Office 365 to which the above mentioned additional fields can be added.
- How to set up Office 365 custom attributes for a user?
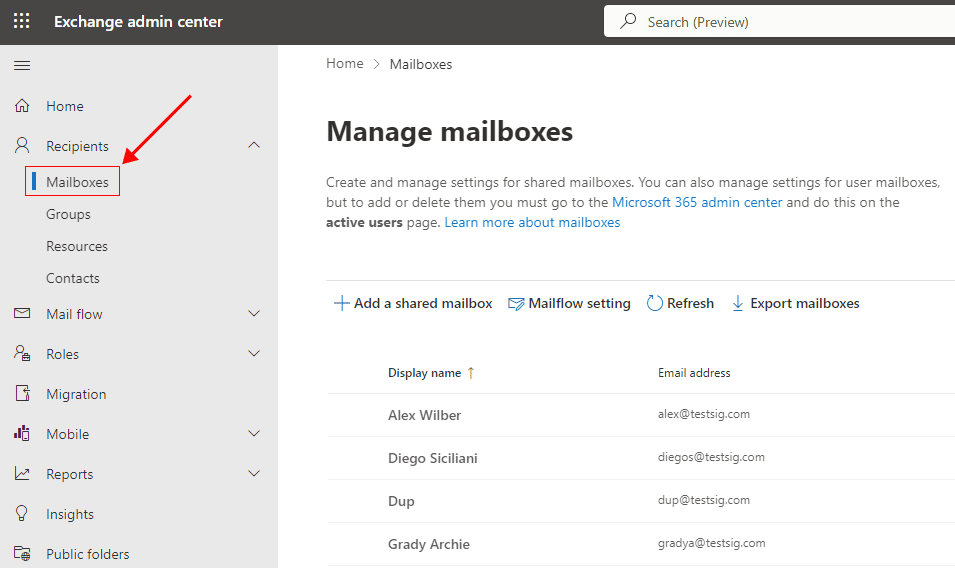
- Login to your Office 365 account as Global Admin
- Click on the App launcher icon on the top left corner of the page and click the Admin gear icon.
- In the Microsoft 365 admin center, expand Users and click on Active users.
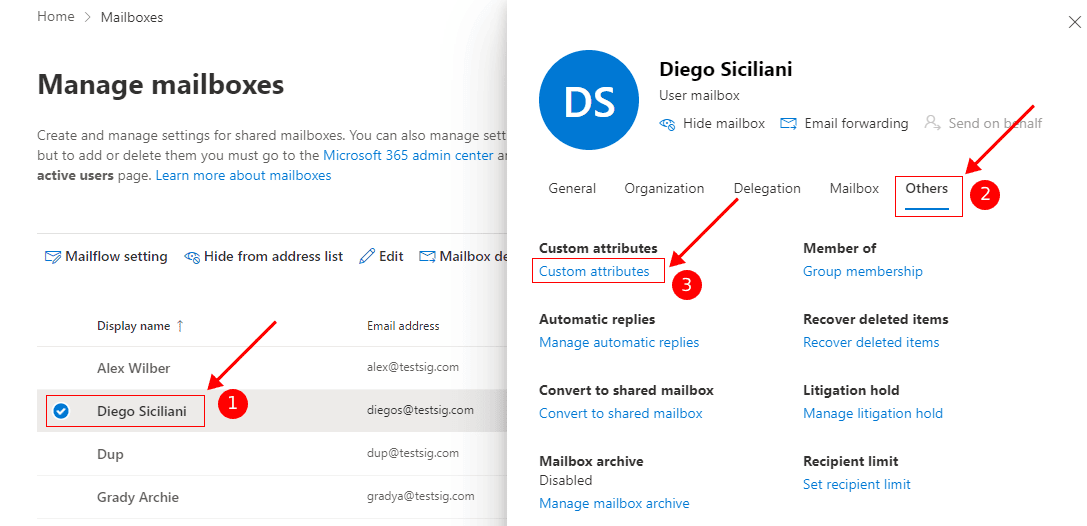
- Under Active users, select the user whose custom attribute you wish to set. In the pane that opens on the right, click the Mail tab.
- Under More Actions, click on the Edit Exchange properties link.
- Click on the More options... link to display the Custom attributes field.
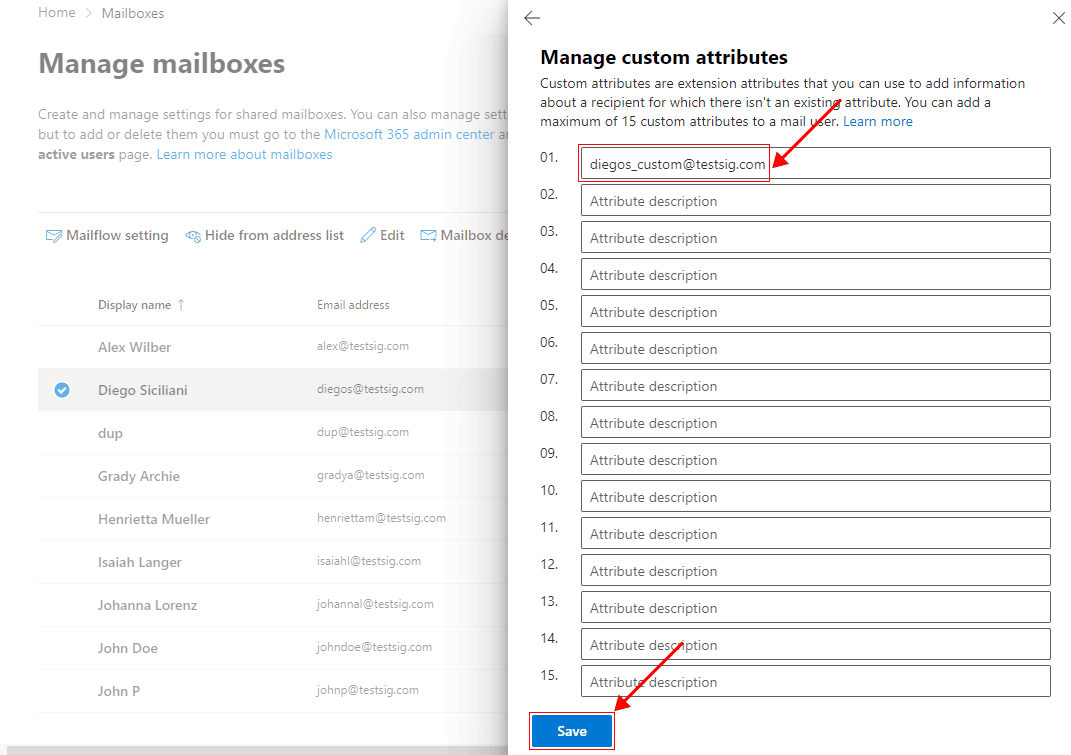
- Click on the ' ' icon to modify the custom attributes for the user.
- You can enter attributes of your choice like personal social media links, custom phone number, employee id, alias email address etc. Click OK to add the attribute and finally click Save to save the changes.
- Update AD Attributes in Sigsync and use custom attributes
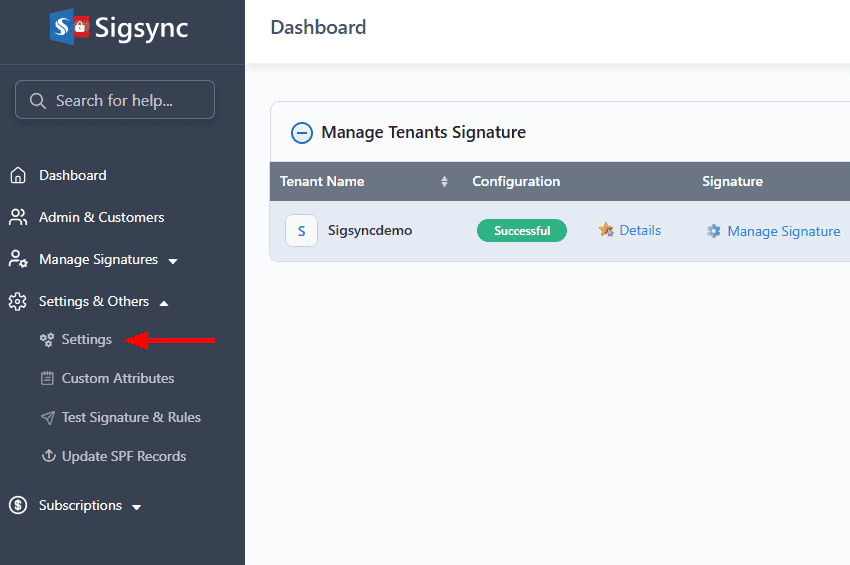
- Login to Sigsync Dashboard.
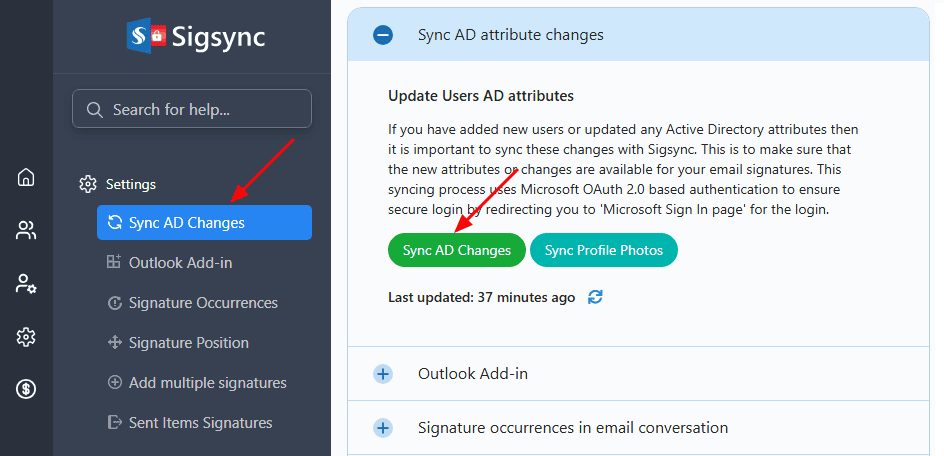
- Select 'Manage Signatures' < 'Settings' tab from the dashboard.
- Then, select the 'Sync AD Changes' tab and click on the 'Sync AD Changes Now' button to update the custom attributes that you have set in the previous section. It normally takes a few minutes for the custom attributes to get updated after which you can add this field in the Signature Generator.
- How to Insert custom attribute AD field in your signature
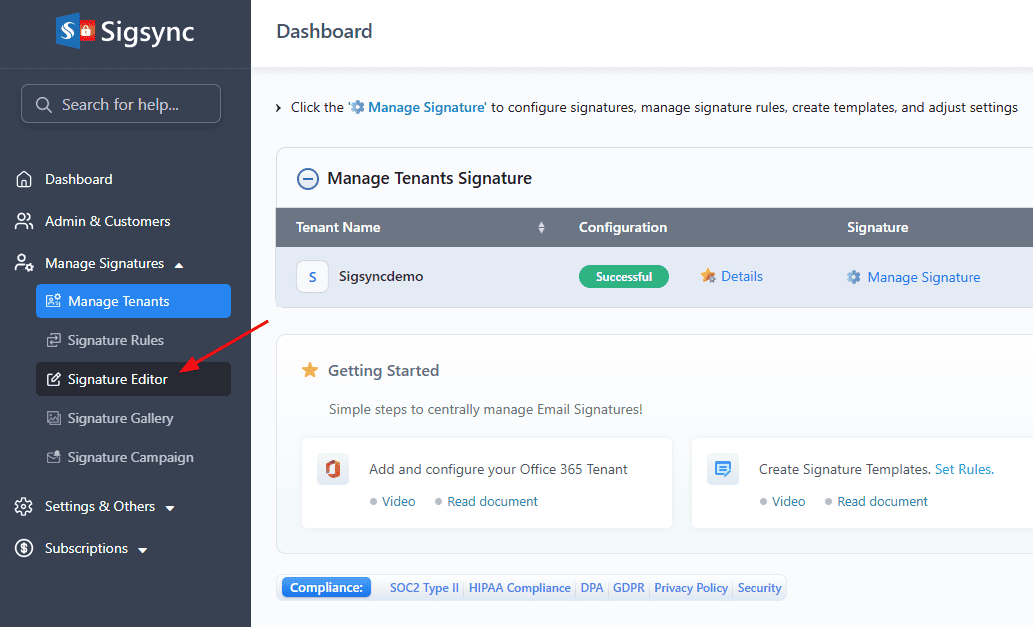
- Select 'Manage Signatures' < 'Signature Editor' tab from the dashboard.
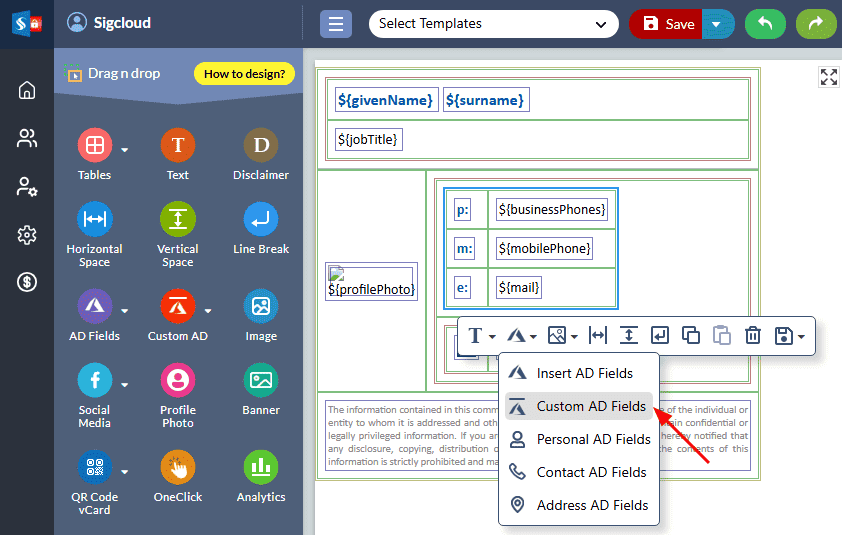
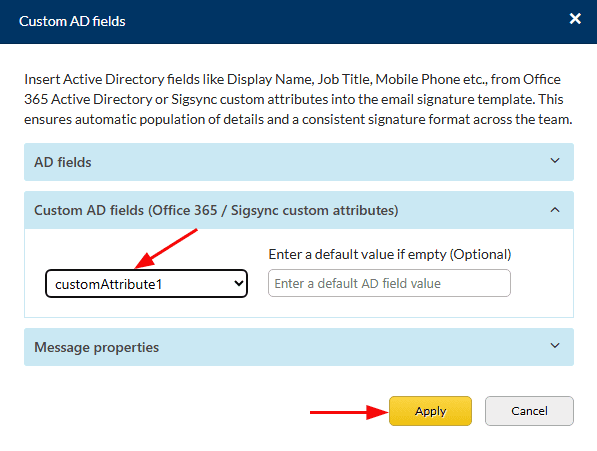
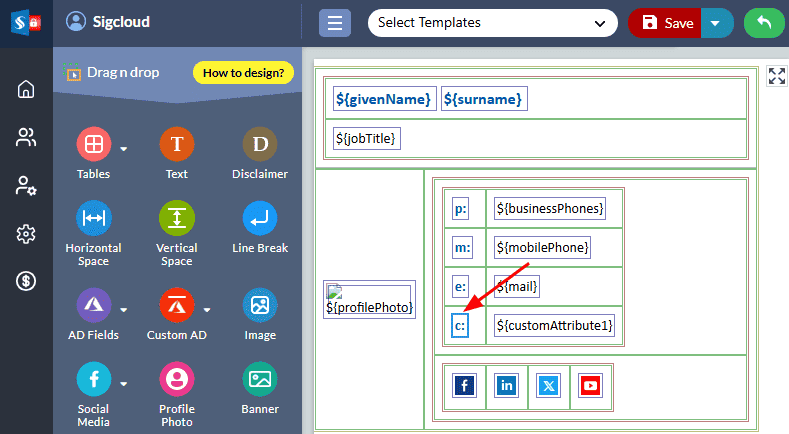
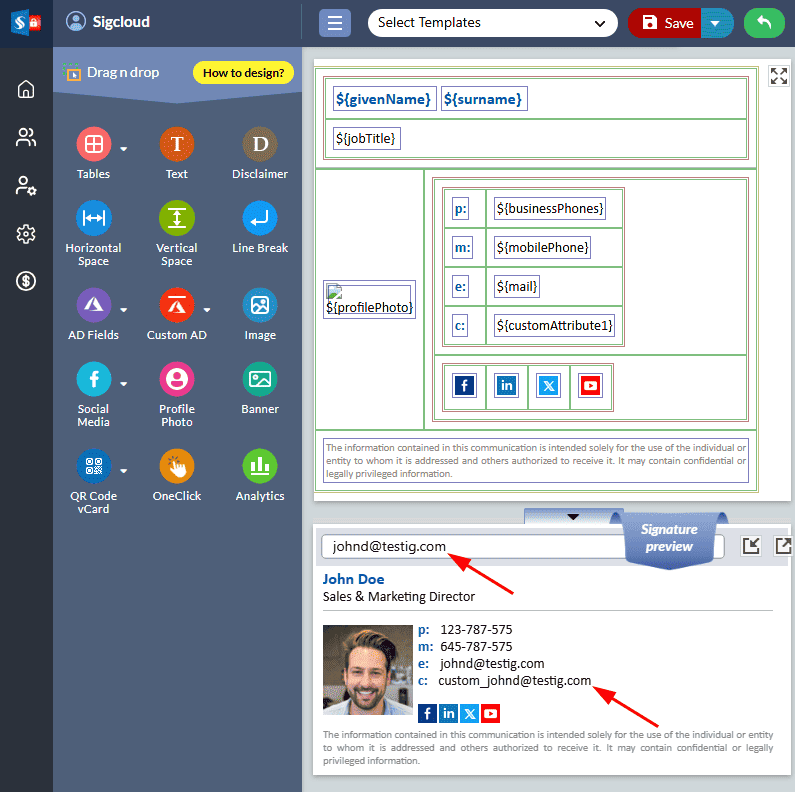
Drag and drop the Custom AD Fields to the signature layout and select the custom AD field from the dropdown menu which has been already set in Office 365.
Remove Empty Fields
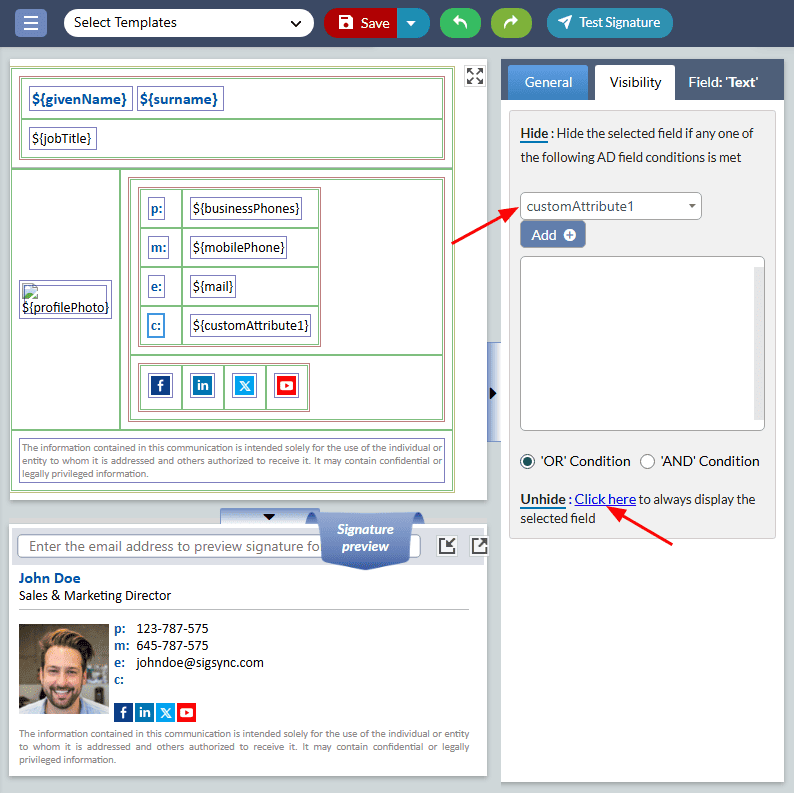
The 'Remove Empty Fields' is helpful to automatically remove the selected Label / Phrase / Node from the signature when the particular AD attribute value is not set or empty.
Free On-demand Product Demo
Sigsync email signature service offers company-wide and centralized email signature
for Office 365 and Exchange. We can assist you in getting your signature ready effortlessly.