How to remove Sigsync completely from my Office 365 tenant?
Note: If you are using the client side mode of adding signatures, refer the second section to deregister the tenant for your Sigsync account.
Pausing the service temporarily
If you want to pause Sigsync service temporarily, you can remove the connectors and then reconfigure connectors. All the rules and signatures created will be preserved intact.
Steps to pause the Sigsync service temporarily
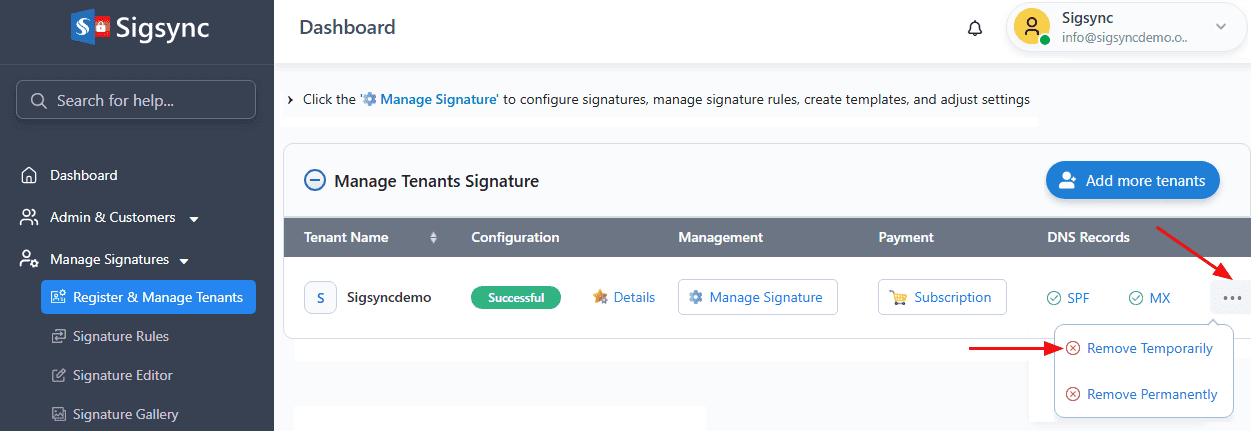
Step 1: In the Dashboard, click the ‘...’ next to the tenant and select ‘Remove Temporarily’.
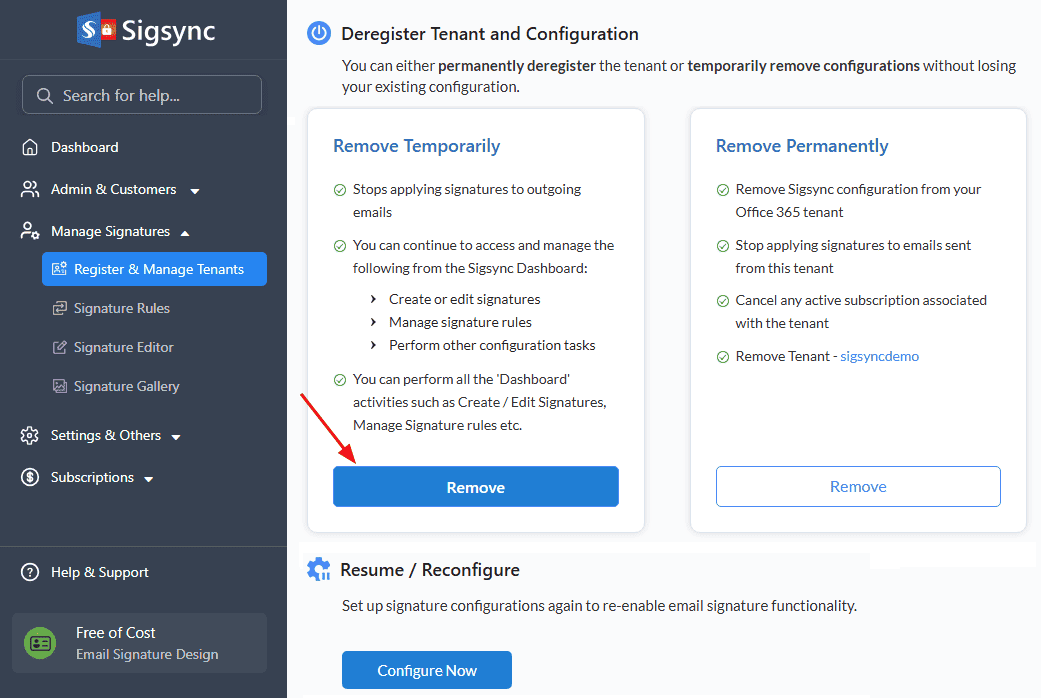
Step 2: In the Deregister tenant and configuration page, under ‘Remove Temporarily’ click on ‘Remove’ to pause the service temporarily.
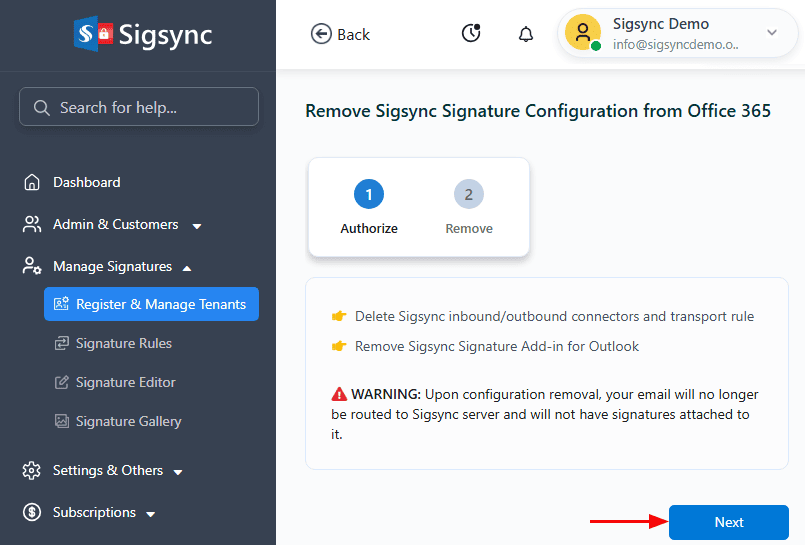
Step 3: Click on ‘Next’.
Step 4: Sign in to your global admin account.
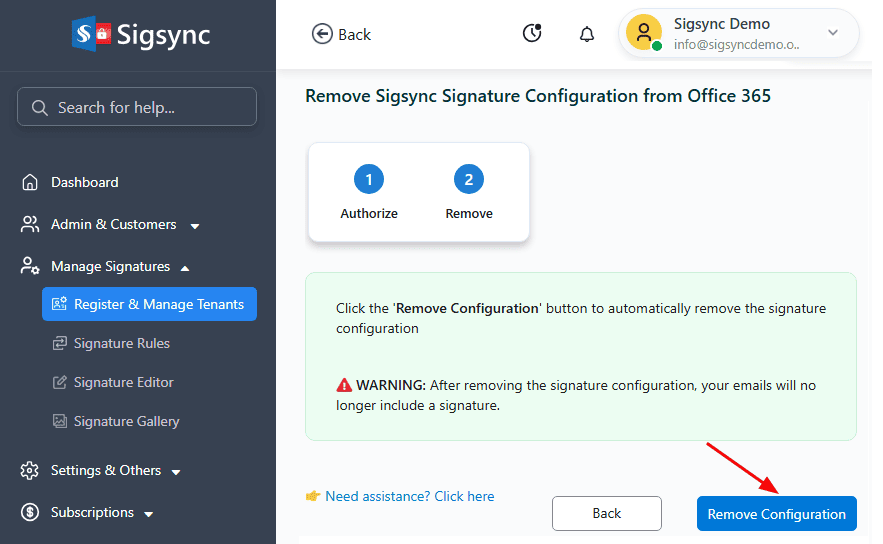
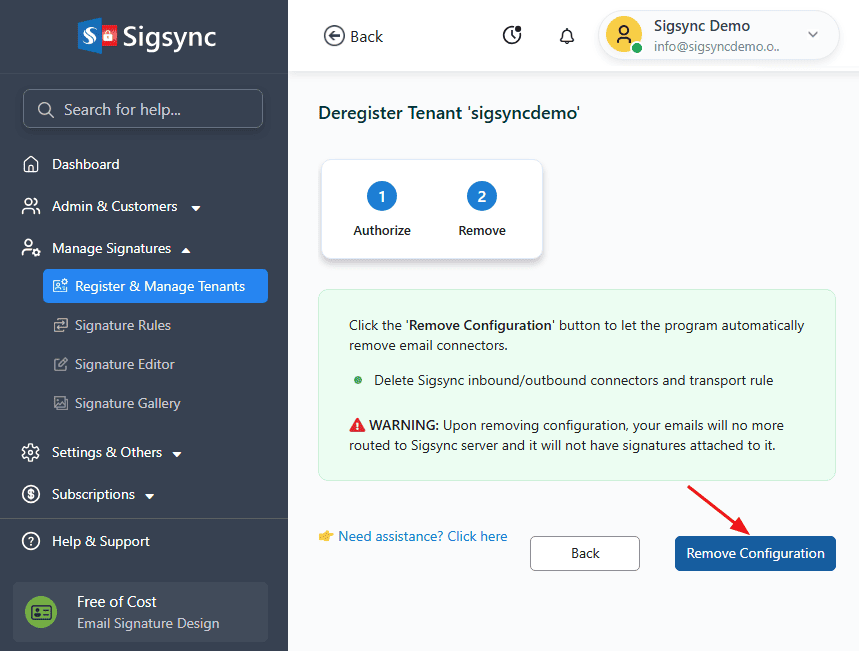
Step 5: Click ‘Remove Configuration’ to automatically remove the signature configuration.
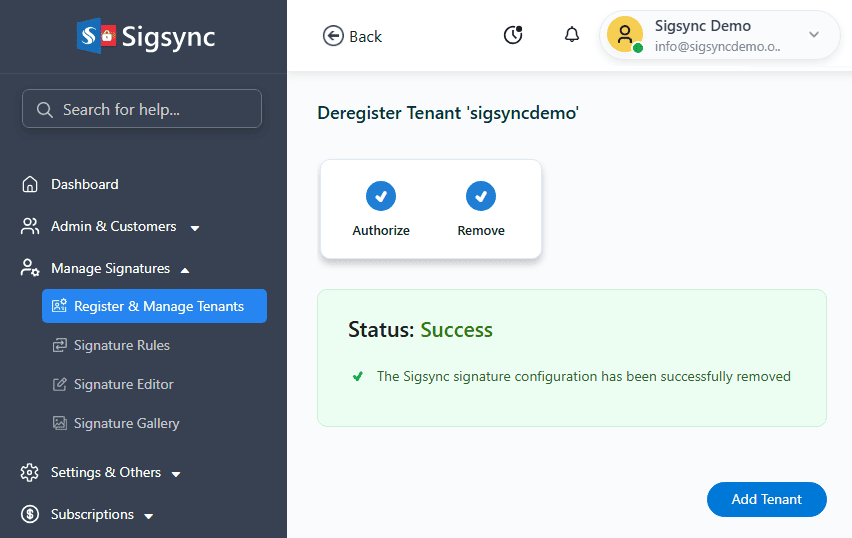
Wait for a few minutes and once the process is completed, no emails will be processed and no signatures will be added by the Sigsync service until the connectors are configured again.
Remove Sigsync service completely
If you want to remove the Sigsync service completely, follow the below steps.
Steps to remove Sigsync service completely
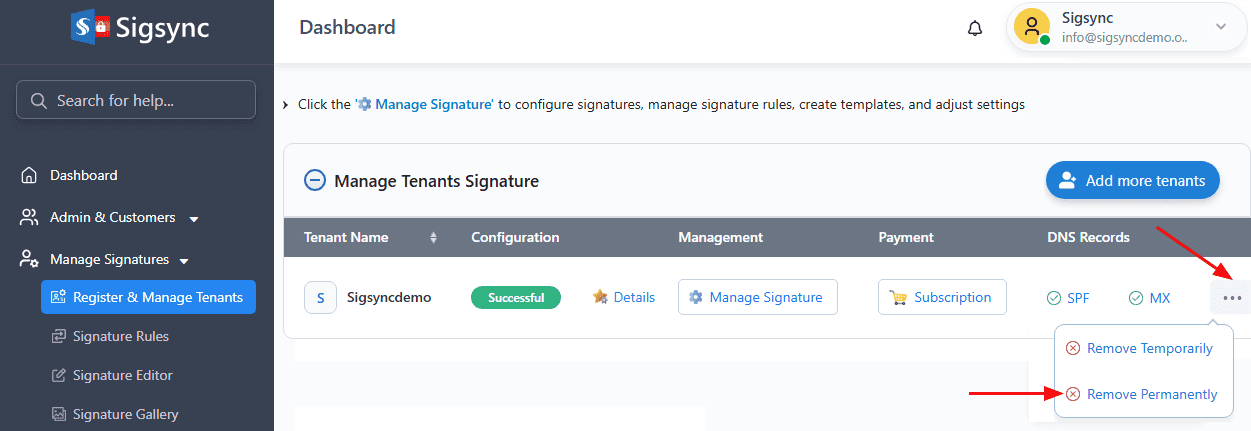
Step 1: In the Dashboard, click the ‘...’ next to the tenant and select ‘Remove Permanently’.
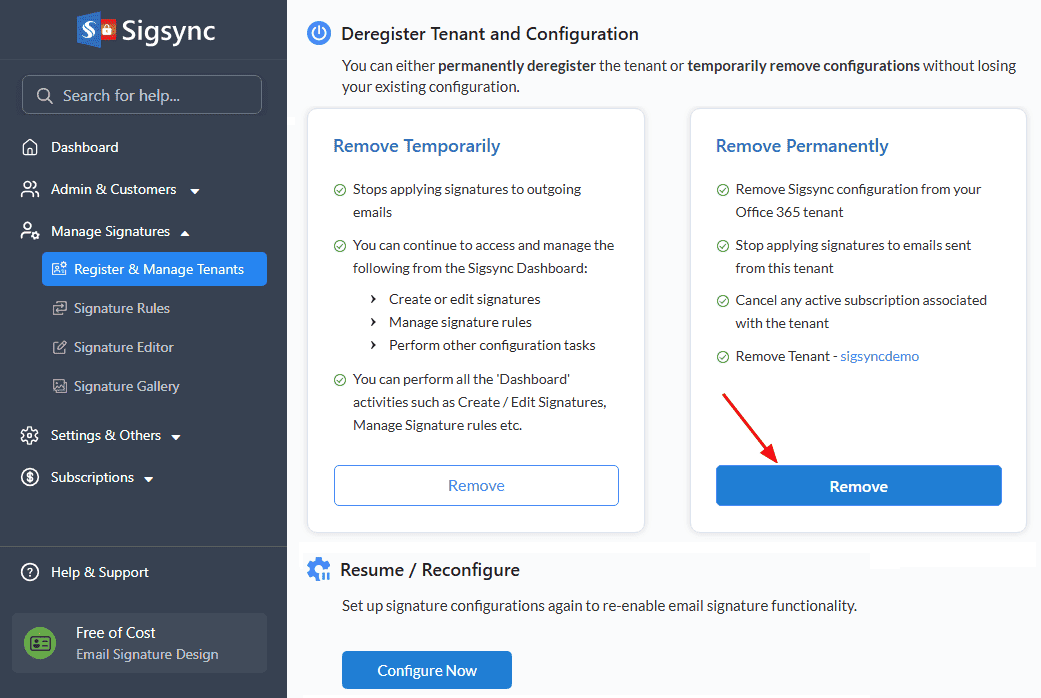
Step 2: In the Deregister tenant and configuration page, under ‘Remove Permanently’ click on ‘Remove’.
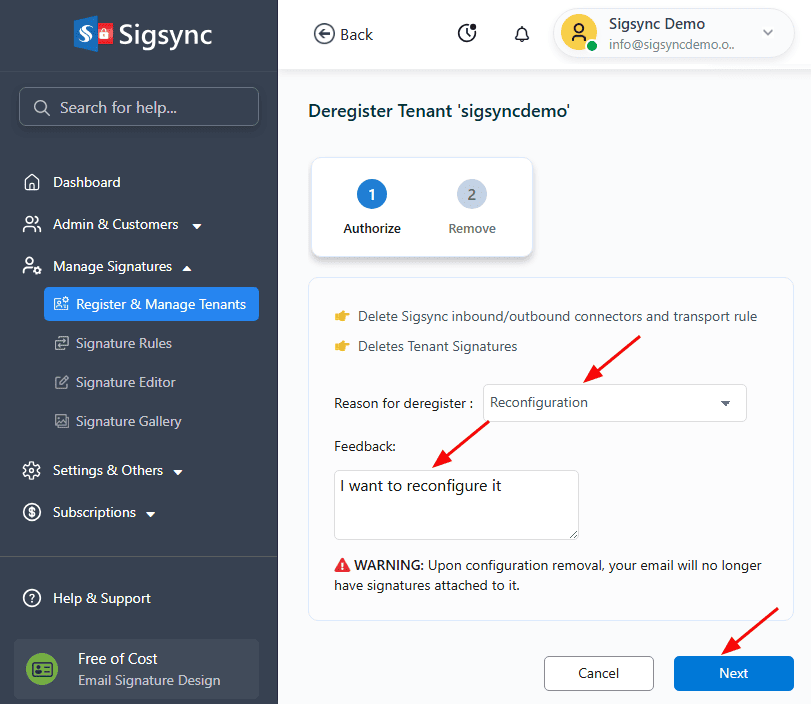
Step 3: In the Deregister wizard, select the reason for deregistration, provide your feedback, and click ‘Next’ as shown below.
Step 4: Sign in to your global admin account.
Step 5: Click on the 'Remove Configuration' button to remove the rules and connectors from Office 365.
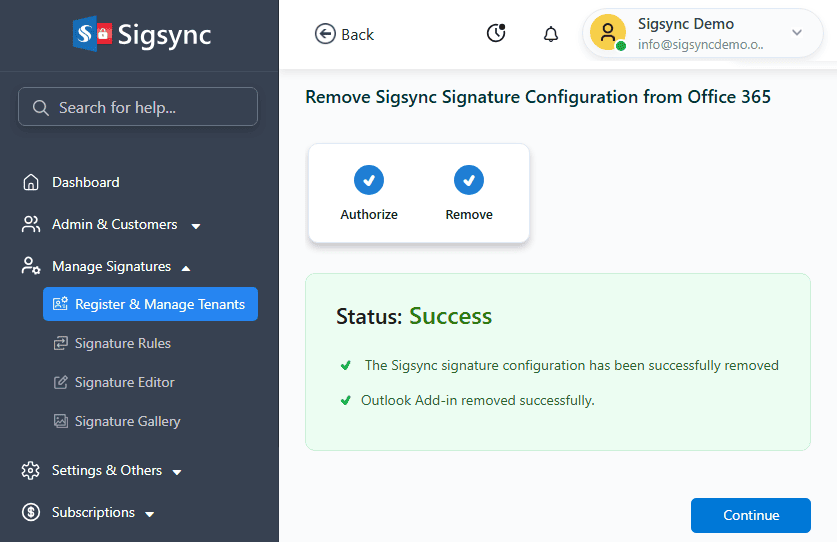
Wait for a few minutes and once the process is completed, no emails will be processed by Sigsync service until connectors are configured again. Signature will not be added once the process completes.
Steps to remove Azure AD applications
Follow the below steps to remove Azure AD application:
Step 1: Login to your Office 365 tenant's admin center. Then, navigate to Azure Active Directory shortcut.
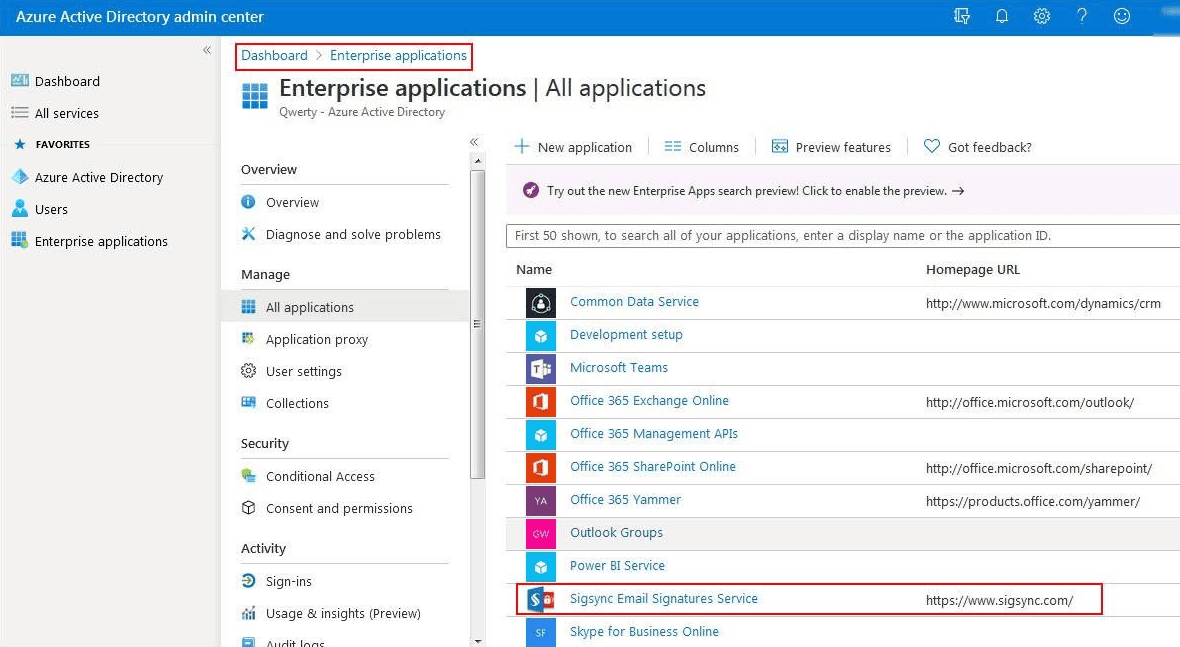
Step 2: Click on the Azure Active Directory on the left panel. Select Enterprise applications under the Manage section.
Step 3: Remove all the Sigsync named applications by clicking on application name and then Select Properties under Manage section. Then click on the Delete button as shown in the screenshot below.
Now you have completed the uninstall procedure.
For the client side mode of adding signatures, follow this link to remove Sigsync Signature Outlook Add-in.
For adding tenants and configuring the connectors again, follow this link.
Streamline Email Signature Management with a Free On-demand Demo from Sigsync
Sigsync email signature service provides effortless, centralized signature management for Office 365 and Exchange. Our team can assist you in quickly setting up company-wide signatures. Request a free on-demand demo to see how Sigsync can simplify your email signature management process.

