-
- Reseller
-
Products
Email Signature for Exchange and Office 365
Sigsync is an all-in-one email signature and disclaimer solution for Office 365 and Exchange. Add consistent web-based signatures to all your emails and manage them from a centralized dashboard.
Tailored Product Demo for Your Exact Needs
Explore how our solution delivers efficiency, control, and scalability.
Request a Demo - Dashboard
- Features
- Pricing
User Manual
Exchange & Office 365 Email Signature
Manual Menu
- Overview
- Supported Platforms & Requirements
- Steps to Set Up Email Signature
- Login to Sigsync Dashboard
- Register and Configure Tenant
- Create & Edit Signature Templates
- Set Signature Rules
- Add SPF Record
- Signature Templates
- Signature Rules
- Settings
- Sync AD Changes
- Outlook Add-in
- Signature Occurrences
- Signature Position
- Set External Domains
- Add Multiple Signatures
- Signature in Sent Items Folder
- Remove Signature Added by Mobile
- Add Linked or Embedded Images
- Manage Secure Messages
- HTML Signature
- Add Tenant Admin
- Add Global Admin
- Custom Attributes
- MX Record
- Deregister Tenant
- Signature Editor
- Manage Subscriptions
- Sigsync Signature Add-in for Outlook
- Update Signature Configuration
- Switch Signature Mode
- Reseller
- Reseller FAQs
- Register as Reseller
- Reseller Dashboard Login
- Add Customers
- Set Up & Manage Customers’ Signatures
- Register and Configure Tenant
- Create & Edit Signature Templates
- Set Signature Rules
- Add SPF Record
- Reseller Subscription
- OneClick CSAT Surveys
- Web Analytics Tools
- Knowledge Base
- Meeting Scheduling
- Support and Services
- Security
Steps to add email signature to alias email address in Sigsync
Follow the below steps to set up Sigsync Office 365 email signatures to alias email address:
- Step 1: Create email aliases for your Office 365 user account
- Log in to your Office 365 admin account
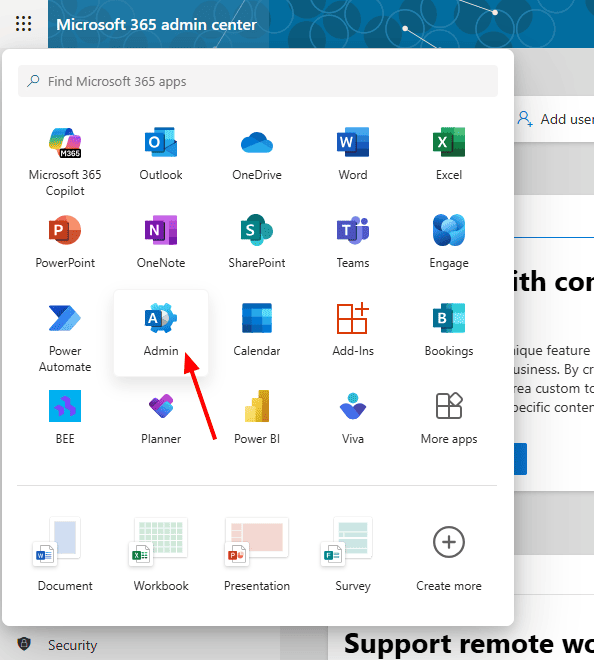
- Click the App launcher icon on the top left corner of the page and select 'Admin'.
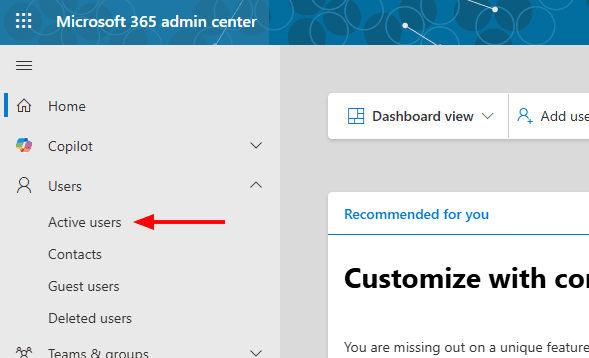
- Navigate to the 'Users' > 'Active users' tabs on the left side panel
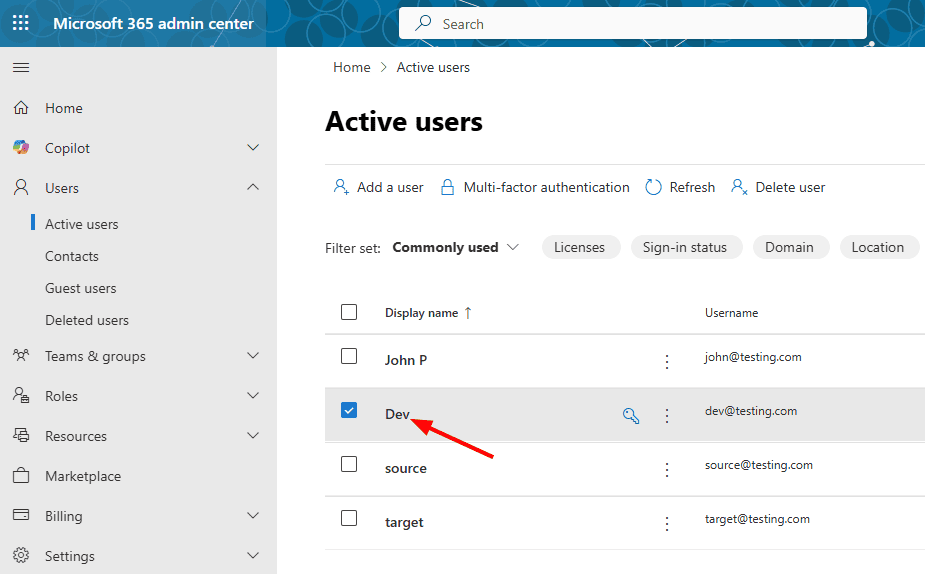
- Select the user you want to set the email alias
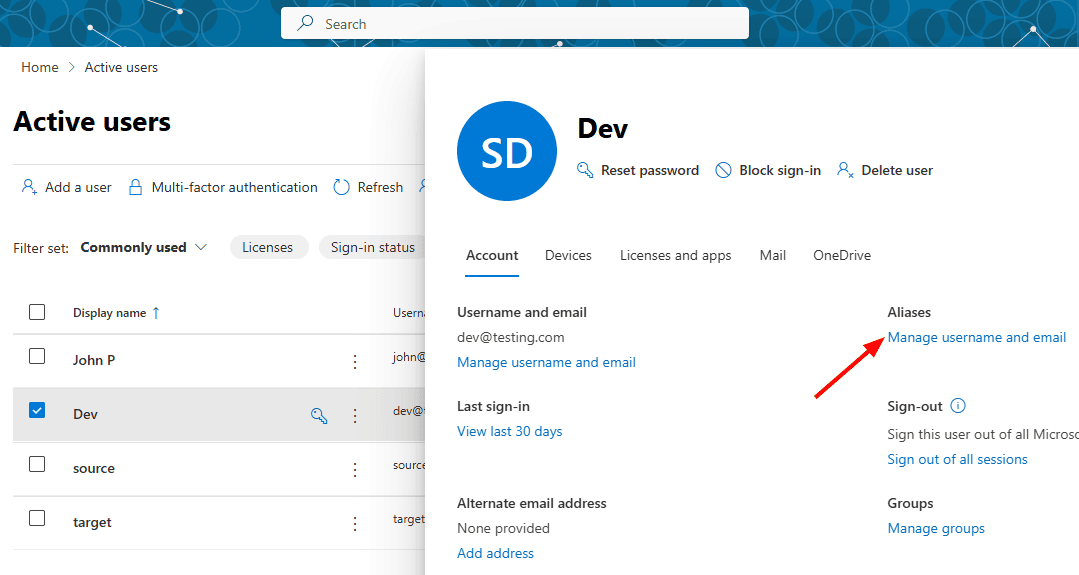
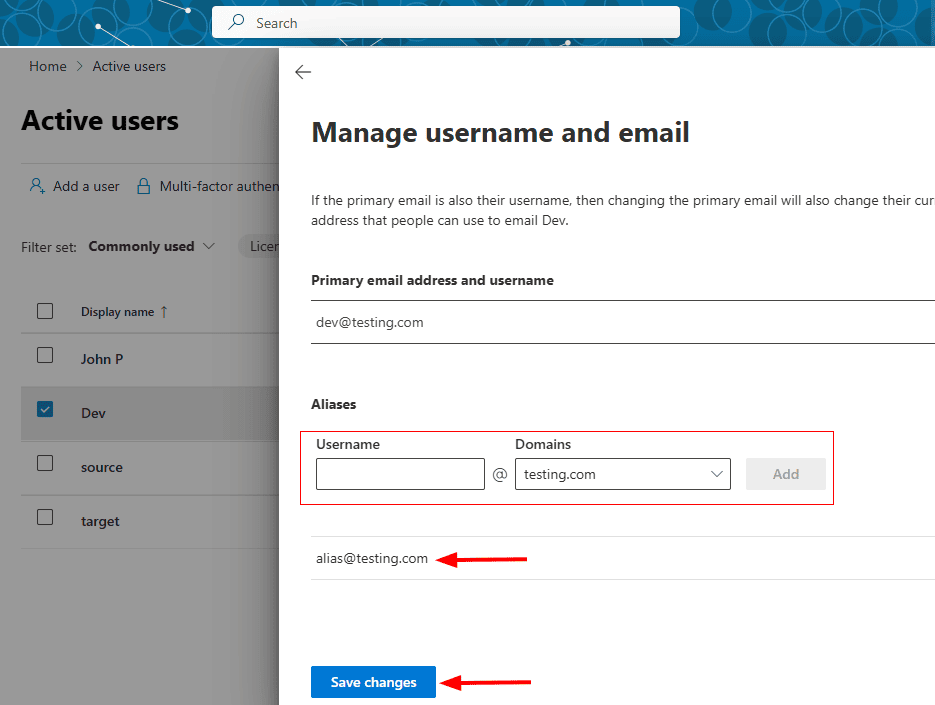
- In the pane that opens on the right, select the 'Account' tab at the top and click the 'Manage username and email' link under 'Aliases'.
- Enter the user name for the alias and select the domain. Click the 'Add' button and save the changes.
- You will get a confirmation message 'Changes saved successfully' and your alias is now successfully created. You can use this email address in place of your primary email address.
- Step 2: Select aliases email in 'Signature Rules' Senders list and assign the appropriate Signature Template
- Login to Sigsync dashboard
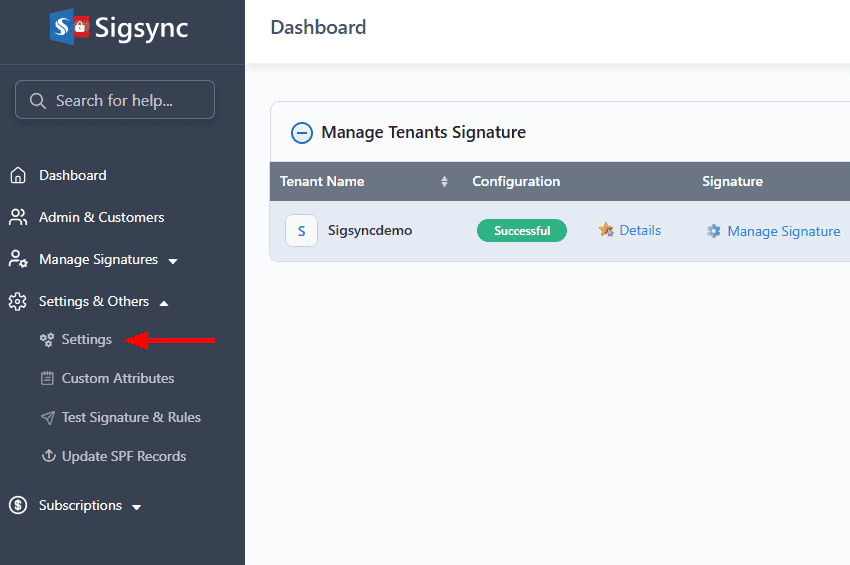
- Navigate to the 'Settings and Others' > 'Settings' tabs
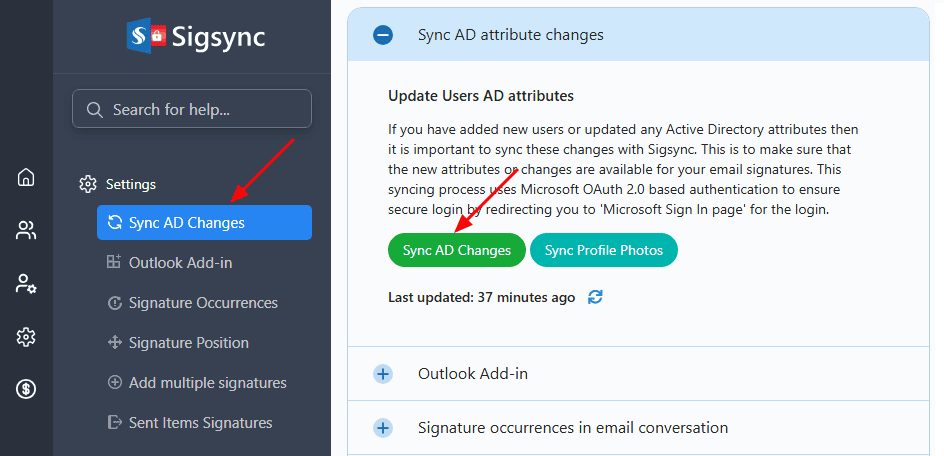
- Select the 'Sync AD Changes' tab and click the 'Sync AD Changes' button.
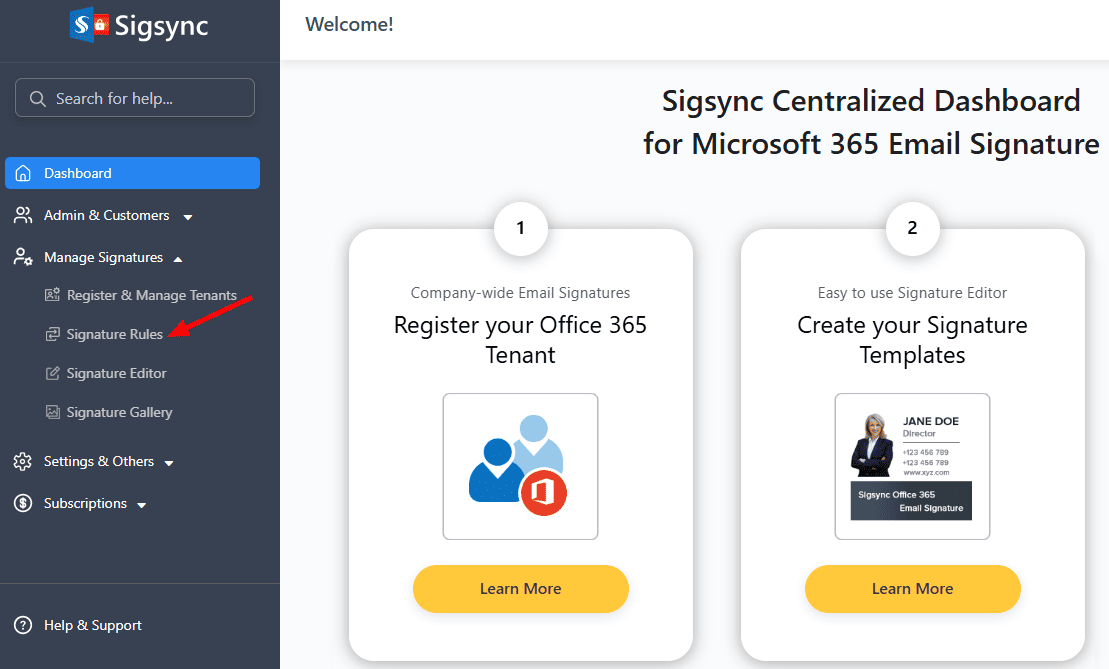
- Select 'Manage Signatures' > 'Set Signature Rules' tab from the dashboard.
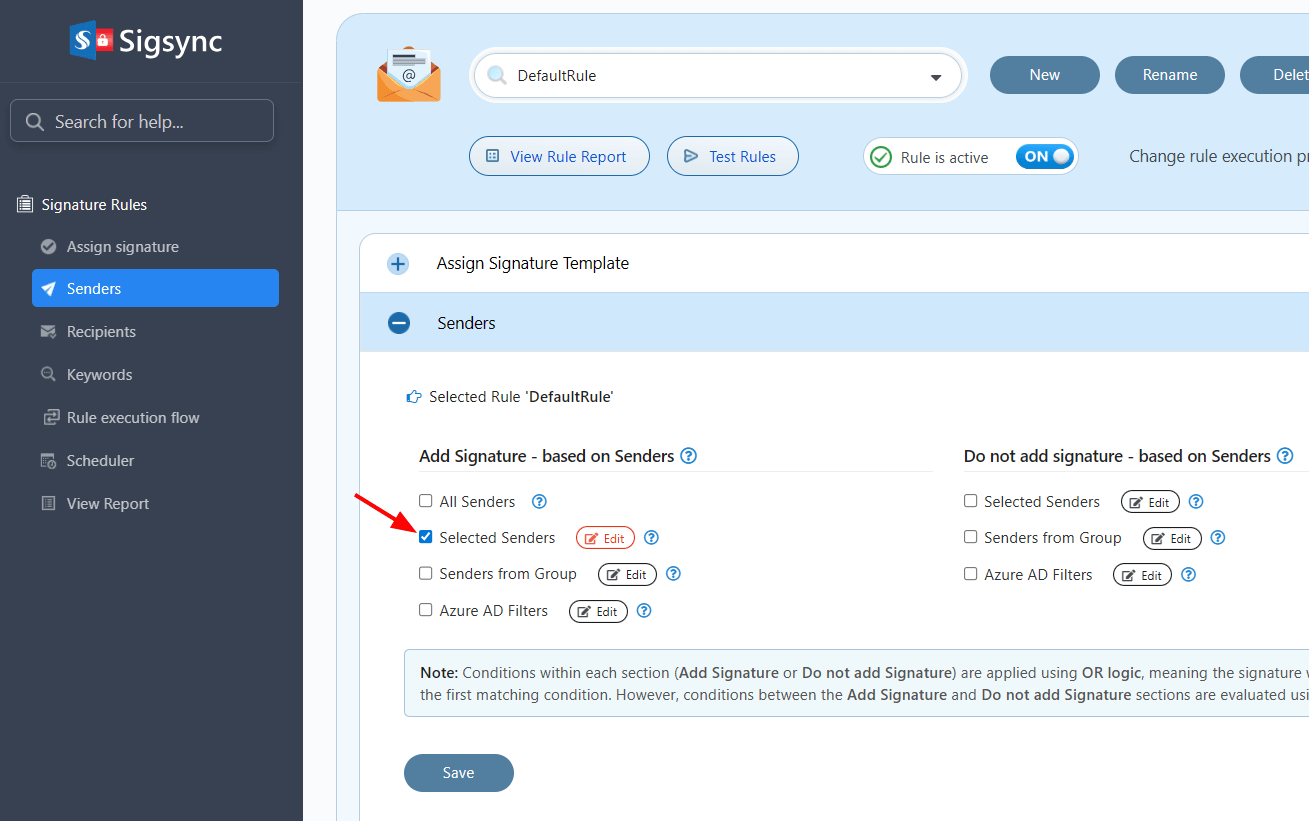
- Select the 'Senders' tab and click the 'Edit' button next to the 'Selected Senders' check box.
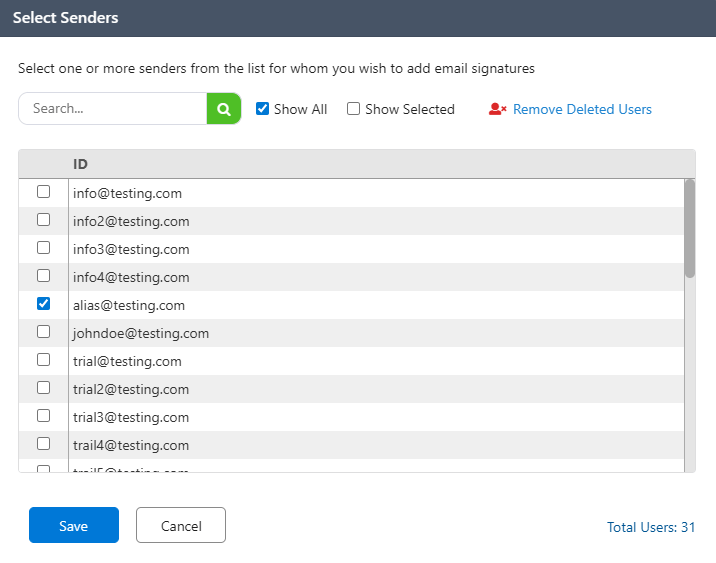
- Select the alias email address and click the 'Save' button to save the sender list.
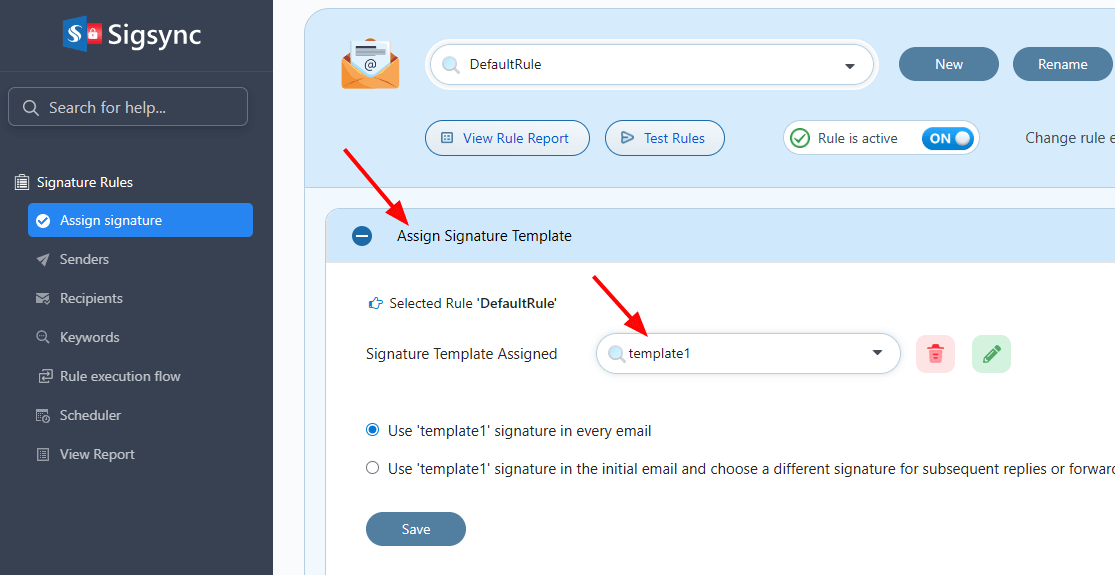
- Click the 'Assign Signature Template' tab and assign the appropriate signature template to the rule.
- Click the 'Save Changes' button to save the rule changes.
- Step 3: Working of aliases on server-side signature mode
In the Server side signature mode, if the user 'Diego Siciliani', selects the alias address in the 'From' field and sends email, the recipients receives the signature with alias address of 'Diego Siciliani'
- Step 4: Working of aliases on client-side (Outlook Add-in) signature mode
By default, in the Client-side signature mode, the signature attached will always be that of the logged-in user, regardless of the selected 'From' field. This default setting is in place to ensure consistent management of 'Send On Behalf' permissions.
However, if you wish to have the signature displayed based on the selected 'From' field, you can adjust the settings by following the steps outlined below:
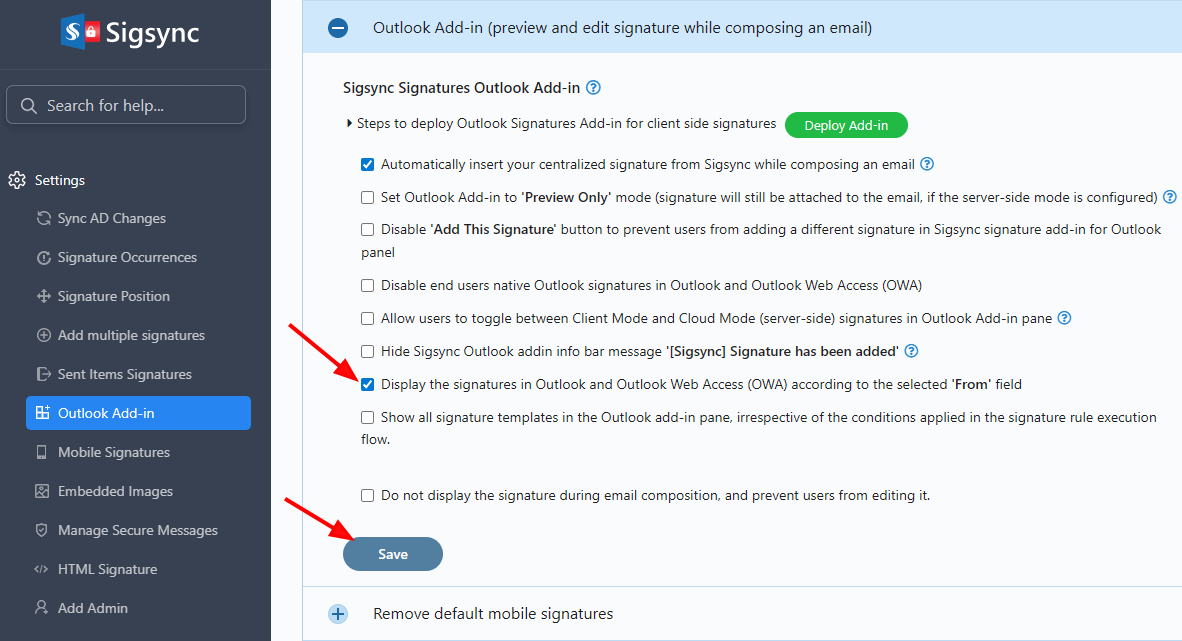
- Navigate to the Sigsync 'Settings'
- Select 'Outlook Add-in (preview and edit signature while composing an email)' tab.
- Locate and select (check) the below option:
'Display the signatures in Outlook and Outlook Web Access (OWA) based on the selected 'From' field'.
Now, if the user 'Diego Siciliani', selects the alias address in the 'From' field and sends email, the alias signature gets automatically applied.
Click here to know the working of Sigsync signatures with 'Send As / Send On Behalf' delegate permissions
Need help?
24/7 Customer support
Contact us on Live chatPersonalized Demo
Book a personalized demoStill need help?
Email us / Call us@sigsync.com All rights are reserved Security • Privacy Policy • SOC 2 Type 2 • HIPAA • GDPR • DPA • Terms and Conditions

