
Centralized deployment of the signature preview add-in
A quick video for installation guide
Note: Outlook 2013 users must have December 8, 2015, update (KB3114349)
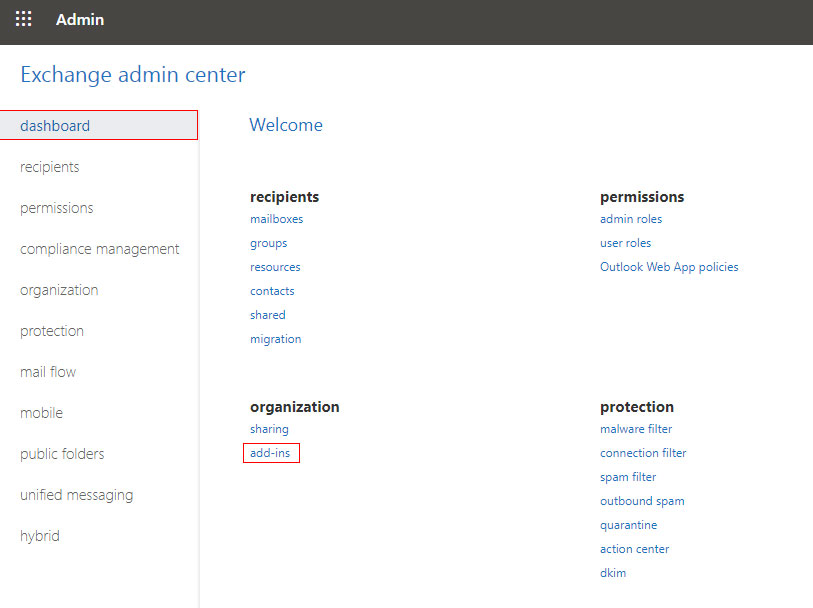
Login to your Office 365 tenant's admin center. Click 'Show all' and navigate to 'Exchange' shortcut as shown in below screenshot to open Exchange admin center in new tab.

Here, navigate to Organization section and click 'add-ins'.
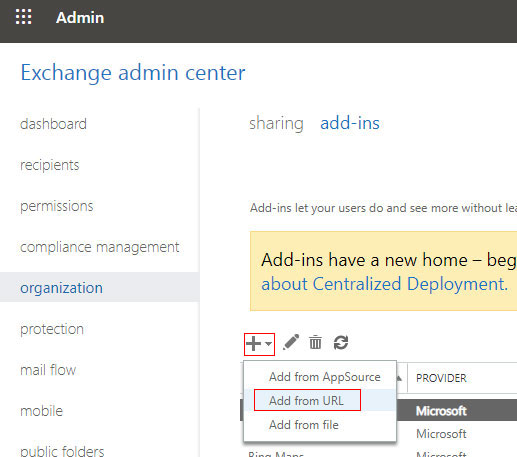
Under add-ins, Click '+' sign and select 'Add from URL' in the drop down menu.
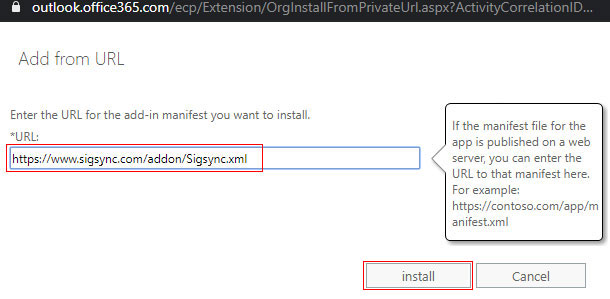
Now, enter below URL in the pop up that appears. Click 'Install' button.
https://www.sigsync.com/addon/Sigsync.xmlCopy URL
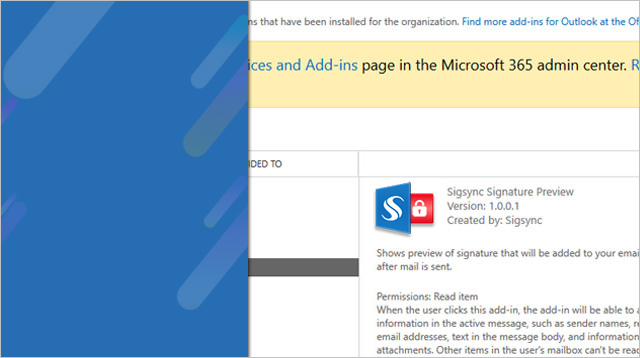
After installation, you should be able to see similiar details as shown in below screenshot.
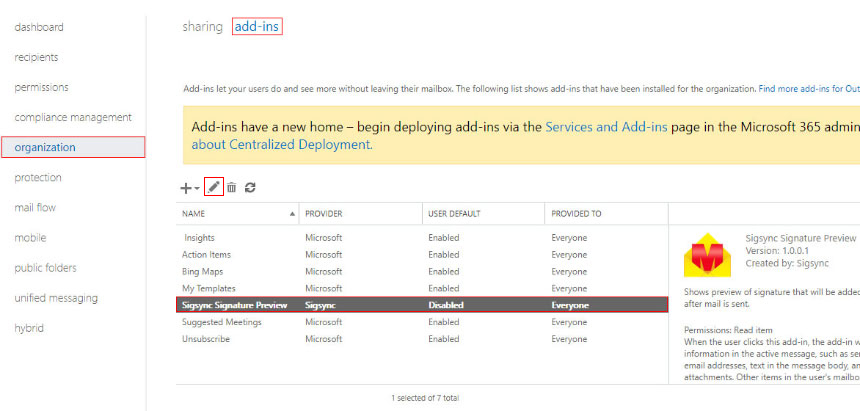
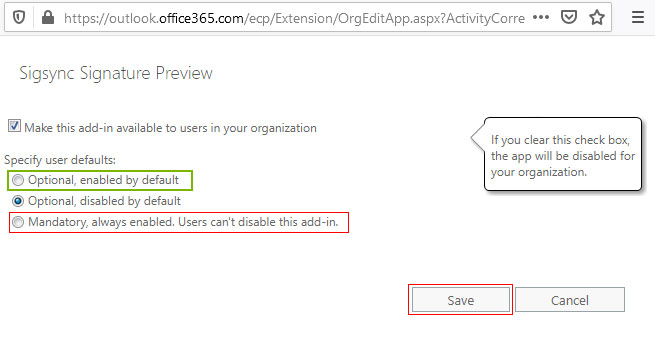
To choose how to enable the add-in for users, click the edit button next to '+' sign in previous screenshot.
- Choose 'Optional, enabled by default' if you want to enable it to all users but let users option to disable it. This is useful if all your users are using sigsync signature service.
- Choose 'Optional, disabled by default' if you want only some users to enable it. This is recommended as it is only enabled by users if they are using sigsync signature service.
- Choose 'Mandatory, always enabled. Users can't disable this' This is not recommended. This will enable it to all users without the user option to disable it.
Now, to enable it for users you can follow the steps provided in Deploy Add-in for Selected users page.
