

Switch from Centralized to Client-side Mode
Sigsync Signatures for Office 365 provides a flexible and scalable signature management system designed to support different organizational workflows. Sigsync includes three signature deployment modes Centralized Mode, Server Mode, and Client-Side (Outlook) Mode. Centralized Mode is the recommended option for most organizations, as it combines both server-side processing and Outlook add-in–based client-side signatures, offering the most complete and reliable signature experience.
After completing the initial setup in any mode, administrators can switch to another mode whenever needed. For example, an organization that starts with Centralized Mode can later move to Server Mode or Client-Side Mode, and the same applies in reverse. This flexibility allows organizations to choose the signature application method that best aligns with their devices, user behavior, and compliance requirements while ensuring consistent and professional email signatures across the entire tenant.
Steps to Switch from Centralized to Client-side Mode
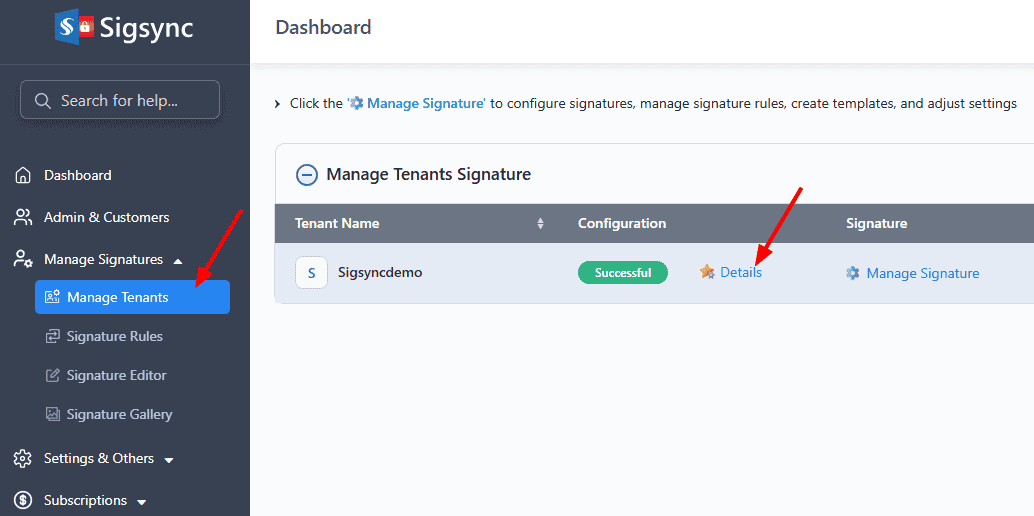
- Login to the Sigsync Dashboard
- Navigate to the ‘Manage Tenants’ tab, and on the right-hand side, click on ‘Details’ in the Configuration column.
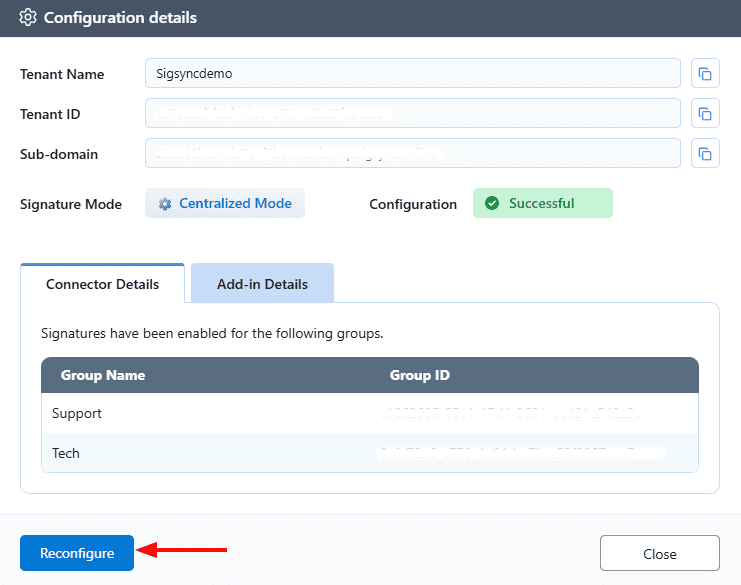
- Click the ‘Reconfigure’ button
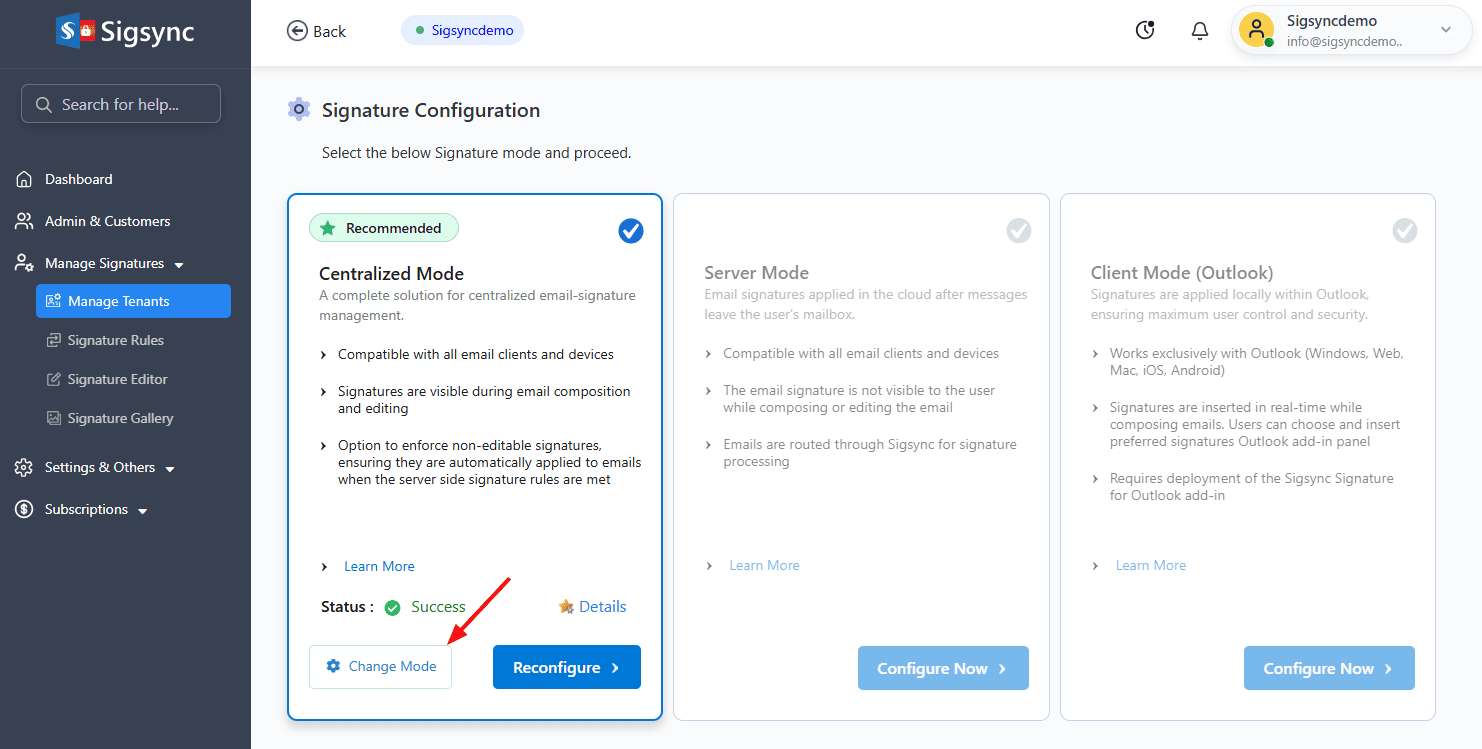
- Click on ‘Change Mode’ to switch between Centralized and Client-Side signature modes.
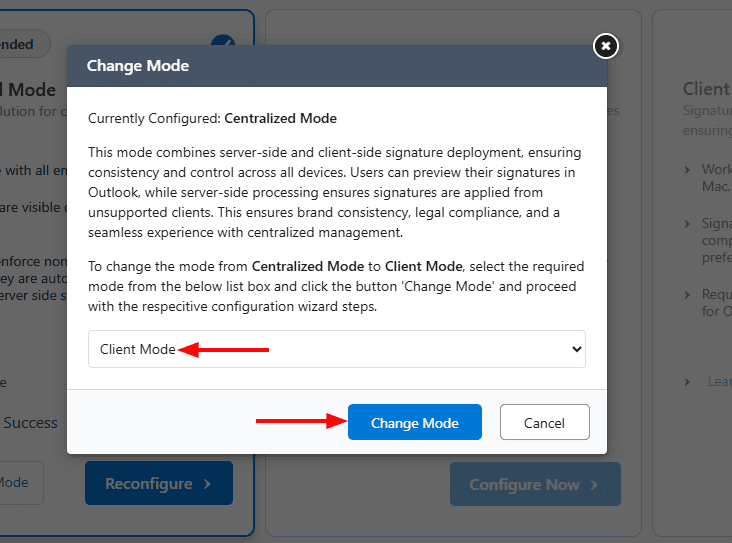
- Select the required mode from the list box and click the ‘Change Mode’ button.
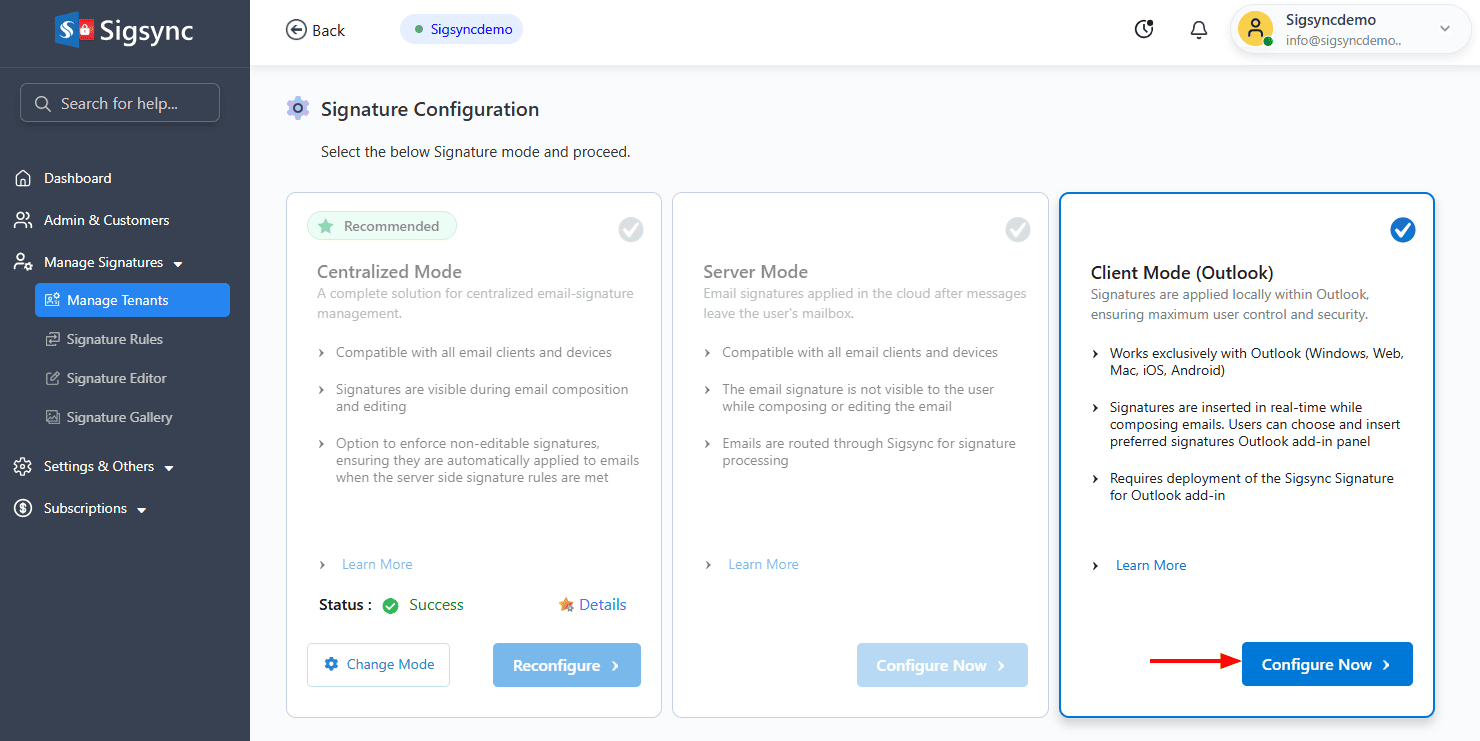
- Now, continue the configuration in Client-Side mode by clicking the ‘Configure Now’ button.
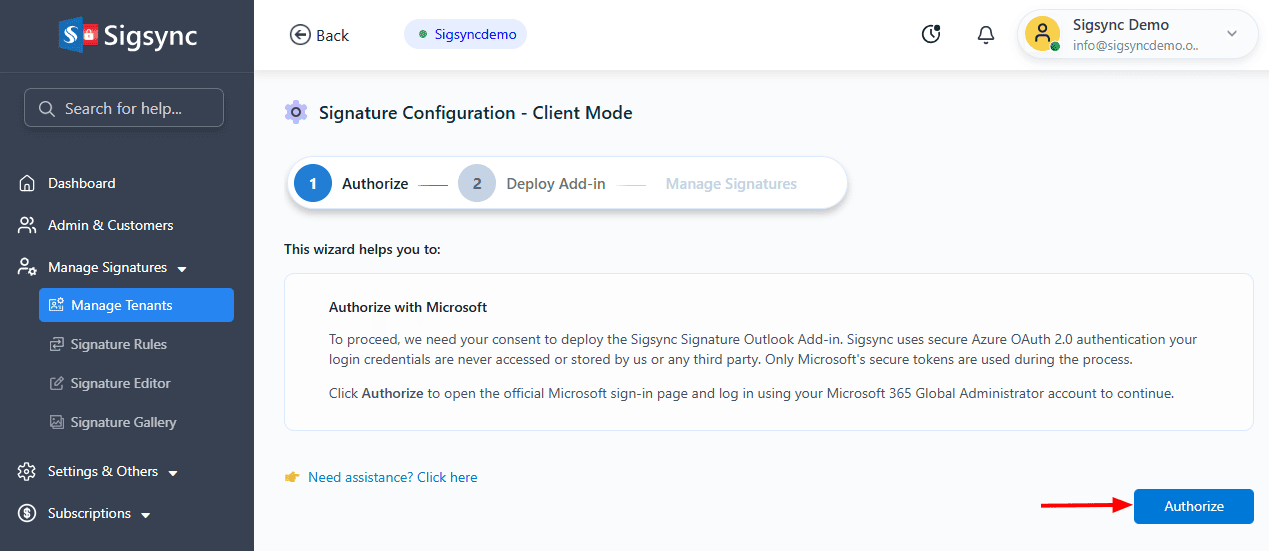
- Click ‘Authorize’ to proceed.
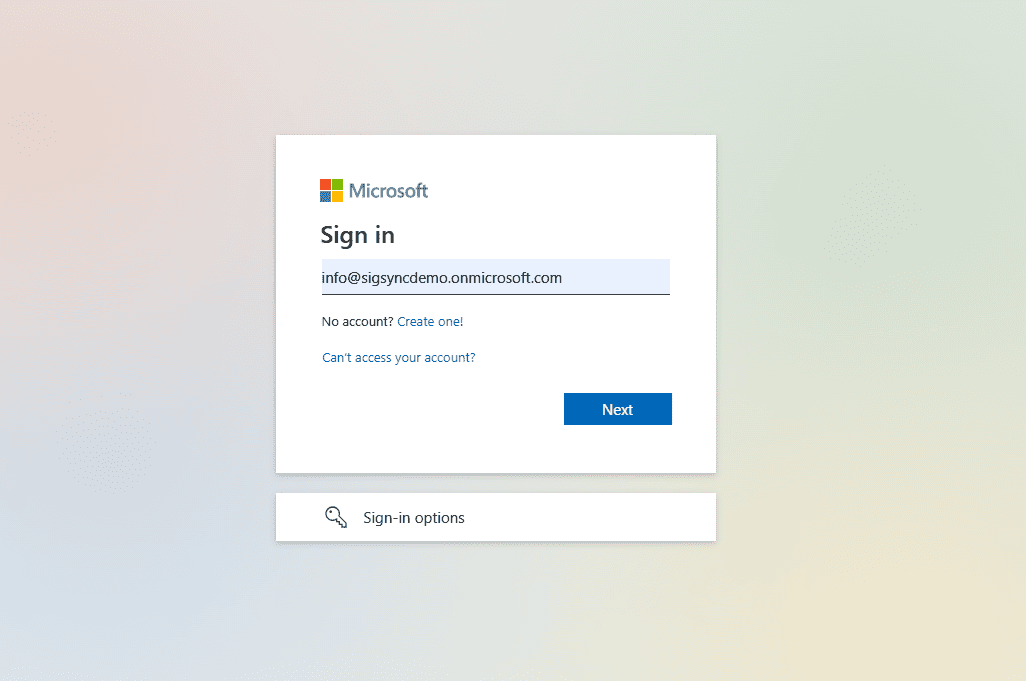
- Authenticate using your Office 365 Global admin account.
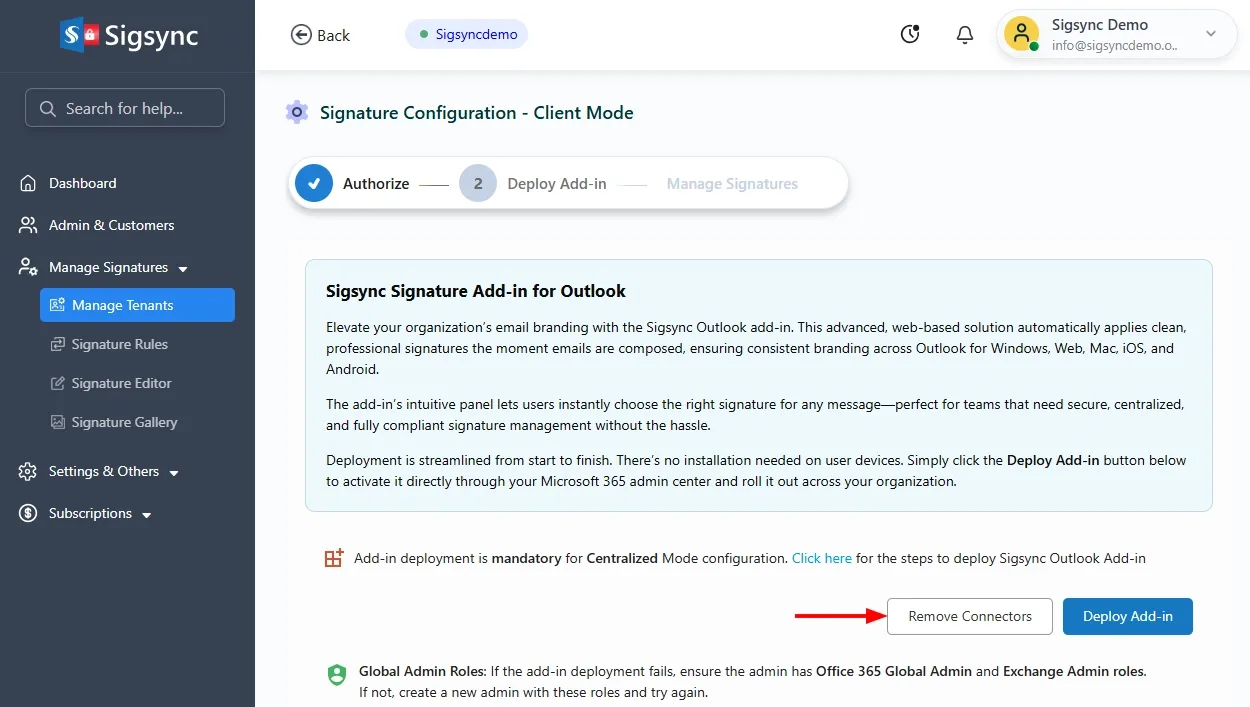
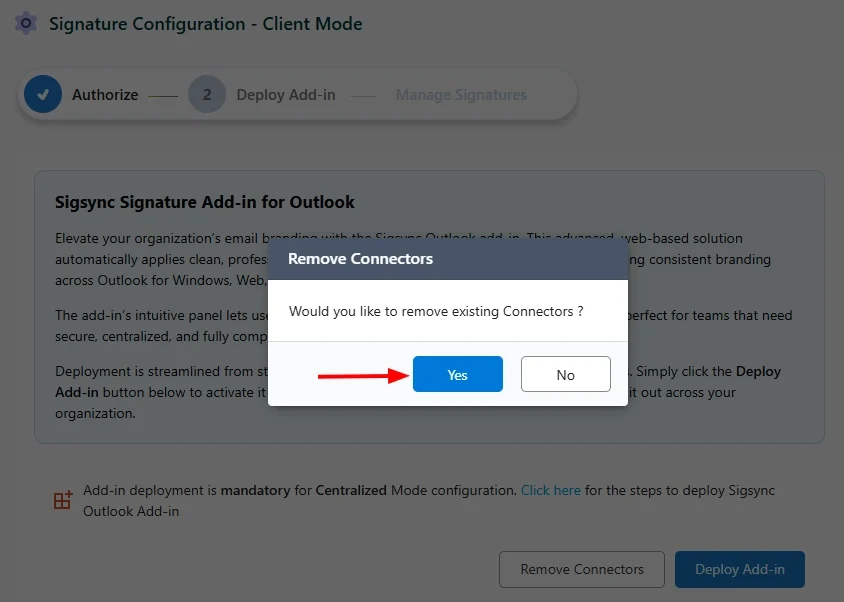
- Client Mode requires only the deployment of the Sigsync Signature Outlook add-in, so no Exchange Online connectors or transport rules are needed. Click 'Remove Connectors' to clean up the existing server-side configuration before deploying the add-in.
- Click ‘Yes’ to proceed with removing the connectors.
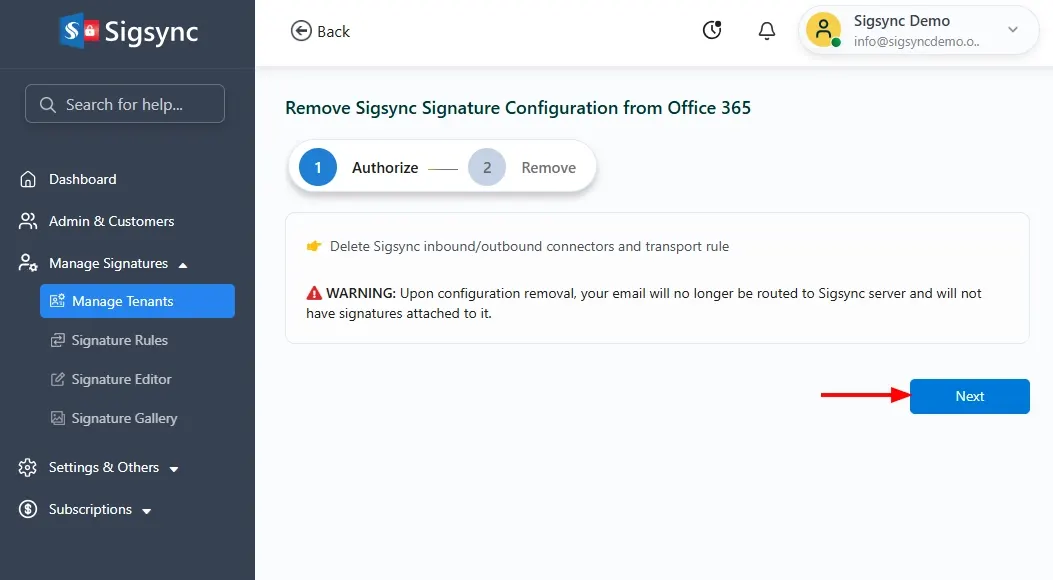
- Click the ‘Next’ button to continue.
- Click the ‘Remove Configuration’ button.
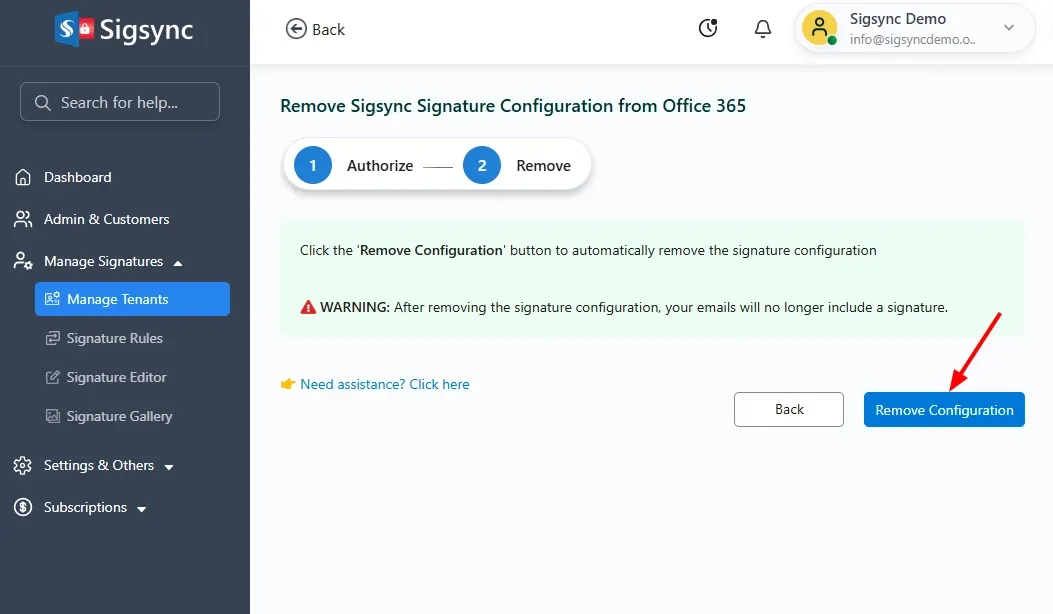
- Wait for a couple of minutes for the process to complete.
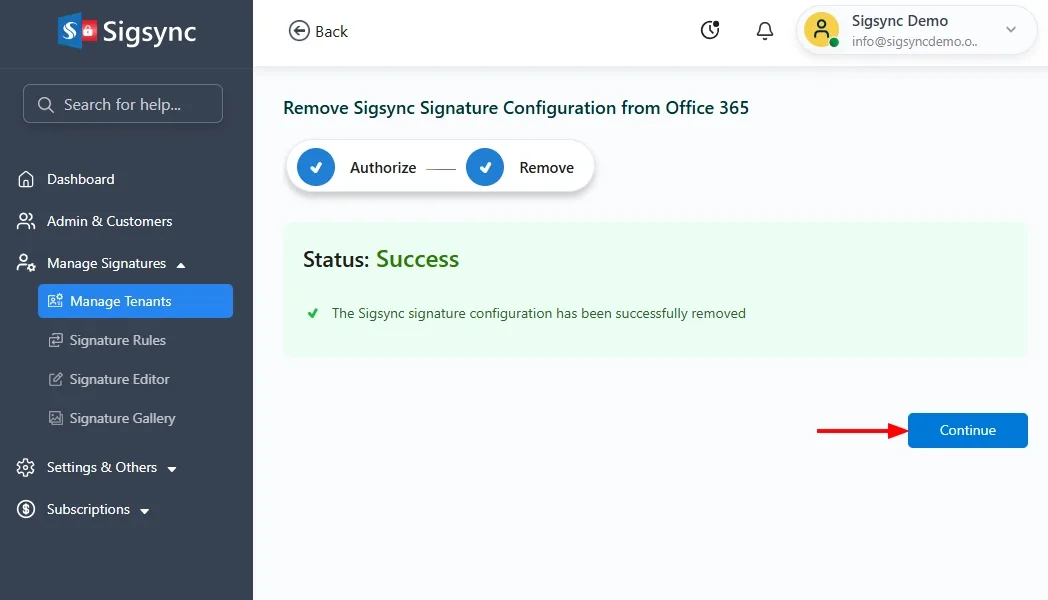
- Click the ‘Deploy Add-in’ button and complete the Add-in deployment process in the Office 365 Admin Center.
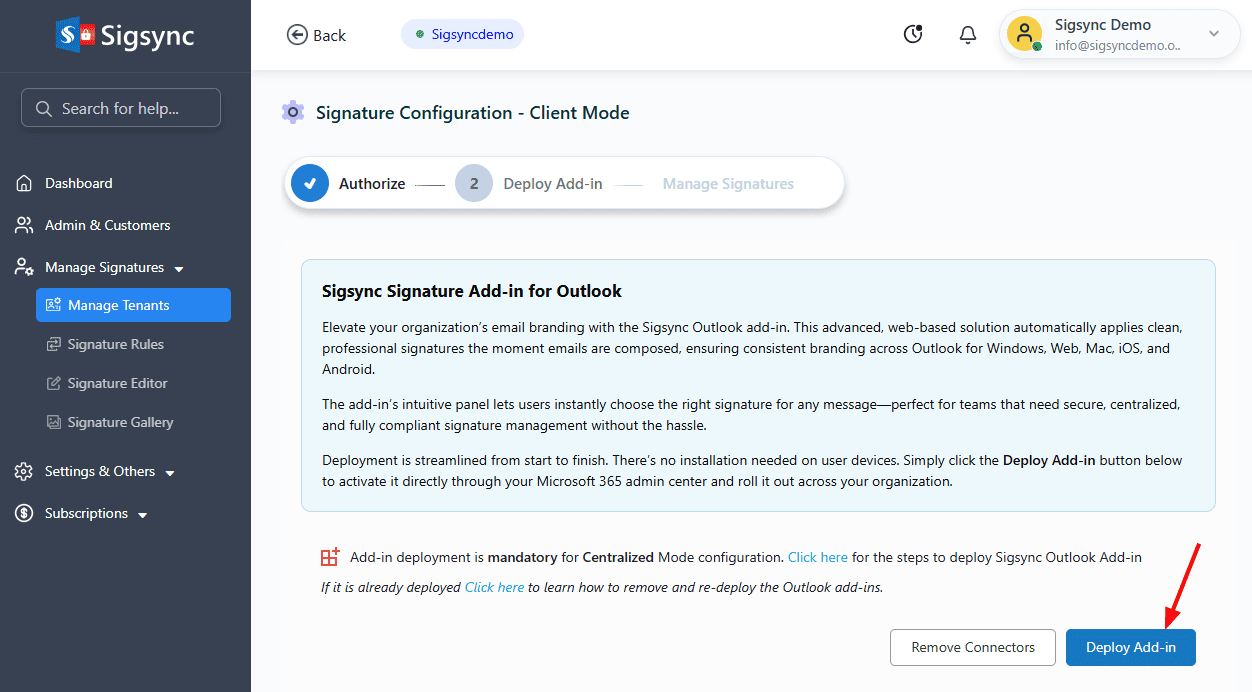
Note: If the add-in was already deployed in Centralized Mode, there's no need to deploy it again. After removing connectors, click the Deploy Add-in button, which will redirect you to the Microsoft 365 admin center to complete the switch from Centralized Mode to Client Mode. Once that's done, navigate to the Sigsync dashboard to proceed with signature creation.
See Also:
In this manual