Switch Sigsync Signatures from Centralized to Server Mode
If you have configured your email signatures in Centralized Mode or Client Mode in Sigsync, you can easily switch to Server Mode and vice versa. In Server Mode, all emails are routed through Sigsync’s Azure server, and signatures are applied automatically after the email is sent. This ensures consistent, professional branding across every device and email client, simplifies configuration, and removes reliance on the Outlook add-in. The signature will appear in the recipient’s email client. If you want the signature to also appear in the sender’s Sent Items folder, you can enable the corresponding option in Sigsync settings.
Steps to Change from Centralized Mode to Server Mode
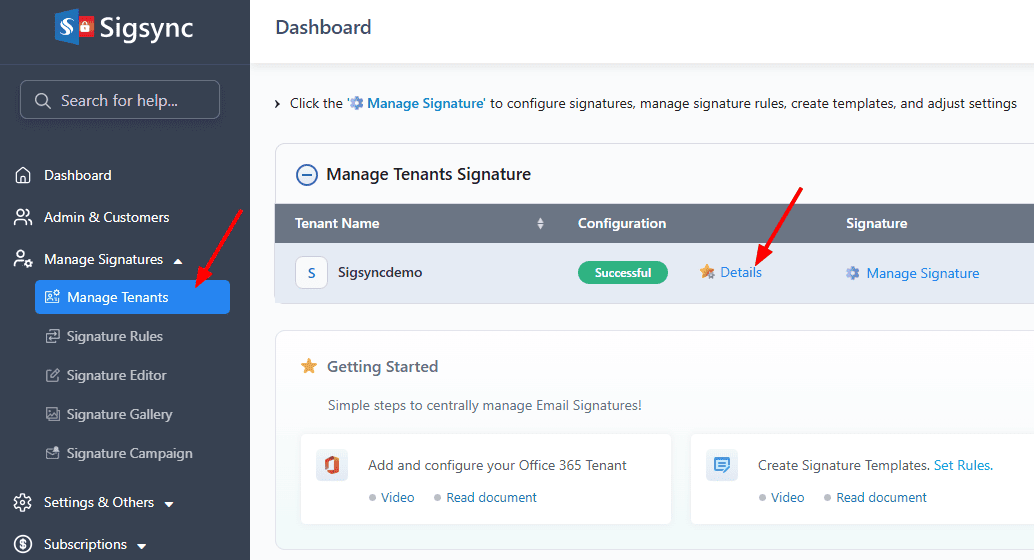
- Login to the Sigsync Dashboard
- Navigate to the ‘Manage Tenants’ tab, and on the right-hand side, click on ‘Details’ under the Configuration column.
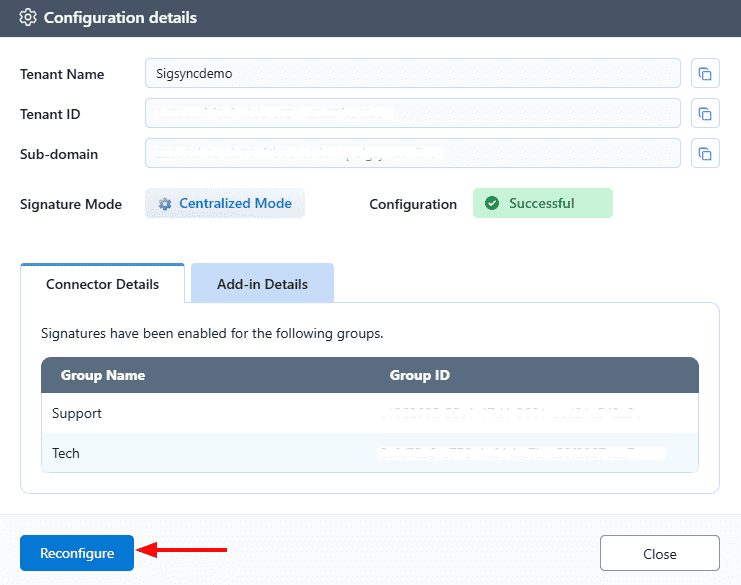
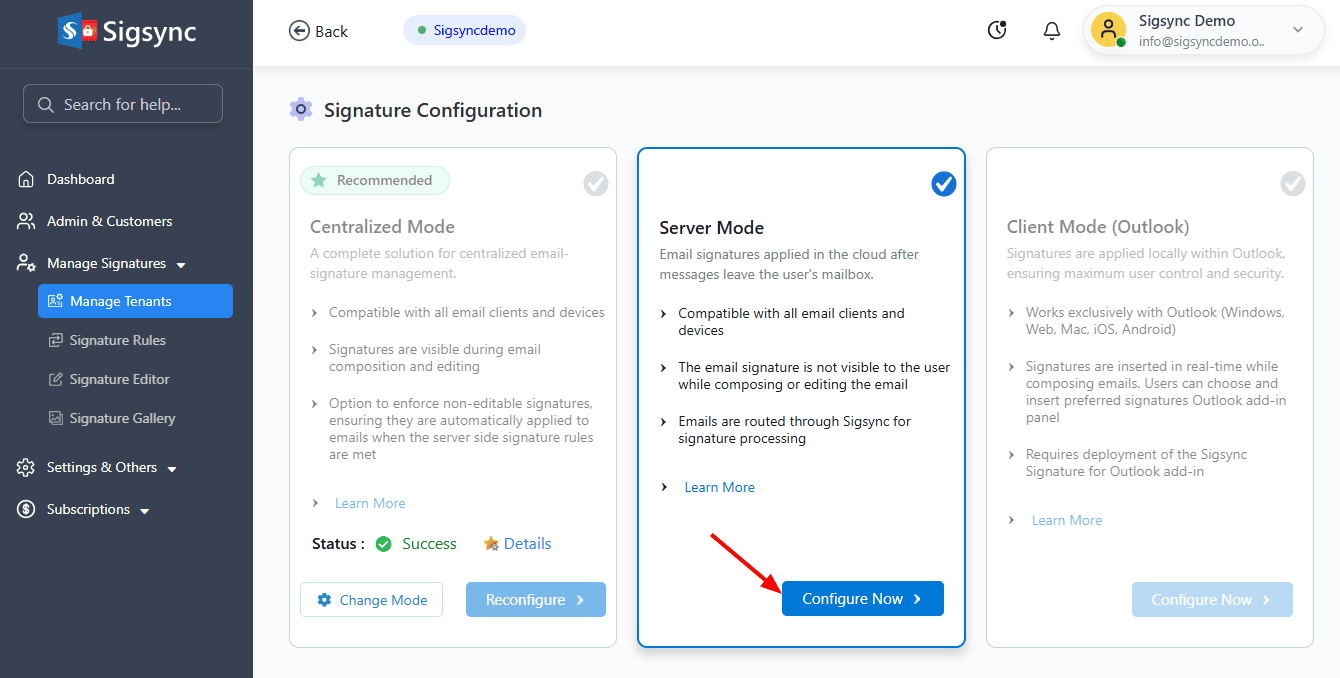
- Click the ‘Reconfigure’ button
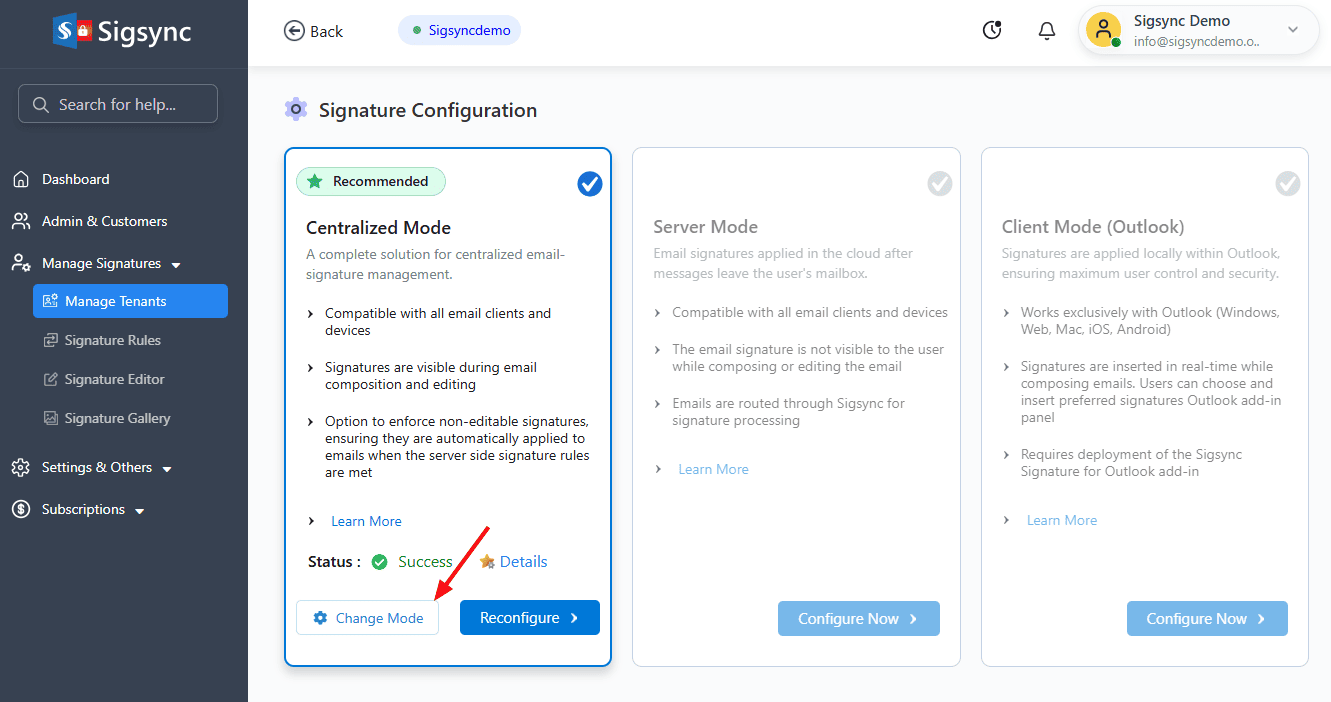
- Click on ‘Change Mode’ to switch between Centralized and Server Side signature modes.
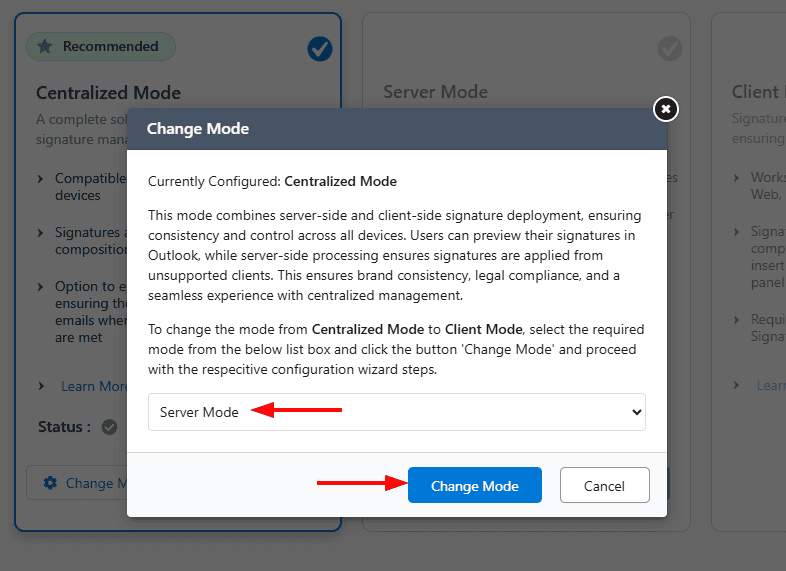
- Select the server mode from the drop-down list and click the ‘Change Mode’ button.
- Click the ‘Configure Now’ button to continue setting up in Server-Side mode.
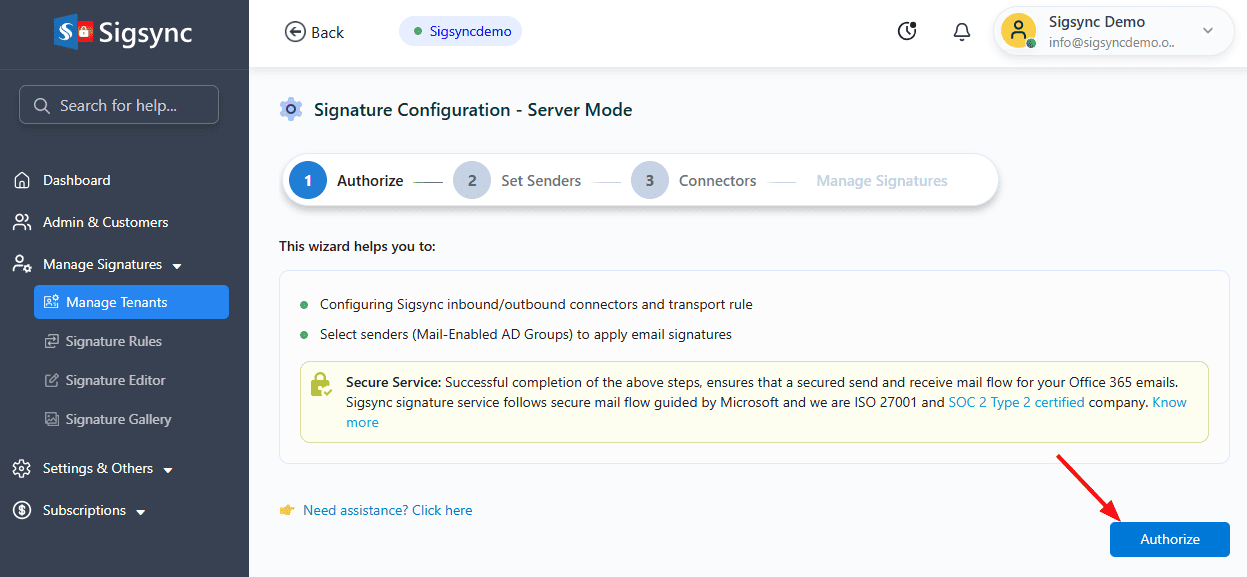
- Click ‘Authorize’ to proceed.
- Authenticate using your Office 365 Global admin account.
Set senders
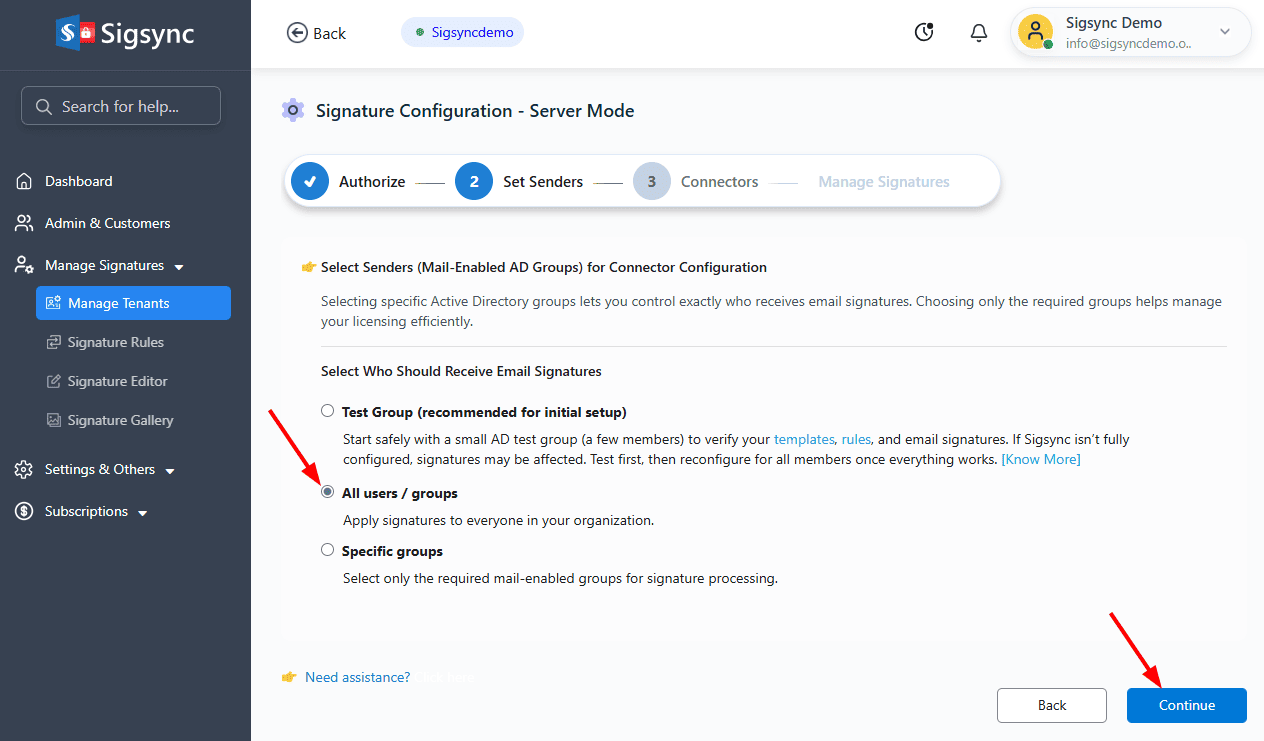
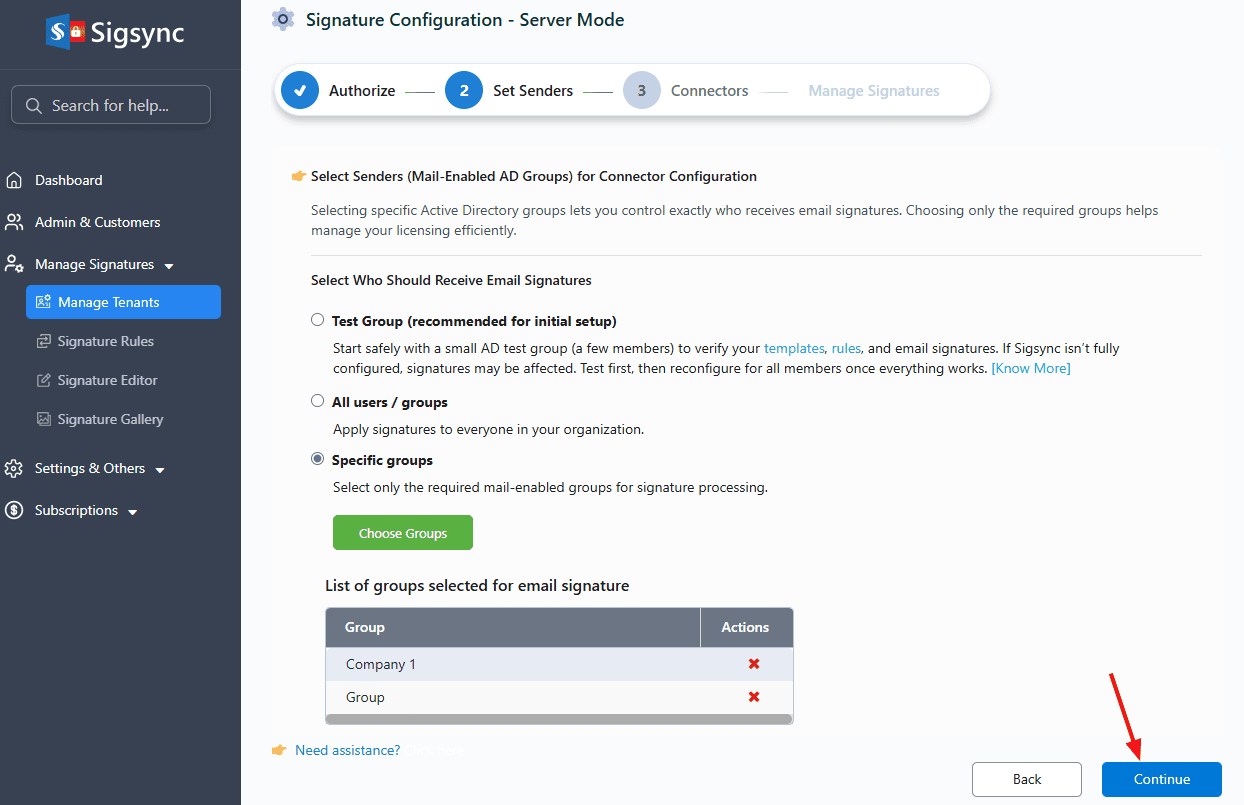
Select the senders for signature configuration. You can choose from the following options:
- All users / groups
This option lets you apply signatures to every user in your Microsoft 365 tenant.
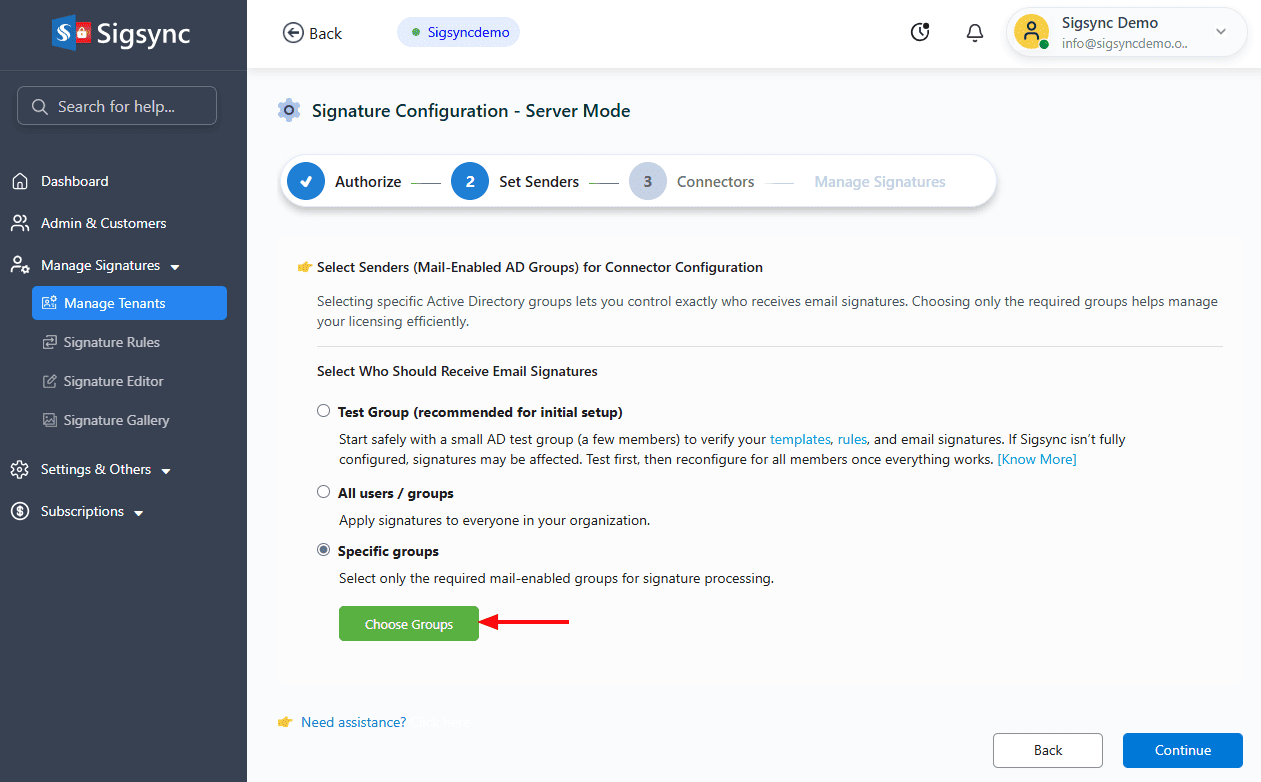
- Specific groups:
This option lets you apply only to the members of your Office 365 Azure Active Directory groups (Example: ‘Sales’, ‘HR’, or ‘Support’ etc.)
- Click ‘Choose Groups’.
- Select the required group and click ‘Ok’ to proceed
- The selected AD groups will be displayed. To remove a group from the list, click the ‘x’ icon in its corresponding row. Click ‘Continue’.
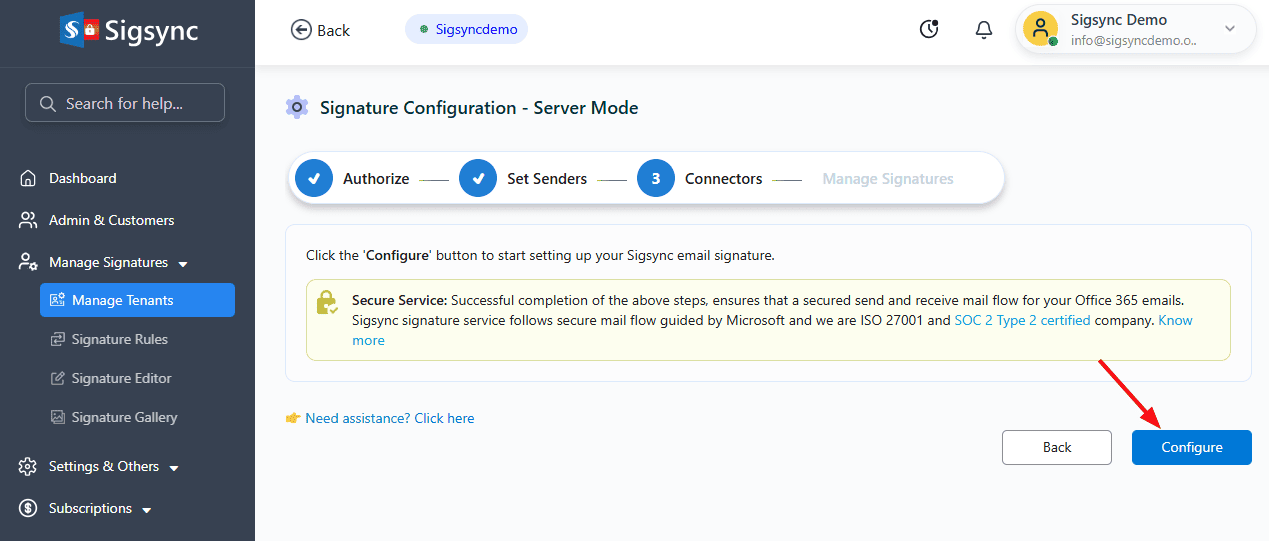
- Click the ‘Configure’ button to proceed with the Sigsync signature configuration.
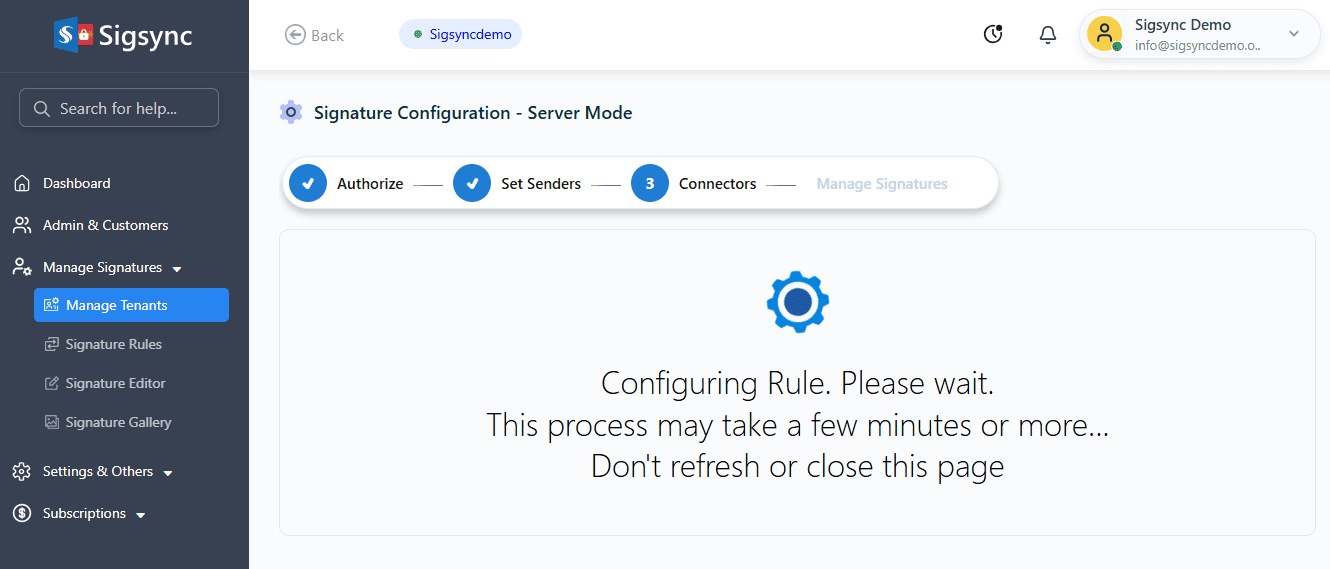
- The signature configuration takes a couple of minutes to complete.
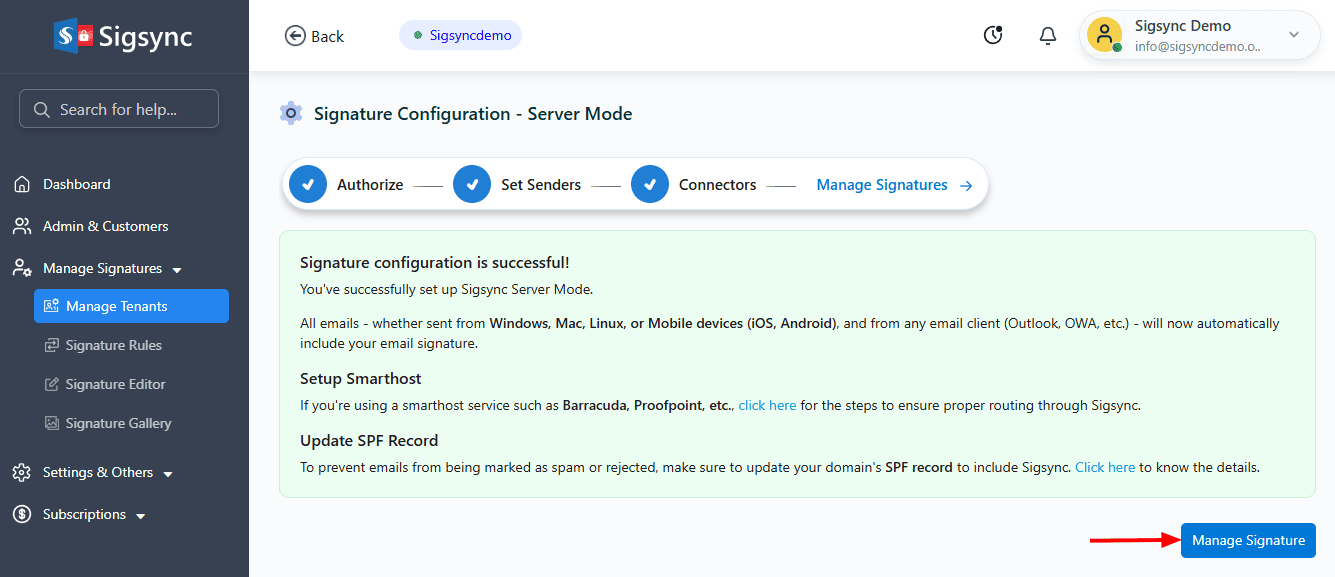
- The server-side configuration is now complete, and you can start creating and managing your email signature templates.
See Also:
Streamline Email Signature Management with a Free On-demand Demo from Sigsync
Sigsync email signature service provides effortless, centralized signature management for Office 365 and Exchange. Our team can assist you in quickly setting up company-wide signatures. Request a free on-demand demo to see how Sigsync can simplify your email signature management process.

