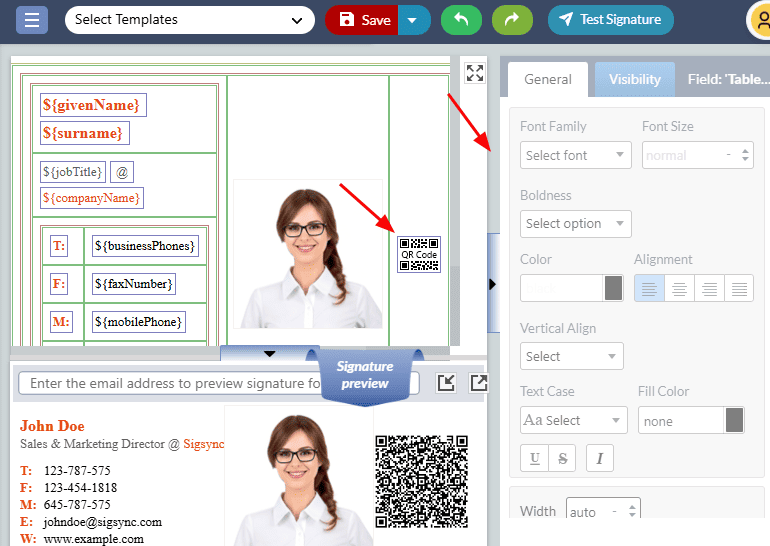
QR code
Sigsync generates and inserts a QR code in your email signature when you input your contact details. Adding QR code in your signature can be a convenient way to provide additional information to your recipients. When the recipient scans the QR code in the email signature using a smartphone, it automatically directs your recipients to your website, social media profile and even enables them to save your contact details on their phone.
To insert a QR code in your email signature using Sigsync, follow these steps:
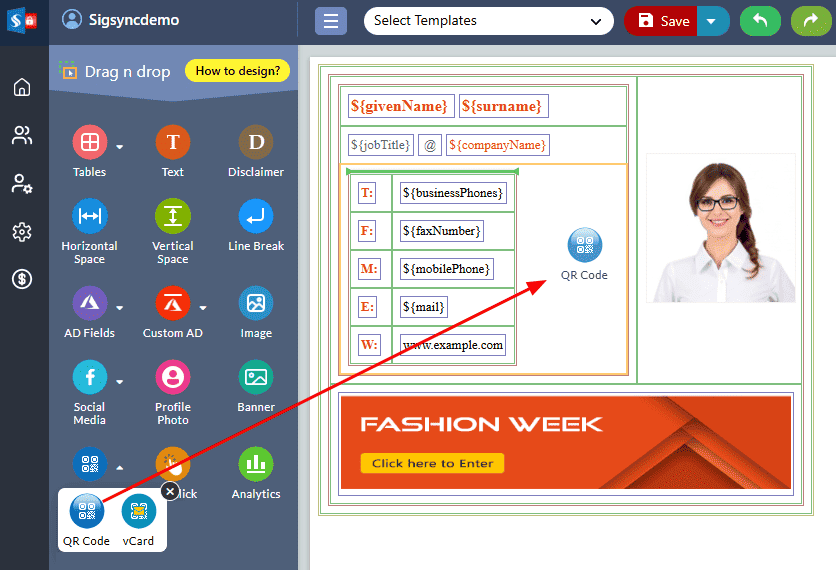
- Drag and drop ‘QR code' component into the design area
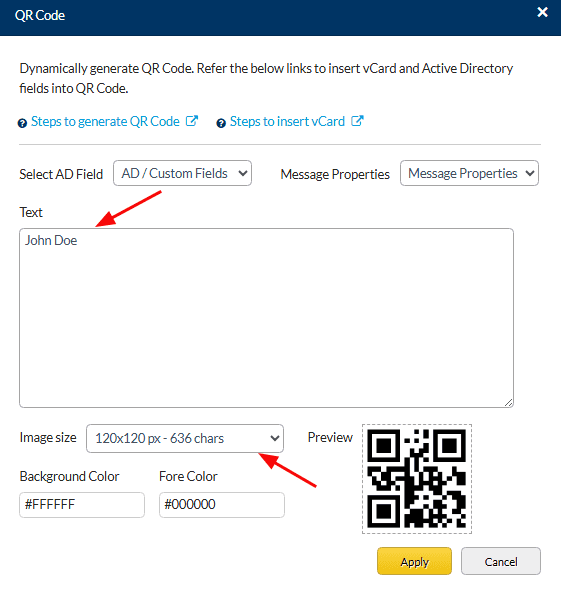
- Enter the details in the 'Text' field area that you want it to be part of your QR code image. This text will be converted into a QR Code image and attached along with your email signature.
You can set the size of the QR code image according to the length of the text that you enter. The QR code image preview will appear as soon as you enter the data into the text field area.
In addition, you can directly insert the 'AD placeholders', 'Custom AD fields' and 'Message Properties' into the text field area based on your QR code requirement.
vCard
Sigsync enables you to insert vCard as QR code in your email signature template. This feature makes it easier for your recipients to save your contact information and reach out to you.
To add a QR code to your email signature in Sigsync, follow these simple steps:
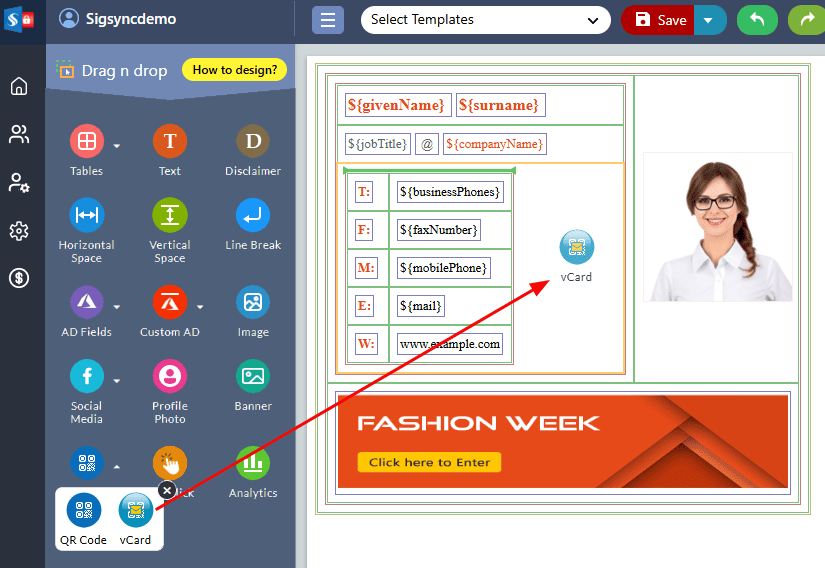
- Drag and drop the ‘vCard’ signature component into the design area
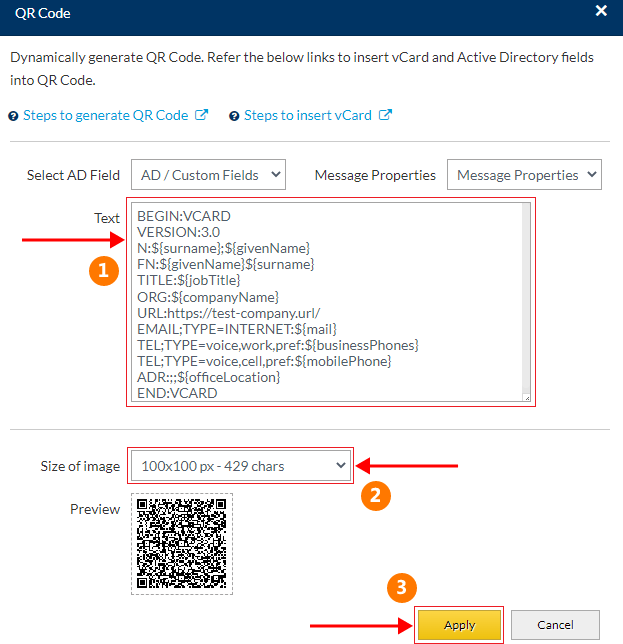
- You can keep the default vCard details or modify it as per your requirement. Click the ‘Apply’ button
QR code component properties
To customize the properties of your QR code in Sigsync Editor, all you need to do is click on the QR code field in the design pane, and then adjust the settings in the 'General’ tab located on the right-hand side of the signature editor.
You can adjust a variety of properties for the QR code components in Sigsync. Here is a comprehensive list of the different properties available:
- Vertical alignment: Adjust the vertical alignment of the QR code component within your email signature.
- Horizontal alignment: Adjust the horizontal alignment of the QR code component within your email signature.
- Direction: Choose the orientation of the QR code component.
- Width: Set the width of the QR code component to fit within your signature layout.
- Height: Set the height of the QR code component to fit within your signature layout.
- Top padding: Adjust the amount of padding above the QR code component.
- Right padding: Adjust the amount of padding to the right of the QR code component.
- Bottom padding: Adjust the amount of padding below the QR code component.
- Left padding: Adjust the amount of padding to the left of the QR code component.
- Border Top: Set the properties for the top border of the QR code component.
- Border Right: Set the properties for the right border of the QR code component.
- Border Bottom: Set the properties for the bottom border of the QR code component.
- Border Left: Set the properties for the left border of the QR code component.
- Border All: Set the properties for all four borders of the QR code component.
- Edit QR Code: Make changes to the content of the QR code.
- Hyperlink: Add a hyperlink to the QR code component.
- Display / Hide Signature Field: Choose whether or not to display the signature field for the QR code component.
- Remove / Add Newline (line break): Adjust the spacing of the QR code component.
- Analytics Link: Add a link to track analytics for the QR code component.
Streamline Email Signature Management with a Free On-demand Demo from Sigsync
Sigsync email signature service provides effortless, centralized signature management for Office 365 and Exchange. Our team can assist you in quickly setting up company-wide signatures. Request a free on-demand demo to see how Sigsync can simplify your email signature management process.

