Manual Menu

Row & Column - Split, Merge, Insert, Delete

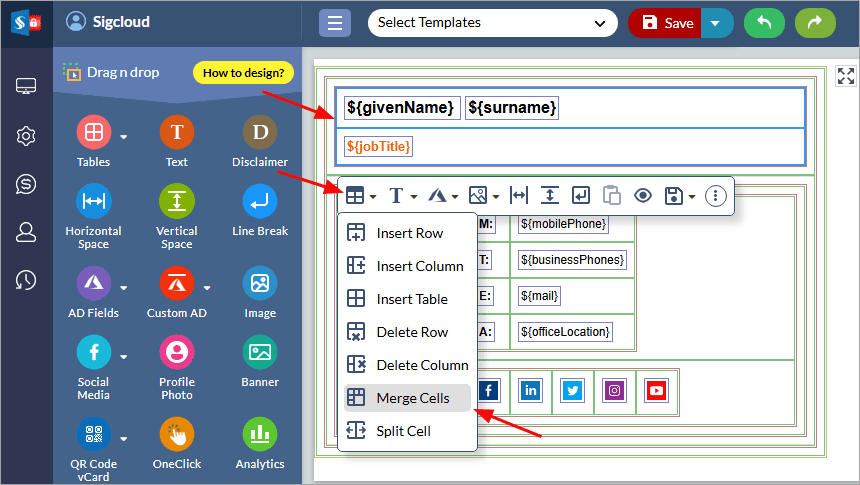
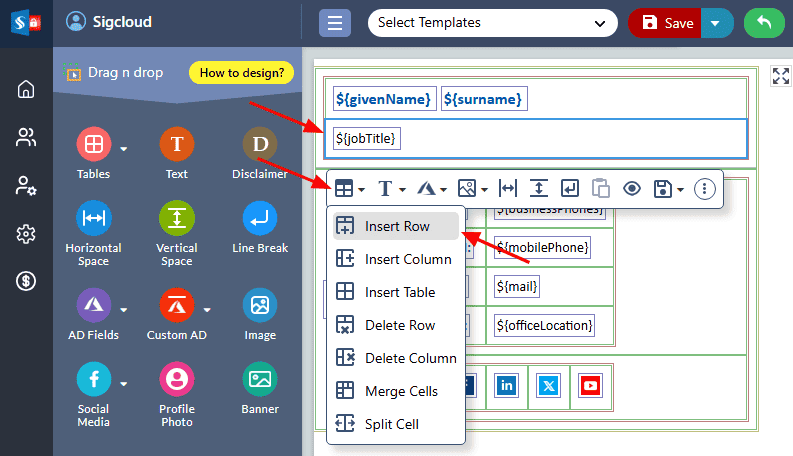
The ‘Row & Column - Split, Merge, Insert, Delete’ property in the Sigsync ‘Properties’ pane allows you to manipulate the layout of your email signature.

With this property, you can split a row or column into multiple sections, merge multiple rows or columns into a single section, insert new rows or columns to your signature, and delete existing rows or columns.

This feature is particularly useful when you want to add or remove fields from your email signature, such as contact information, social media icons, or marketing banners. By using the ‘Row & Column - Split, Merge, Insert, Delete’ property, you can easily customize the layout of your signature to fit your needs

The list of table rows properties are:

The list of table columns properties are:

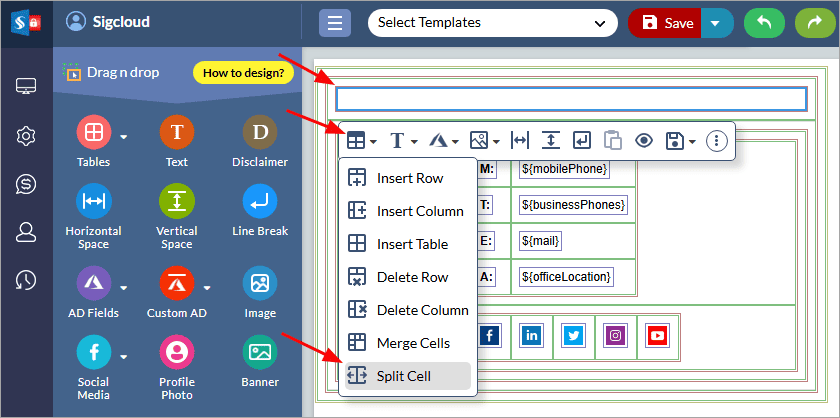
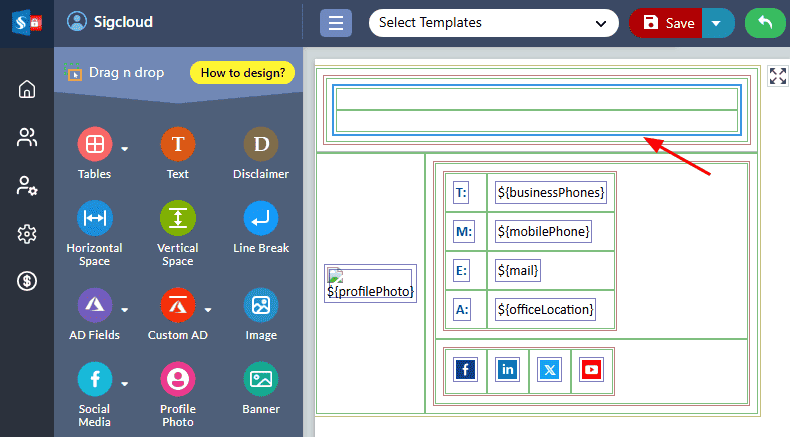
Split Row

The ‘Split Row’ property allows you to divide a single row in your email signature into multiple sections.

You can insert individual fields to each section of the split row. For example, you could use the split row property to add your name in one section, and your job title to another section.

To utilize the Split Row property in the Sigsync editor property pane, you can follow these simple steps:

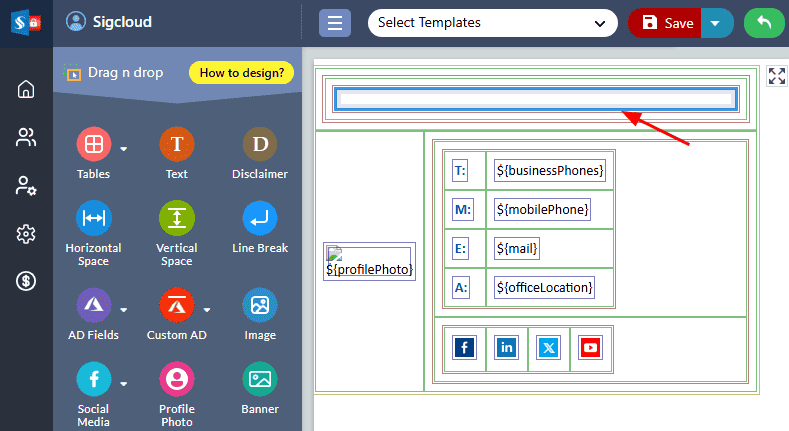
  1. Select the row to split from the design pane

    Select the row

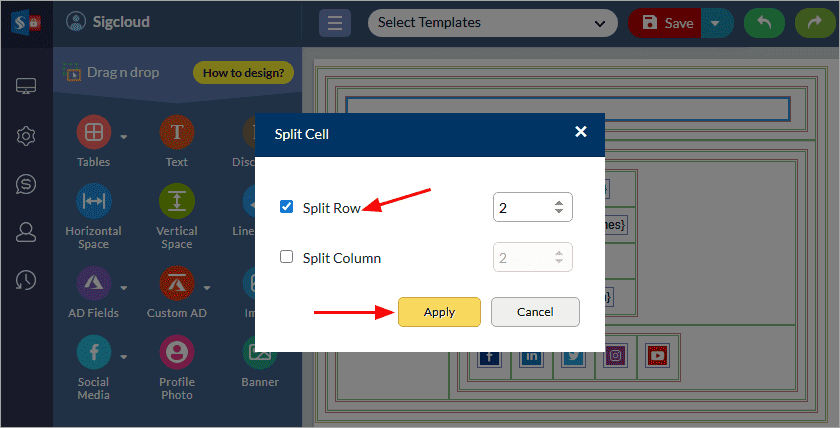
  2. Choose the ‘Row & Column - Split, Merge, Insert, Delete’ tab from the ‘Properties’ pane located on the right side of the editor. Next, choose the ‘Table rows’ option, and select ‘Split Row’ as the operation type. Enter the number of rows you want to split, and then click the ‘Apply’ button to apply the changes to your signature.

    Click apply

  3. The row you selected will now be split into two separate rows.

    preview the changes

Merge Row

The ‘Merge Row’ property allows you to combine two or more adjacent rows in a table into a single row. This can be useful when you have data that spans multiple rows but should be displayed as a single entity.

To merge two rows, follow these simple steps:

  1. Select the row to merge from the design pane

    Select the row to merge

  2. Select the ‘Row & Column - Split, Merge, Insert, Delete’ tab from the ‘Properties’ pane from the right side of the editor.Then, choose the ‘Table Rows’ option, and select ‘Merge Row’ as the operation type. Enter the number of rows you want to merge, and then click the ‘Apply’ button to get changes updated in the template.

    Select merge rows

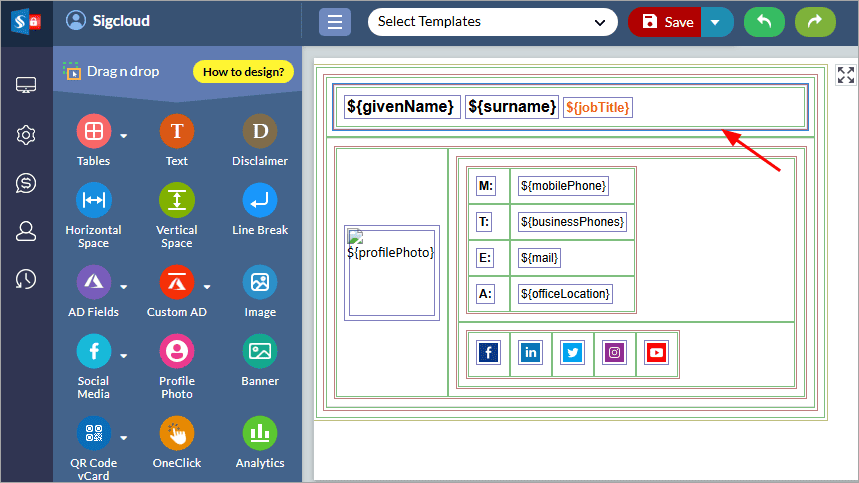
  3. The row you selected will now be merged into a single row

    merged-into-single-row

Insert Row Above

The ‘Insert Row Above’ property allows you to add a new row to a table in your email signature above the currently selected row.

Insert Row Above

To add a new row above the existing row in Sigsync editor, follow the steps provided below.

  1. Click the row above which you want to insert a new row

    Click the row

  2. Select the 'Row & Column - Split, Merge, Insert, Delete' tab from the 'Properties' pane from the right side of the editor.Then, choose the 'Table Rows' option, and select 'Insert Above' as the operation type. Enter the number of rows you want to insert, and then click the 'Apply' button to apply the changes.

    Insert Above

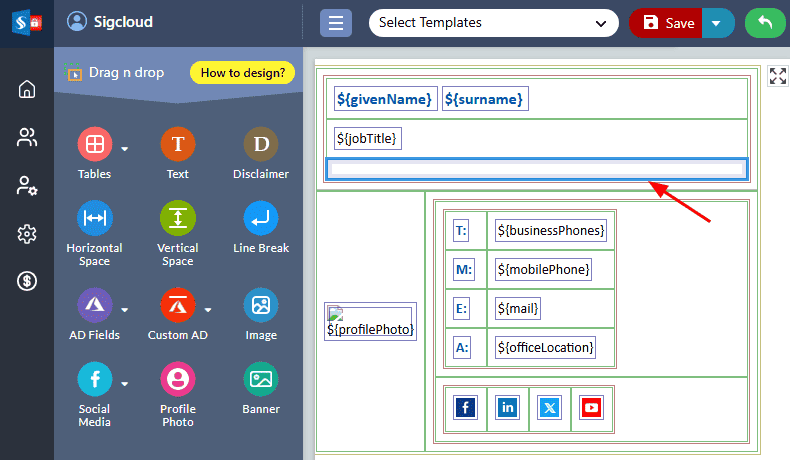
  3. A new row is inserted above the currently selected row

    A new row is inserted

Insert Row Below

The 'Insert Row Below' property allows you to easily add a new row directly below the currently selected row in a table.

Insert Row below

In order to insert a new row underneath an already existing row in the Sigsync editor, simply follow the steps provided below.

  1. Select the row below which you want to add a new row

    Click the row

  2. Select the 'Row & Column - Split, Merge, Insert, Delete' tab located in the 'Properties' pane on the right side of the editor. Next, choose the 'Table Rows' option and select 'Insert Below' as the operation type. Specify the number of rows you want to insert and click the 'Apply' button to confirm the changes

    Insert below

  3. A new row is inserted below the currently selected row

    A new row is inserted

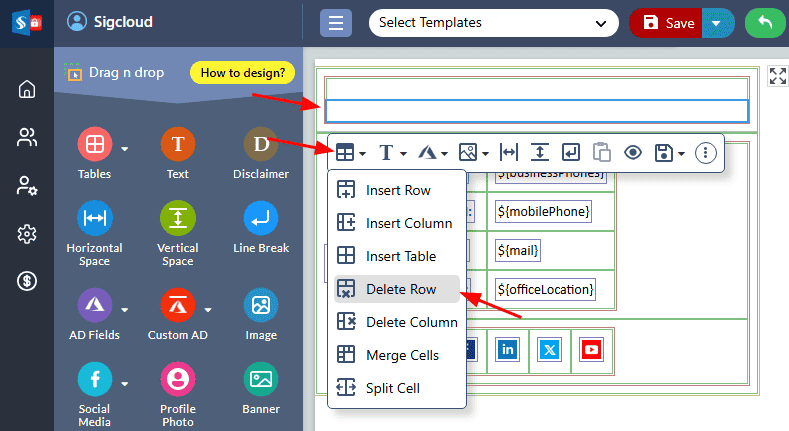
Delete Row

The 'Delete Row’ property allows you to remove a row from a table within your email signature.

To delete a row in Sigsync editor, follow the steps provided below

  1. Choose the row that you want to delete.

    Click the row

  2. Select the 'Row & Column - Split, Merge, Insert, Delete' tab in the 'Properties' pane on the right-hand side of the editor. Then, select the 'Table Rows' option and choose 'Delete Row' as the operation type and click the 'Apply' button to apply the changes.

    Delete Row

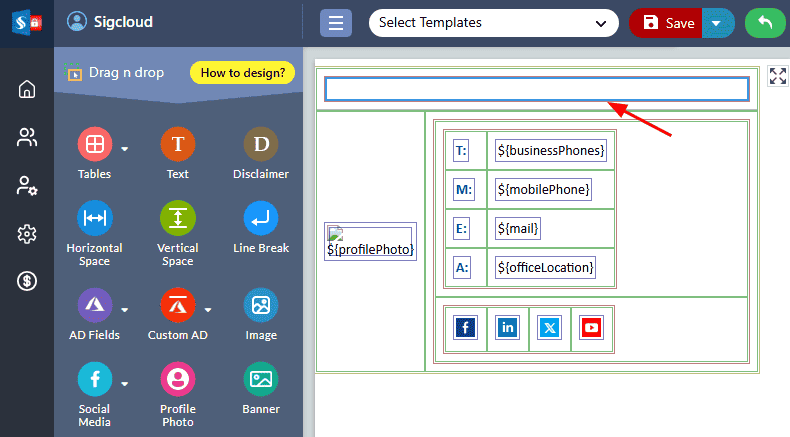
  3. The selected row gets deleted

    The selected row gets deleted

Split Column

The 'Split Column’ feature allows you to split a single column into multiple columns. This property is useful when you have a list of fields in a single column that needs to be separated into different categories.

To split a column in a table using Sigsync editor, simply follow the below steps.

  1. From the design pane, choose the column that you want to split.

    choose the column

  2. Select the 'Row & Column - Split, Merge, Insert, Delete' tab in the 'Properties' pane on the right-hand side of the editor. Then, select the 'Table Columns' option and choose 'Split Column' as the operation type and click the 'Apply' button to apply the changes.

    Split Column

  3. The column gets split into two individual columns

    The column gets split

Merge Column

The 'Merge column’ involves combining two or more adjacent columns in a table into a single column.

You can merge a column in a table using the Sigsync editor by following the steps below:

  1. Choose the column you want to merge.

    choose the column

  2. First, select the 'Row & Column - Split, Merge, Insert, Delete' tab located in the 'Properties' pane on the right-hand side of the editor. Next, choose the 'Table Columns' option and select 'Merge Column' as the type of operation. Finally, click on the 'Apply' button to implement the changes.

    Merge Column

  3. The columns are merged into a single column

    The column gets merged

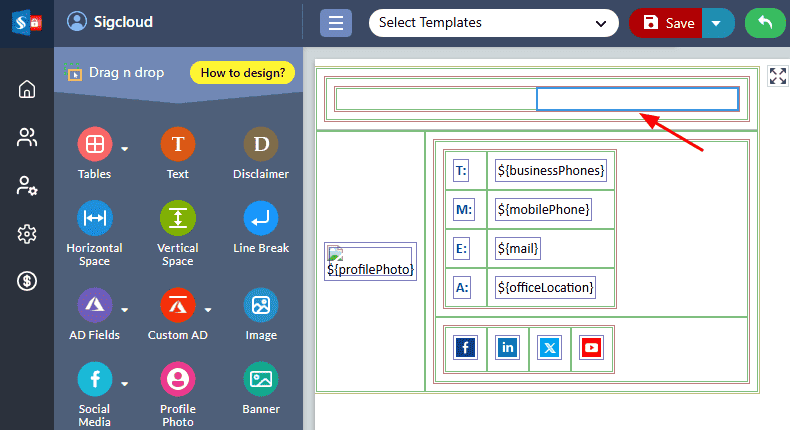
Insert Right

The 'Insert Right’ property allows you to insert a new column to the right side of an existing table column

Follow the below steps to insert a new column to the right of an existing column:

  1. Select the column next to which you want to insert a new column to the right.

    choose the column

  2. Select the 'Row & Column - Split, Merge, Insert, Delete' tab from the 'Properties' pane on the right-hand side of the editor and choose the 'Table Columns' option. From there, select 'Insert Right' as the type of operation you wish to execute. Lastly, click on the 'Apply' button to implement the changes you have made.

    Insert Right

  3. A new column gets inserted to the right-hand side of the column you have selected.

    The column gets inserted

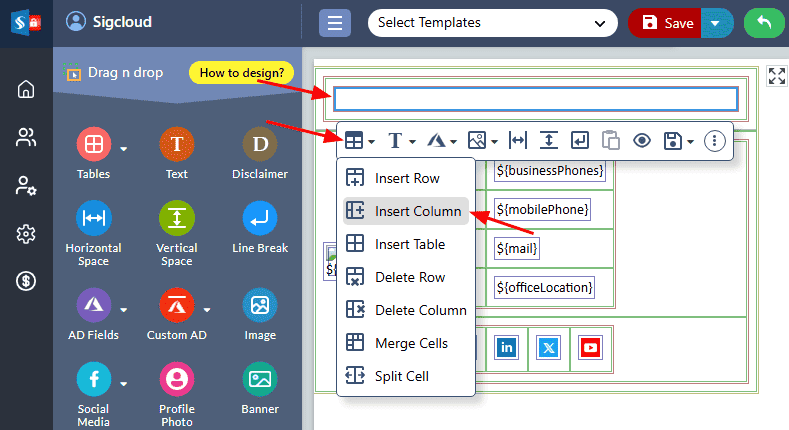
Insert Left

You can use the 'Insert Left' property to add a new column to the left side of an existing column in a table.

To insert a new column to the left of an existing column in a table, take the following steps:

  1. Select the column directly adjacent to the location where you want to insert the new column on the left side.

    choose the column

  2. Access the 'Properties' pane located on the left-hand side of the editor. Once there, choose the 'Row & Column - Split, Merge, Insert, Delete' tab and select the 'Table Columns' option. Then, specify the 'Insert Left' operation and click on the 'Apply' button to implement the changes.

    Insert left

  3. A new column gets added to the left-hand side of the currently selected column

    The column gets inserted

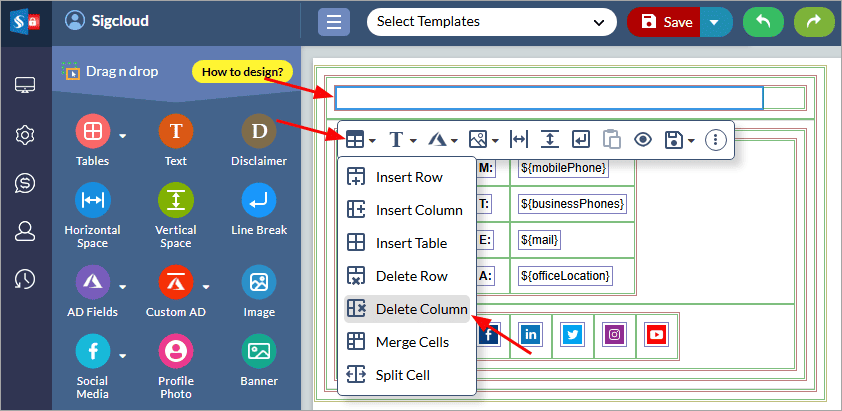
Delete Column

The 'Delete Column' property in the Sigsync editor allows you to remove a specific column from a table

To remove a column from a table using the Sigsync editor, follow the steps below:

  1. Select the column that you want to delete

    Click the column

  2. Select the 'Row & Column - Split, Merge, Insert, Delete' tab from the ‘Properties’ pane on the right side of the editor. Then, choose the 'Table Columns' option and select 'Delete Column' as the operation to execute. Finally, save your changes by clicking on the 'Apply' button.

    Delete Column

  3. Now, the the selected row gets deleted from the tabl

    The selected Column gets deleted

Streamline Email Signature Management with a Free On-demand Demo from Sigsync

Sigsync email signature service provides effortless, centralized signature management for Office 365 and Exchange. Our team can assist you in quickly setting up company-wide signatures. Request a free on-demand demo to see how Sigsync can simplify your email signature management process.

SCHEDULE A DEMO

Demo sitemap