

Salesforce Integration with Sigsync
Sigsync Microsoft 365 Email Signature Software lets you connect to Salesforce and use Contact, Account, and Opportunity lists when setting recipient conditions for email signature rules.
Once connected, you can sync the required Salesforce lists with Sigsync and assign a signature template to a specific list. This allows you to apply different signatures, banners, or campaign messages based on the recipients included in selected Salesforce lists.
For example, you can apply a specific signature to recipients in a Contact list, use different signature content for recipients associated with selected Accounts, or display targeted banners for recipients linked to Opportunities.
Why Connect Salesforce with Sigsync?
Salesforce integration makes it easier to use the recipient information you already manage in Salesforce when applying Sigsync email signatures.
You can:
- Use Salesforce lists directly in Sigsync signature rules.
- Apply different signatures to different recipient groups.
- Use targeted signature banners for customers, prospects, or campaigns.
- Update Salesforce lists and sync the changes with Sigsync.
- Manage signature templates centrally without recreating recipient lists in Sigsync.
Steps to Set Up Salesforce Integration
Setting up Salesforce integration has three main parts:
Install the Salesforce Integration Package
First, install the Sigsync package in the Salesforce account you want to connect.
- Log in to your Sigsync Dashboard.
- Navigate to the ‘Integrations’ tab and click ‘Salesforce Integration Package’.
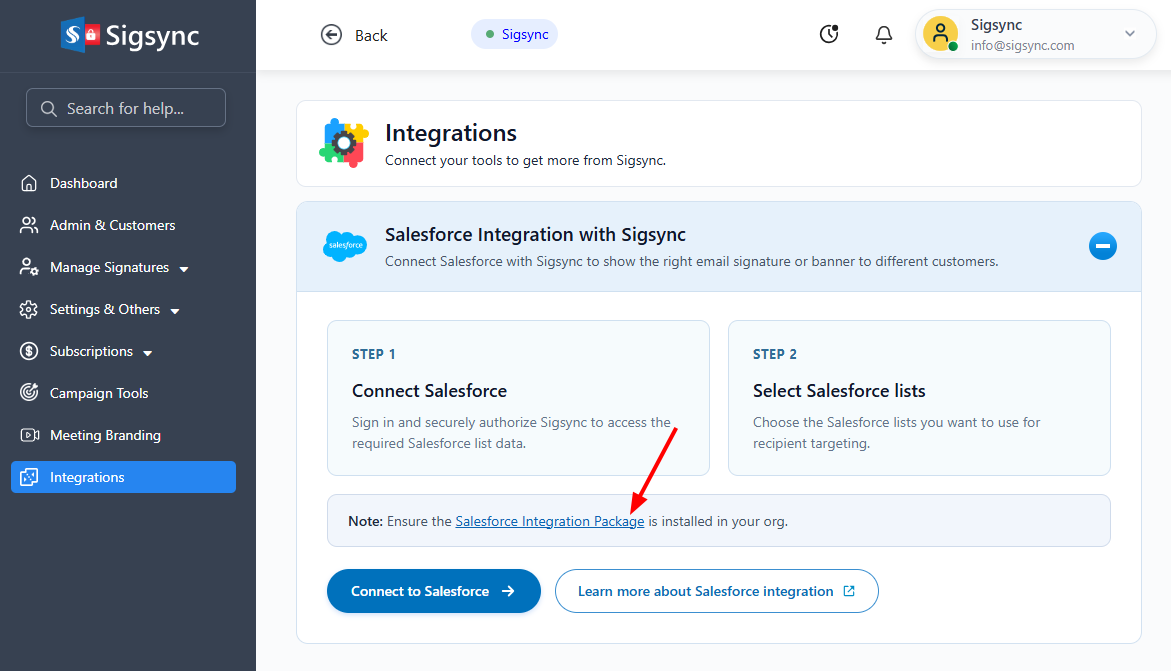
- Log in with your Salesforce account and choose the appropriate package access level for your organization.
- Install for Admins Only: Gives access to Salesforce administrators only.
- Install for All Users: Makes the package available to all applicable Salesforce users.
- Install for Specific Profiles: Limits package access to selected Salesforce profiles.
- Select the acknowledgement checkbox and click ‘Install’.
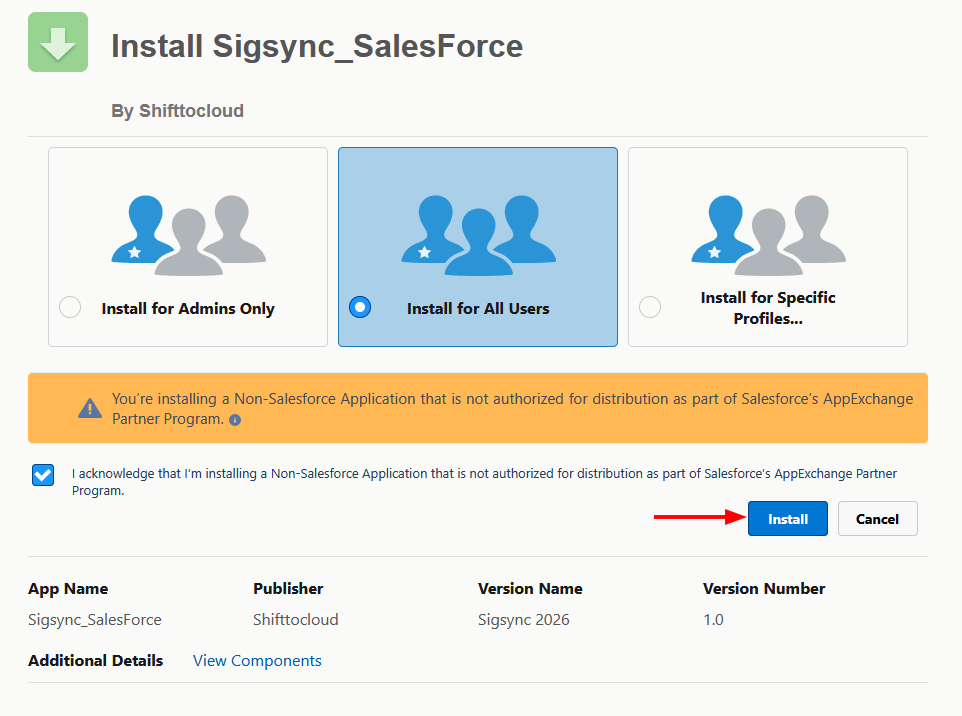
- After the installation is complete, click ‘Done’.
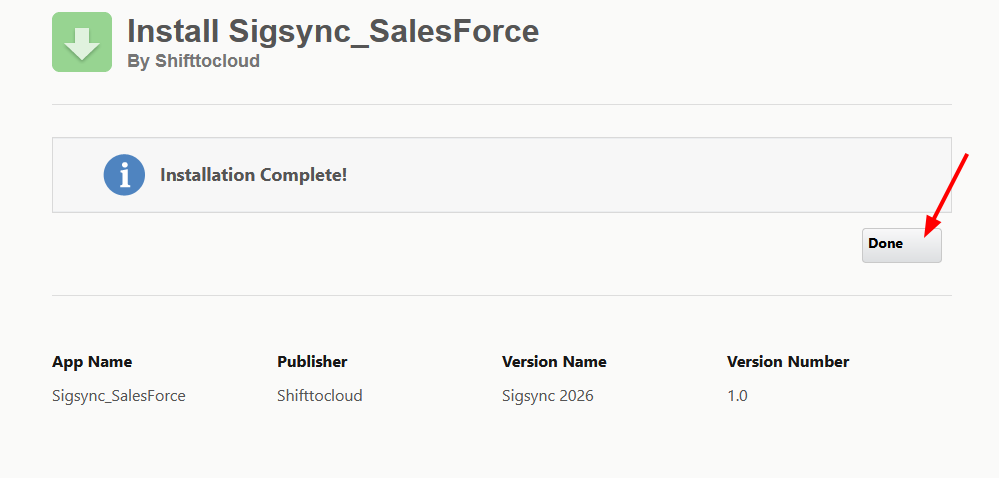
Connect Salesforce with Sigsync
After installing the package, return to the Salesforce integration setup in Sigsync.
- Go to Integration, then click ‘Connect to Salesforce’.
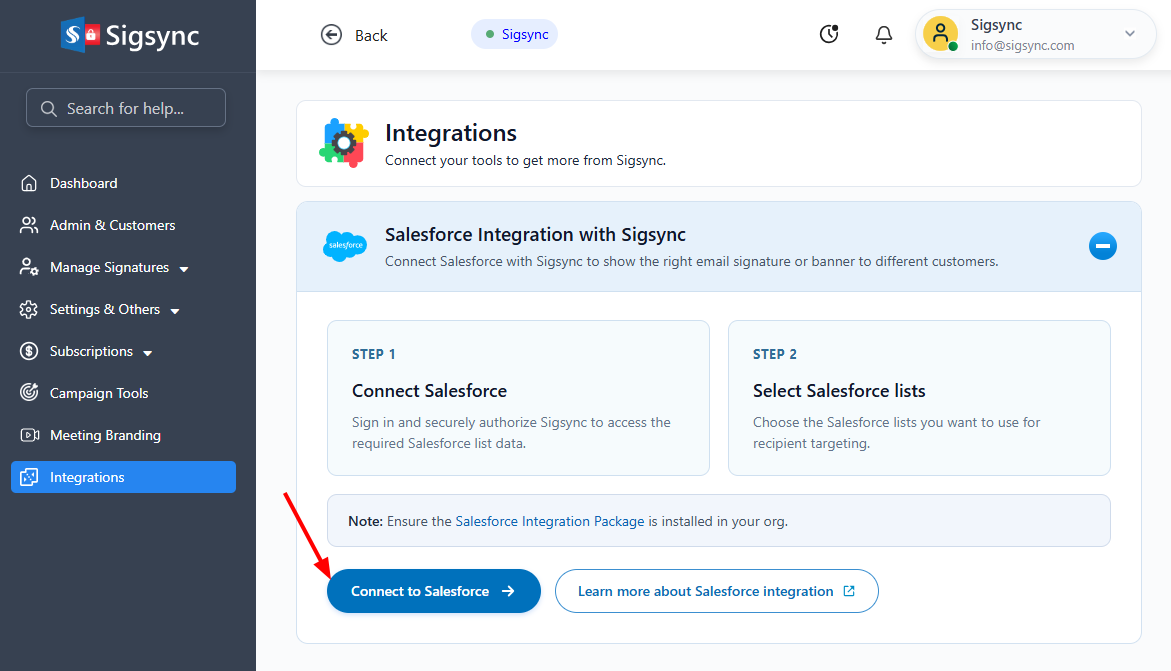
- Sign in to your Salesforce account, review the requested permissions, and click ‘Allow’.
- Your Salesforce account is now connected to Sigsync.
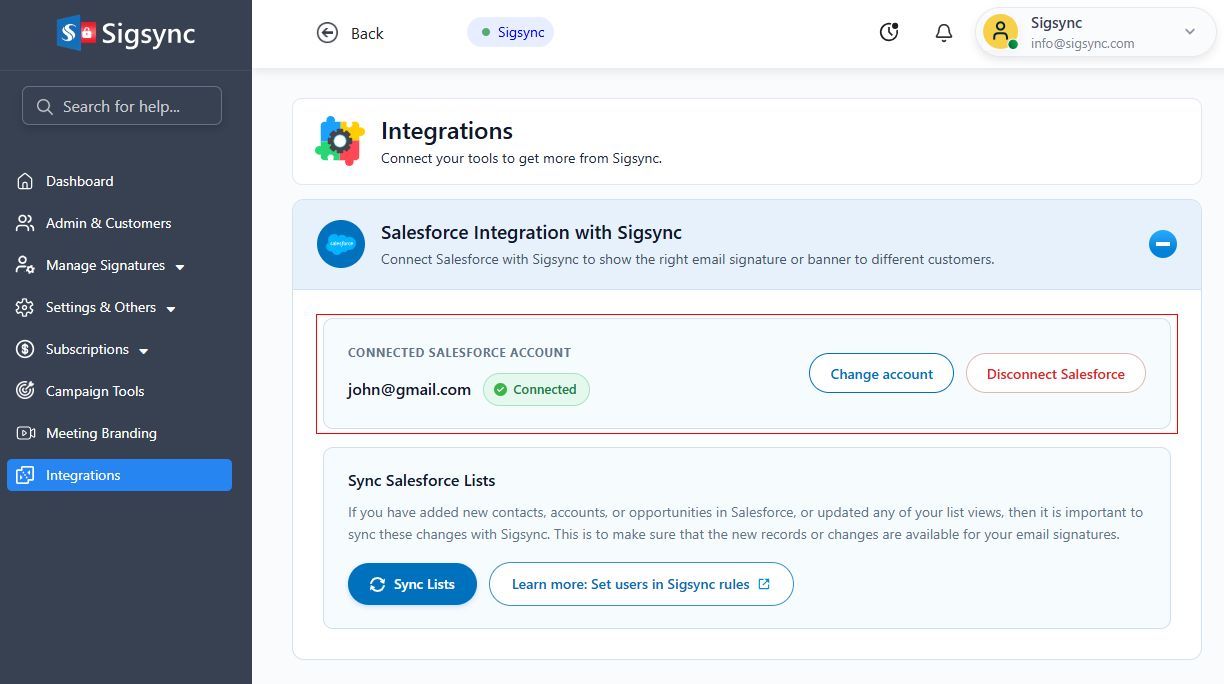
Assign a Salesforce List to a Signature Rule
- Navigate to the ‘Signature Rules’ tab from the Sigsync dashboard.
- Select the signature rule and assign the signature template.
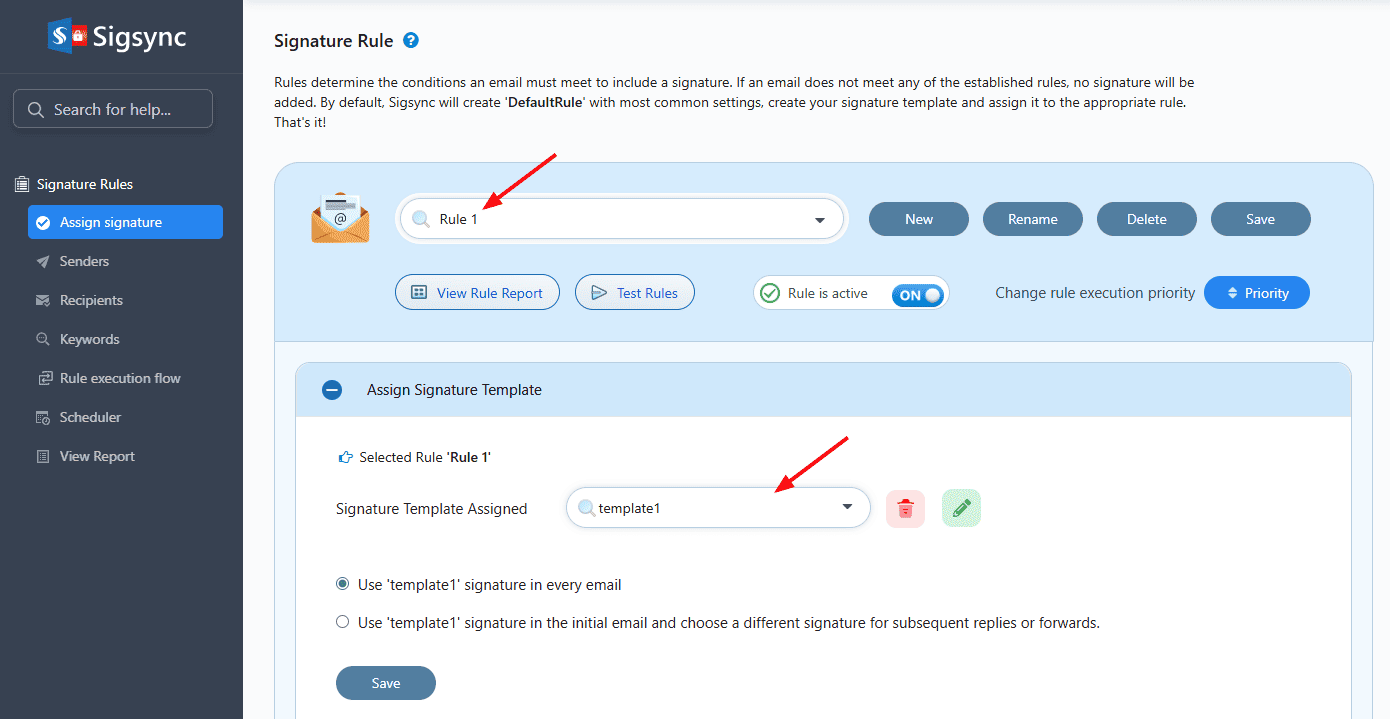
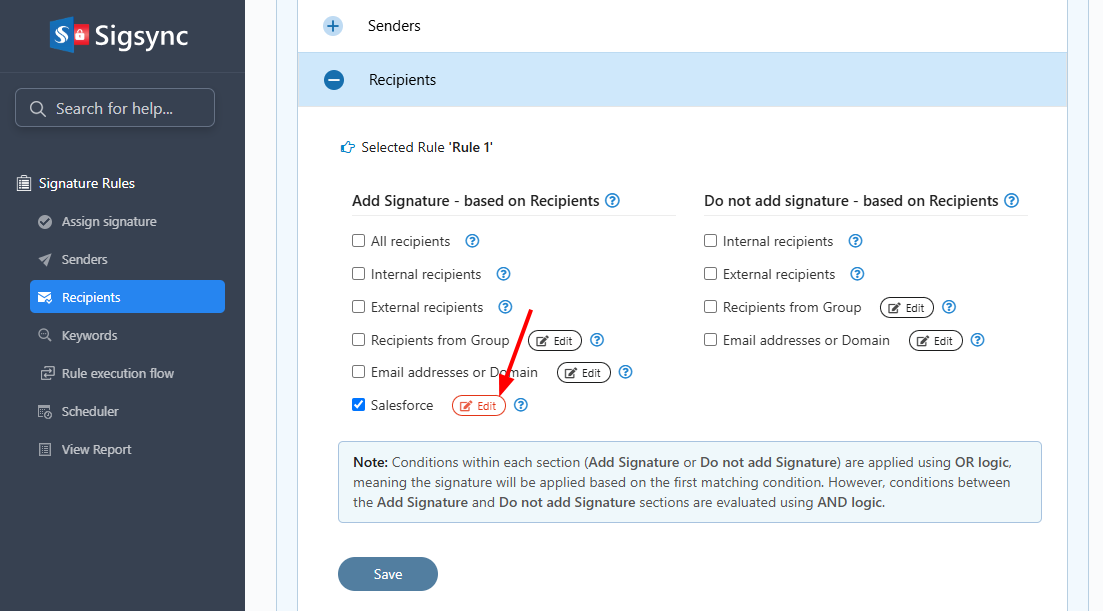
- Under the ‘Recipients’ tab, select the ‘Salesforce’ checkbox and click ‘Edit’.
- Select the required Salesforce list and save the signature rule.
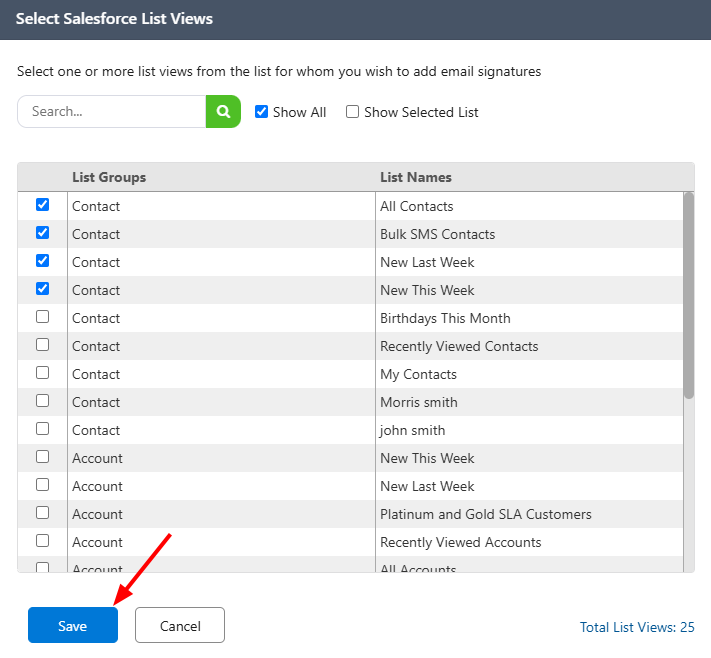
The selected signature rule can now apply when the email recipient belongs to that Salesforce list.
Test the Salesforce Signature Rule
After saving the rule, send a test email to a recipient who belongs to the selected Salesforce list.
Check that:
- The correct signature is applied.
- The expected banner or signature content appears.
- Images and links work correctly.
Note: If you recently changed the Salesforce list, make sure the latest changes have been synced before testing.
Using Different Signatures for Salesforce Lists
You can create different Sigsync signature rules for different Salesforce lists, including Contact, Account, and Opportunity lists.
For example:
- Contact Lists: Apply a specific signature or banner when sending emails to contacts included in a selected Salesforce contact list.
- Account Lists: Use different signature content for recipients associated with selected Salesforce accounts.
- Opportunity Lists: Apply targeted signature content or banners based on recipients associated with selected Salesforce opportunities.
Select the required Salesforce list under Recipients > Salesforce in the Sigsync signature rule and assign the appropriate signature template.
Updating Salesforce Lists
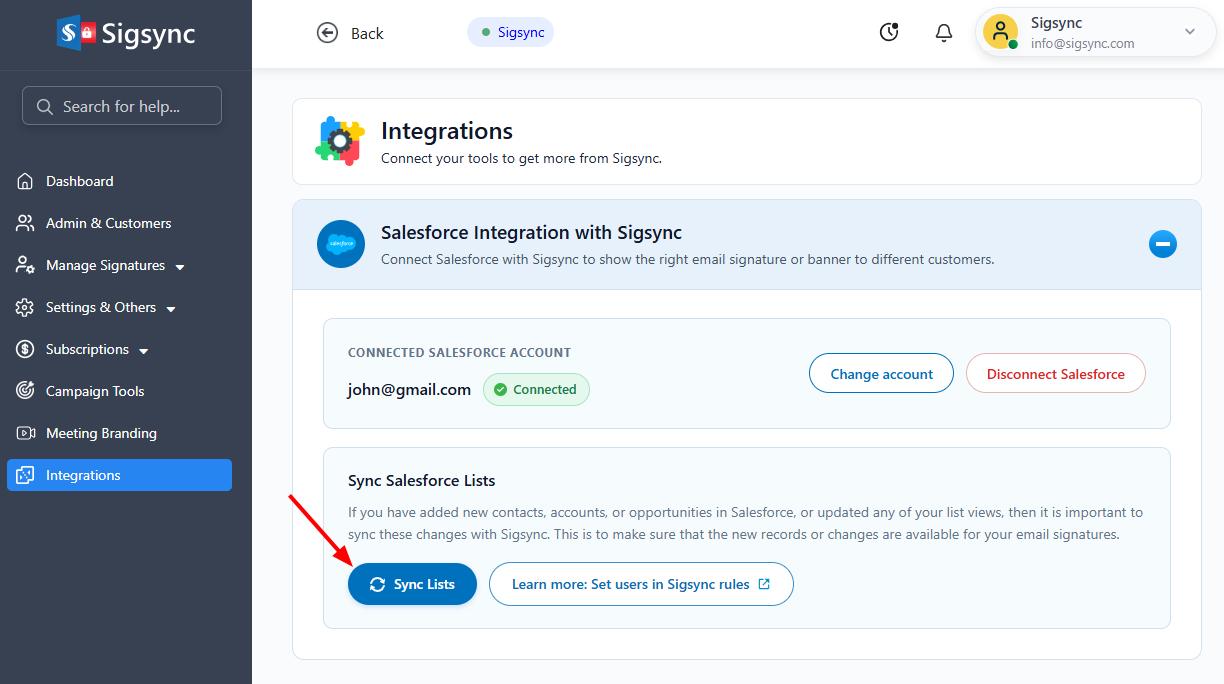
If you add new contacts, accounts, or opportunities in Salesforce, or update any existing list views, sync the changes with Sigsync. This ensures that the latest Salesforce records and list updates are available when configuring email signature rules.
- Make the required change in Salesforce.
- Open the Salesforce integration in Sigsync.
- Click Sync Lists.
- Wait for the synchronization to complete.
- Verify the updated Salesforce list.
Note: A minimum gap of 30 minutes is required between Force Sync requests.