-
- Reseller
-
Products
Tailored Product Demo for Your Exact Needs
Explore how our solution delivers efficiency, control, and scalability.
Request a Demo
-
Solutions
Tailored Product Demo for Your Exact Needs
Explore how our solution delivers efficiency, control, and scalability.
Request a Demo
- Dashboard
- Features
- Pricing
Meeting Branding
Sigsync Office 365 Email Signature Software gives your team a branded background and an on-screen name badge for video calls on Microsoft Teams, Google Meet or Zoom. Your logo and design elements come straight from the Brand Kit you've set up in Sigsync, so there's nothing extra to design. You can build several Meeting Branding themes and hand out different ones to different teams. To use a theme, you just download your assigned icon, name badge, and background from Sigsync, then set it as your background in Microsoft Teams, Google Meet or Zoom.
Why Use Meeting Branding?
Meeting Branding gives you control over how employees appear on every video call, so every meeting looks consistent and professional.
- Apply a branded background across the whole organization in just a few clicks
- Show the caller's name, job title, and company logo automatically on every call
- Keep those details accurate by pulling them straight from your Active Directory (AD)
- Maintain the same branding across Zoom, Microsoft Teams, and Google Meet without extra work for IT
- Cut down on IT support requests from employees trying to set up their own backgrounds
Without Meeting Branding, IT ends up sending out template files and hoping employees set them up correctly. That's slow, inconsistent, and means extra work every time someone joins, changes their title, or the brandgets a refresh.
Steps to Set Up Meeting Branding
Setting this up has four parts:
- Create a Brand Kit - add your logo and brand colors to Sigsync.
- Create a Meeting Branding theme - design your personalised background and name tag overlay.
- Assign the theme to users - control who can use this theme in their meetings.
- Download your branded background - get it ready to apply on Zoom, Teams, or Google Meet.
Create a Brand Kit
Before you can create a Meeting Branding theme, you need a Brand Kit set up with your logo and brand colors. If you already have one, you can skip ahead to creating your theme. If not, here's how to create one.
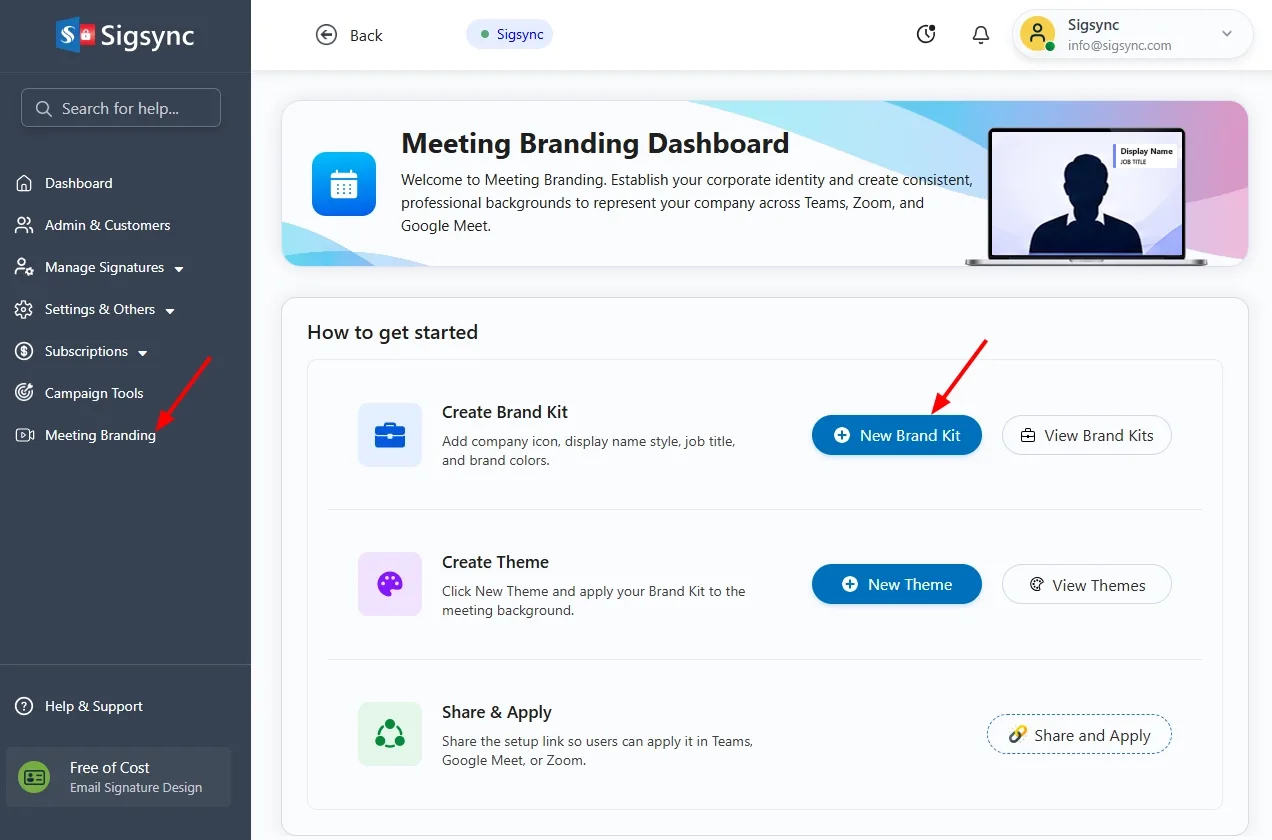
- Log in to your Sigsync Dashboard.
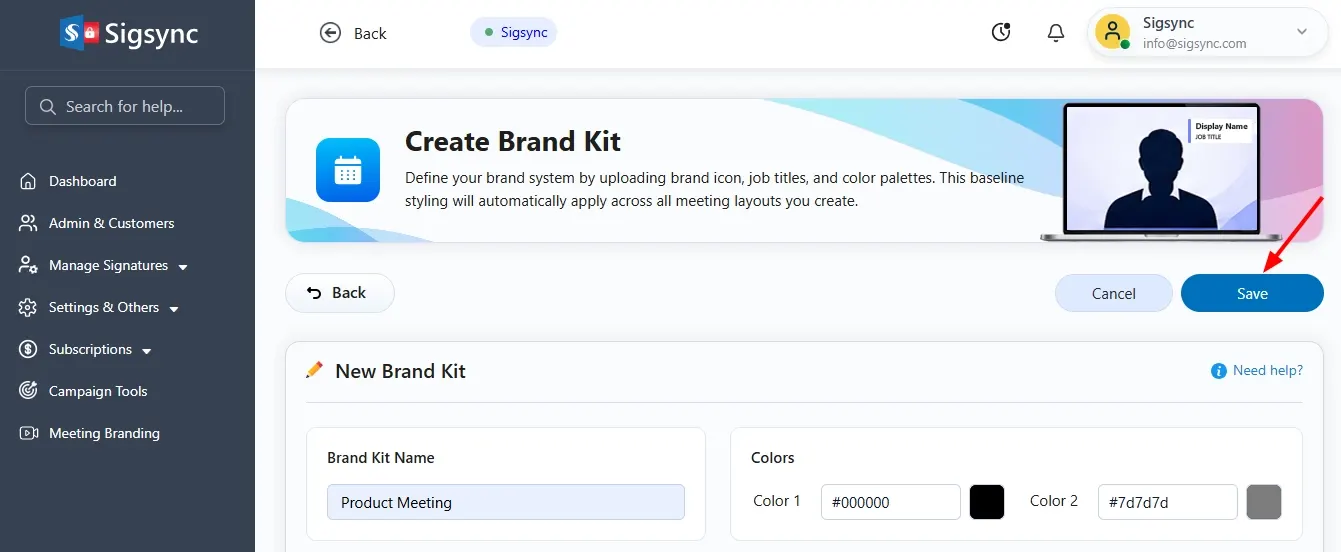
- Go to Meeting Branding and click New Brand Kit.
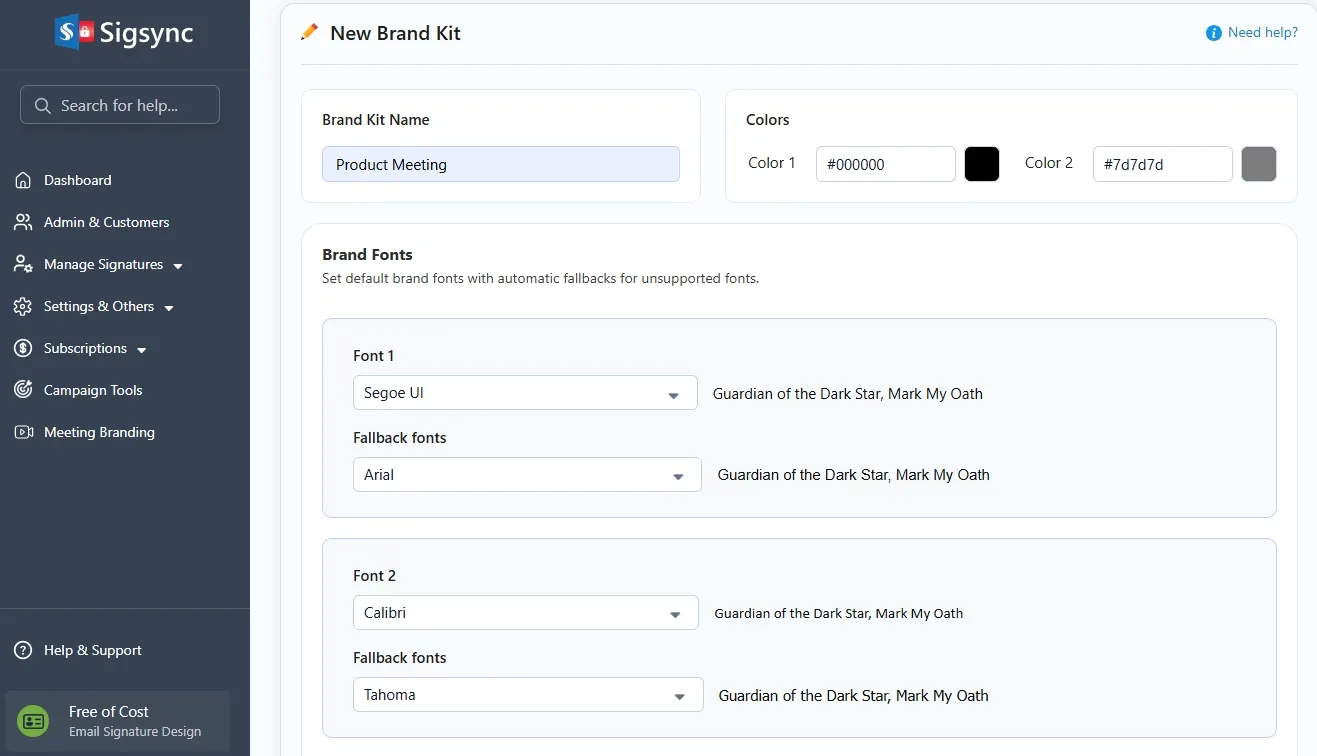
- In the Brand Kit Name field, enter a name for your new Brand Kit.
- Brand Fonts: Choose up to two fonts to use as your brand fonts. Each one can also have a fallback font, which is used if the main font isn't available. Pick a font from the drop-down list and the preview text updates to show how it will look.
- Colors: Under Color 1 and Color 2, enter a hex code or select the color swatch to choose your two brand colors.
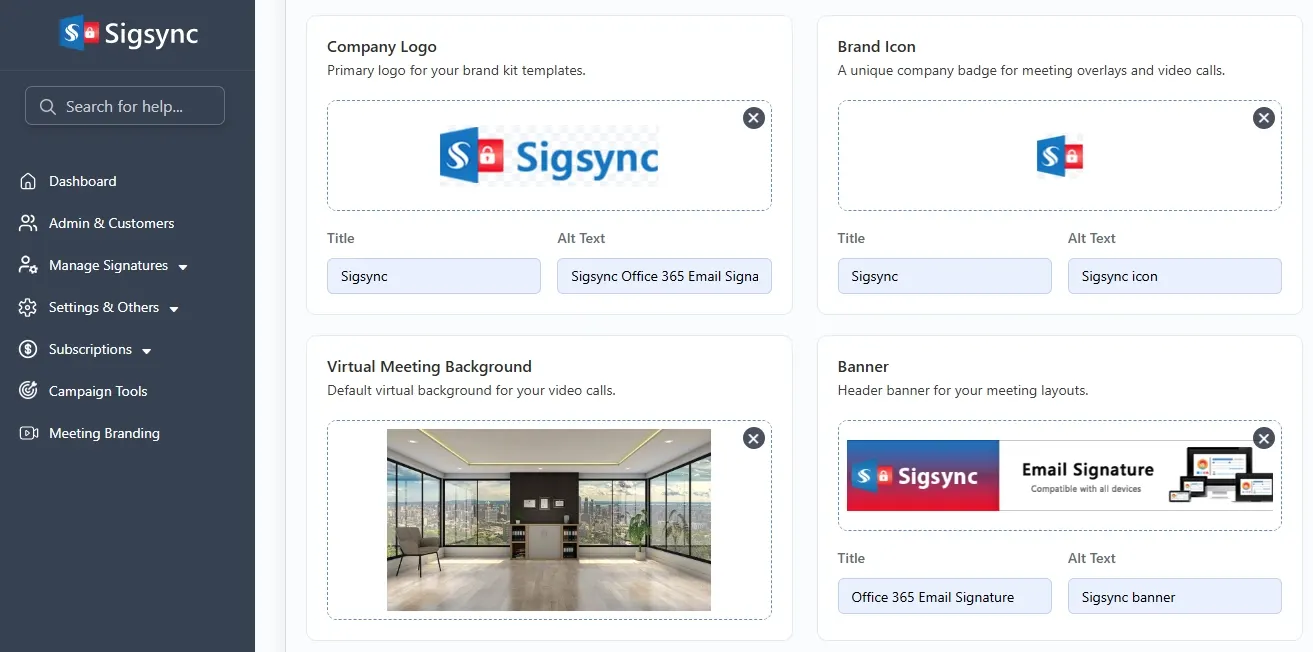
- Company Logo: Upload a small rectangular image for your logo. Add a logo title and alt text for the image.
- Brand Icon: Upload a small square image to use as your icon.
- Virtual Meeting Background: Upload a wide rectangular image, 1920 x 1080 pixels, to use as the default background for your video calls.
- Banner: Upload a banner image for your meeting layouts.Note:
- Once you upload an image for the Logo, Icon, Background, or Banner, it opens in the editor where you can zoom, reposition, or resize it to fit the preview box. Select Reset if you want to start over.
- Each image must be under 300KB.
- Disclaimer: Add a disclaimer in plain text if you need a legal disclaimer or liability message included.
- Click Save.
Create a Meeting Branding Theme
Here's how to design a branded meeting background theme in Sigsync.
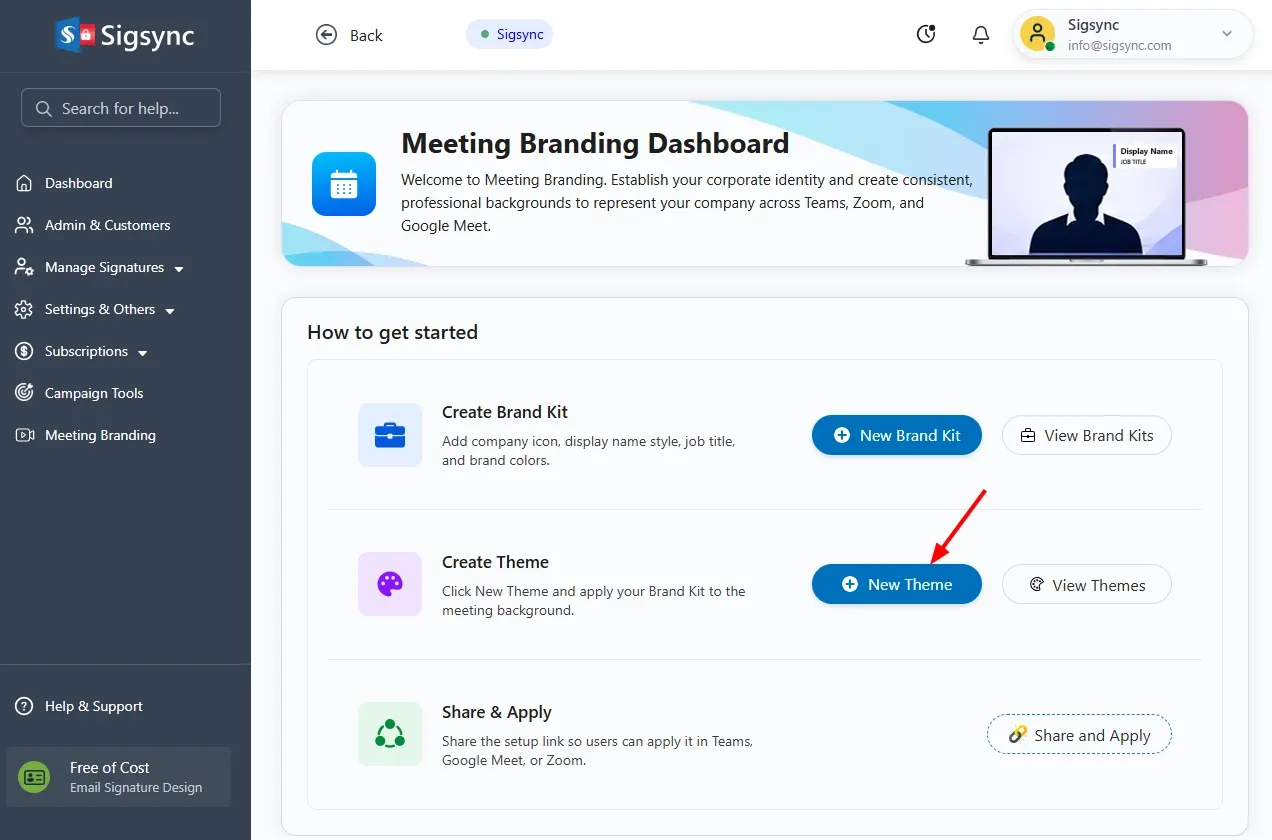
- Navigate to meeting branding dashboard and click on New Theme button.
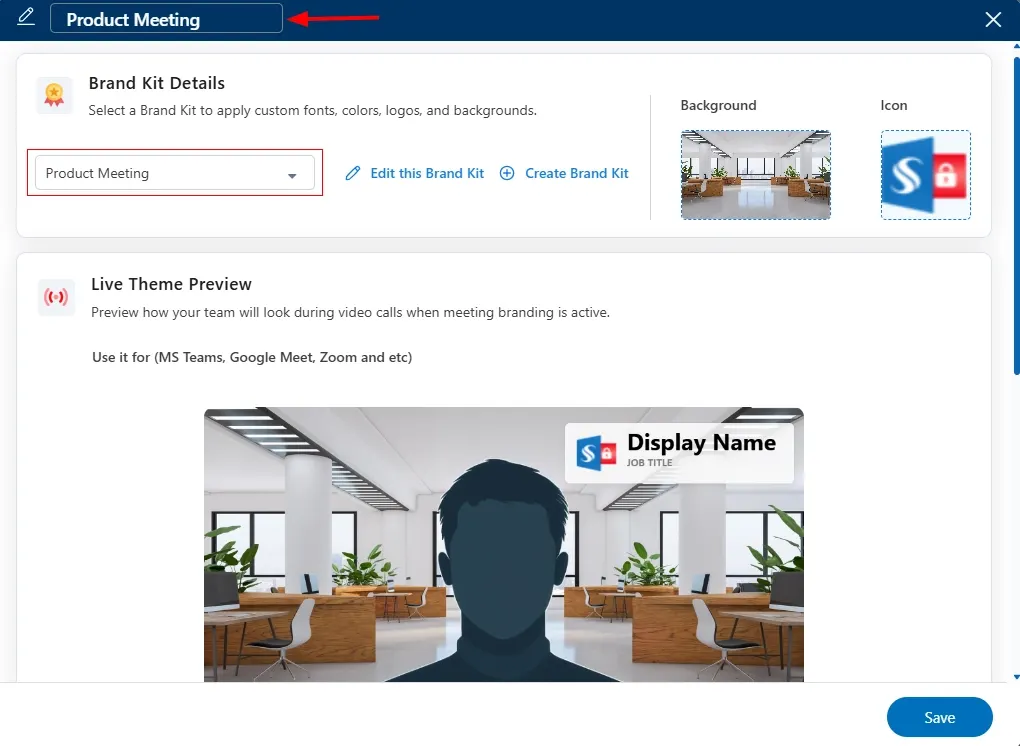
- Give your theme a name.
- Under Brand Kit Details, select a Brand Kit from the drop-down list. This pulls in the background and icon images from that brand kit, and a preview of both appears on screen.
Note: If you need to edit the selected Brand Kit or create a new one, use the Edit this Brand Kit or Create Brand Kit buttons. This takes you to the Brand Kits screen without saving your theme.
- Under Name Badge, set the font, color, and transparency for your name badge overlay.
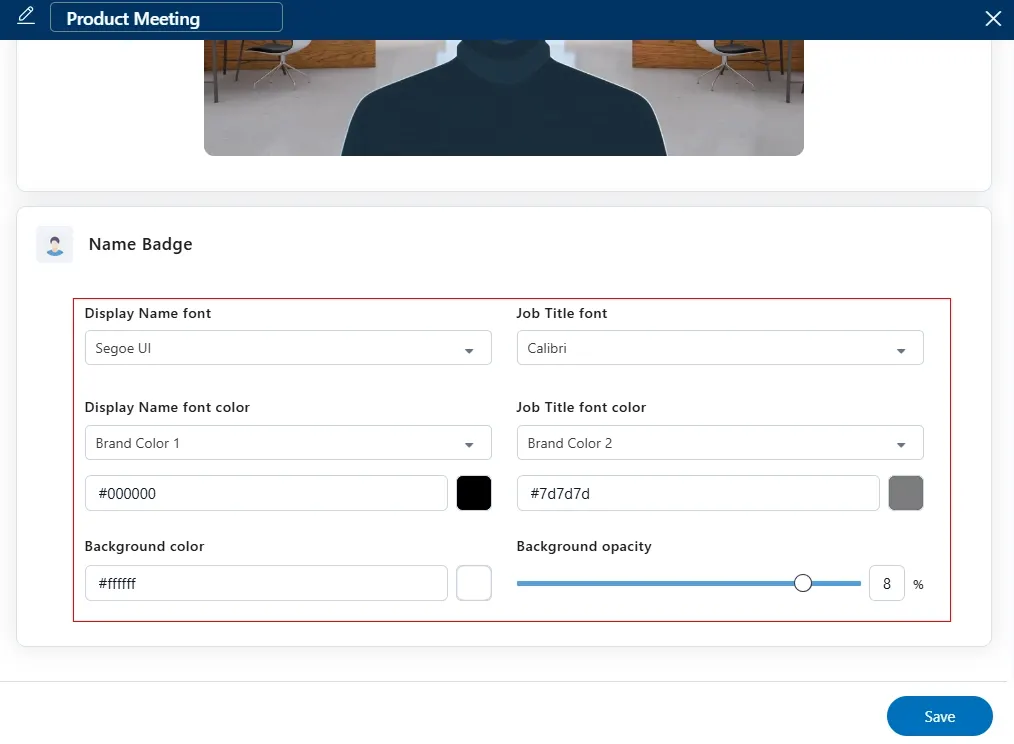
- Your changes appear right away in the Live Theme Preview panel, so you can check how it looks before saving.
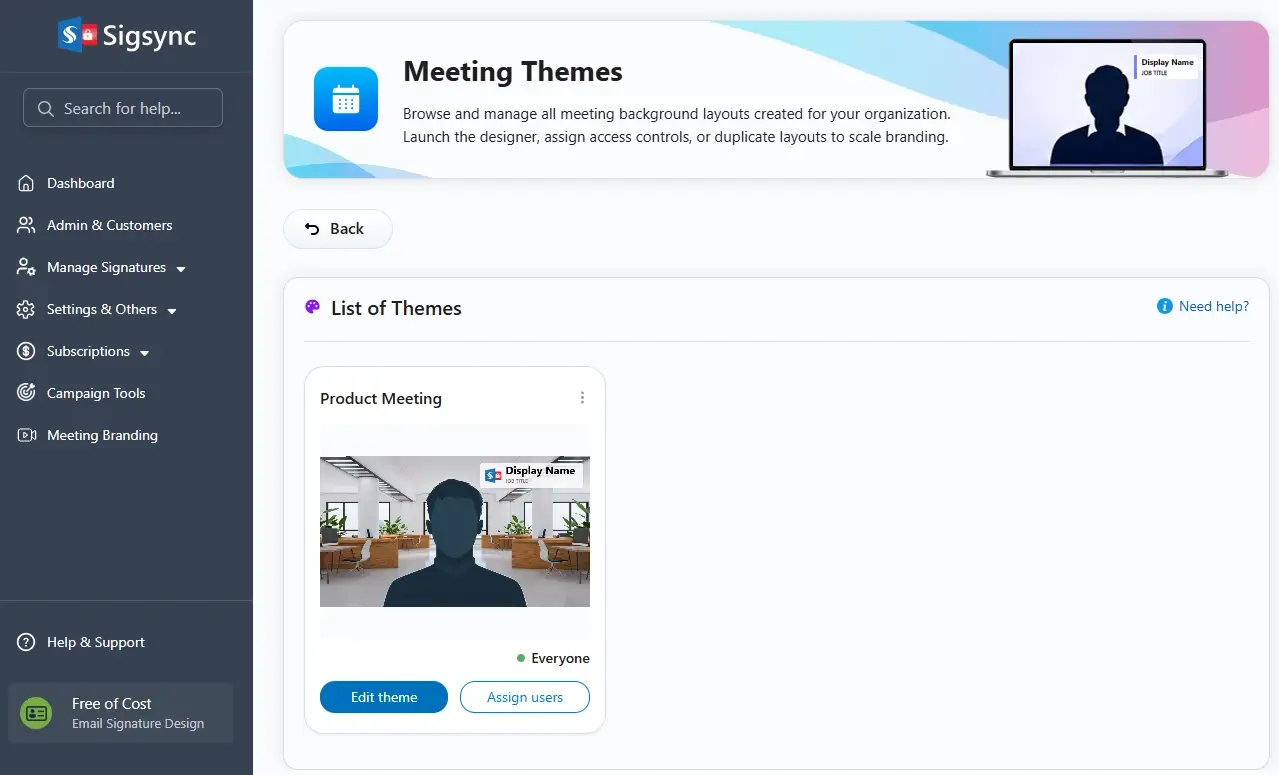
- Select Save. Your theme is added to the List of Themes.
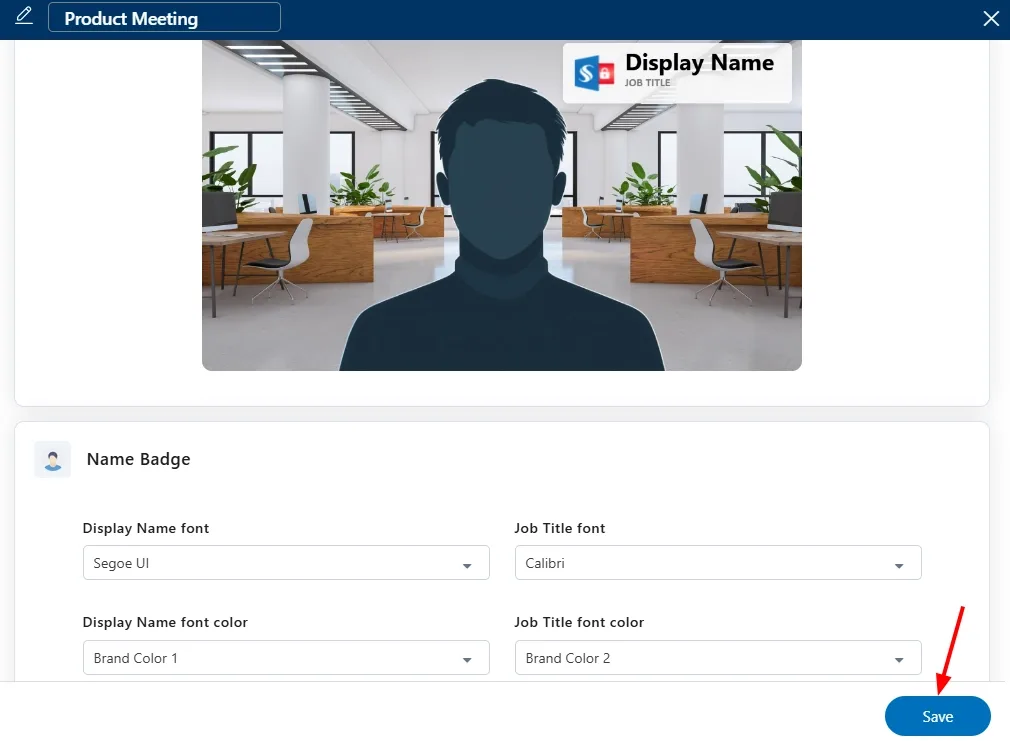
- To make changes later, select Edit Theme on any saved theme.
- To remove a theme, select the ellipsis icon next to it, then select Delete.
Assign the Theme to Users
By default, a new theme applies to everyone in your organization, which works fine if you want one background for the whole company. But if different teams or regions need their own look, you can limit a theme to just the users or groups who should have it. Here's how to set that up.
- Navigate to the ‘List of Themes’ section and click ‘Assign Users’ for the theme you want to assign to a user.
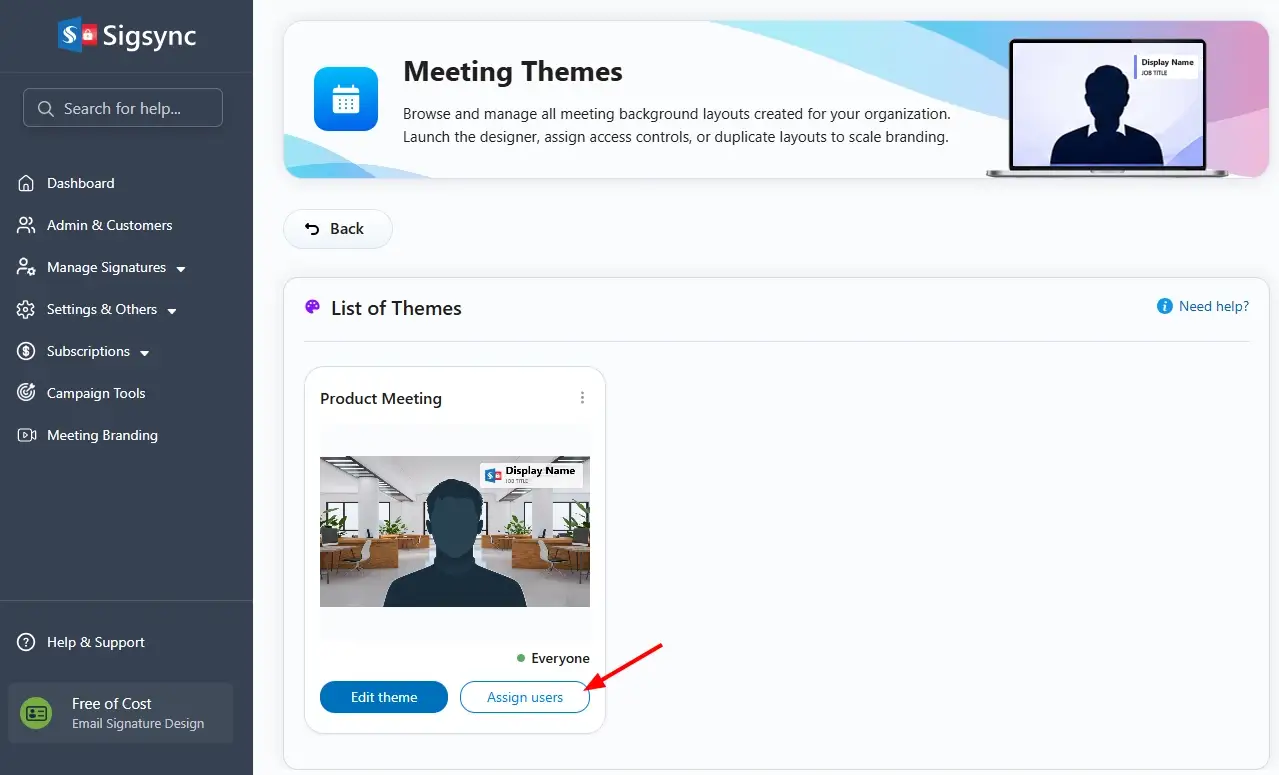
- Every theme is open to all users unless you change this. Switch to Selected users or groups if you want to restrict it.
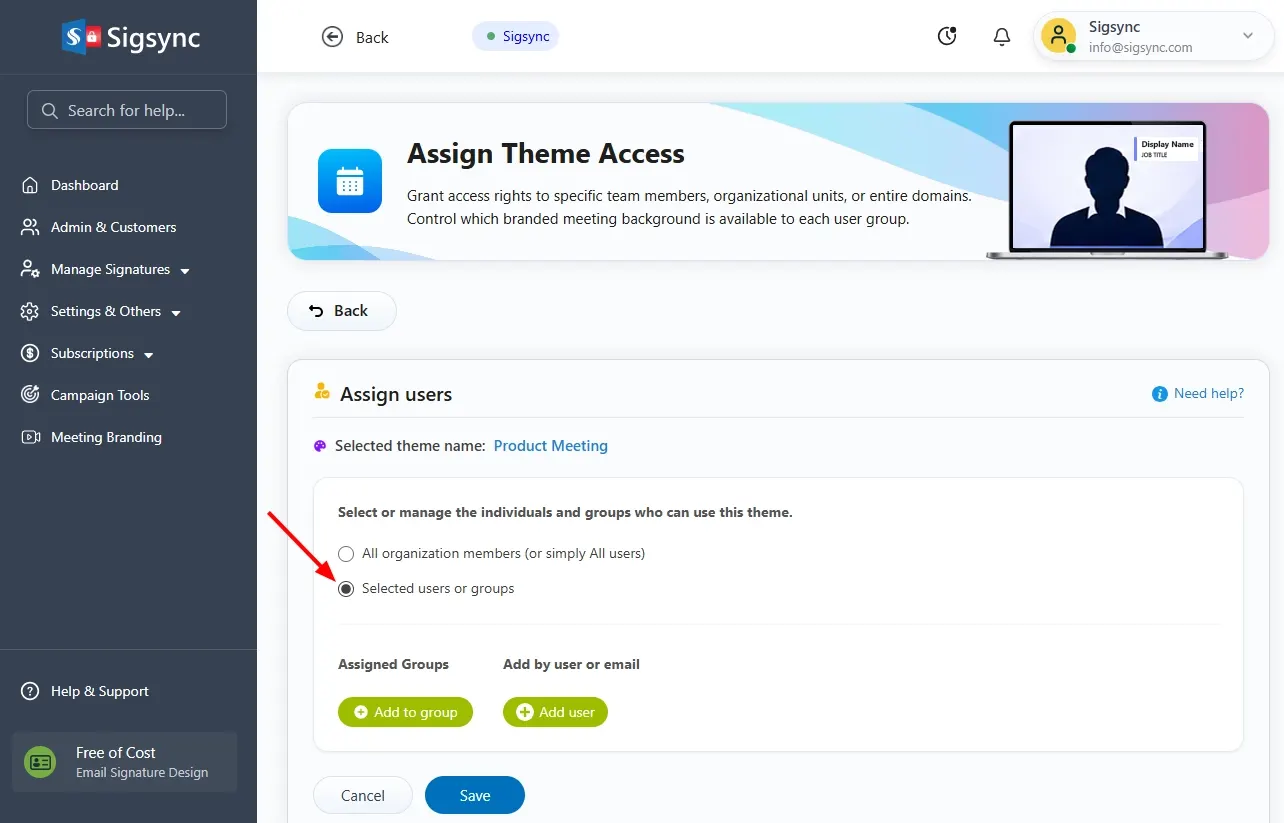
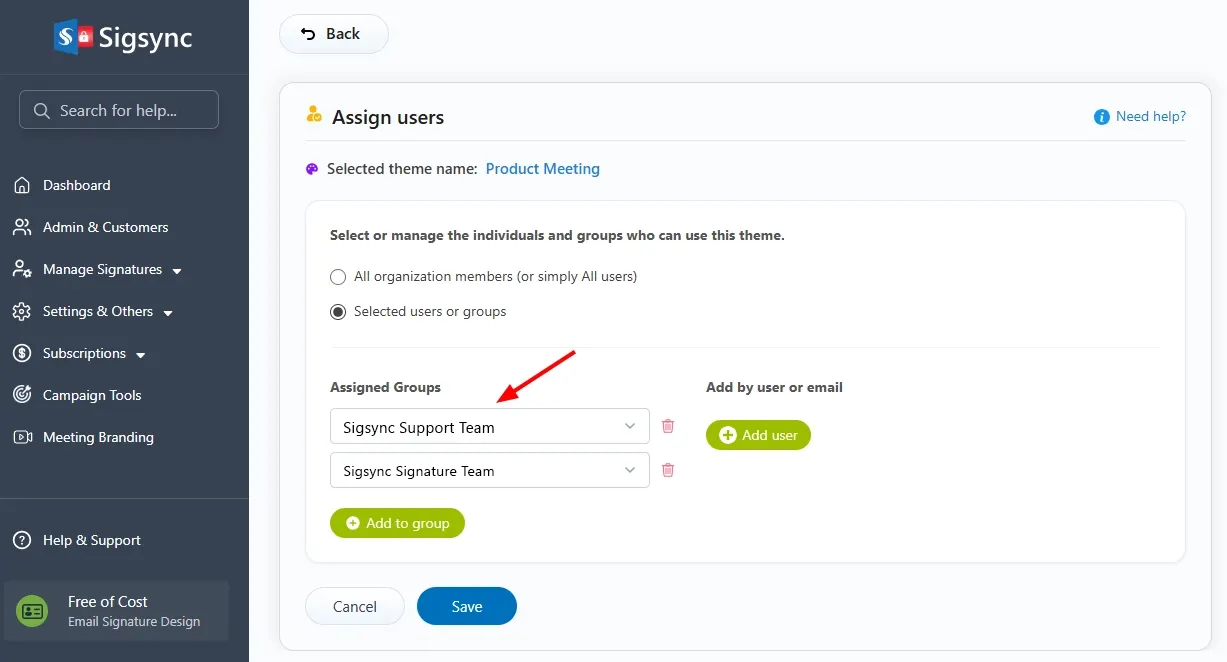
- To allow a specific group to use this theme, select Add to Group, then search for and select the group name.
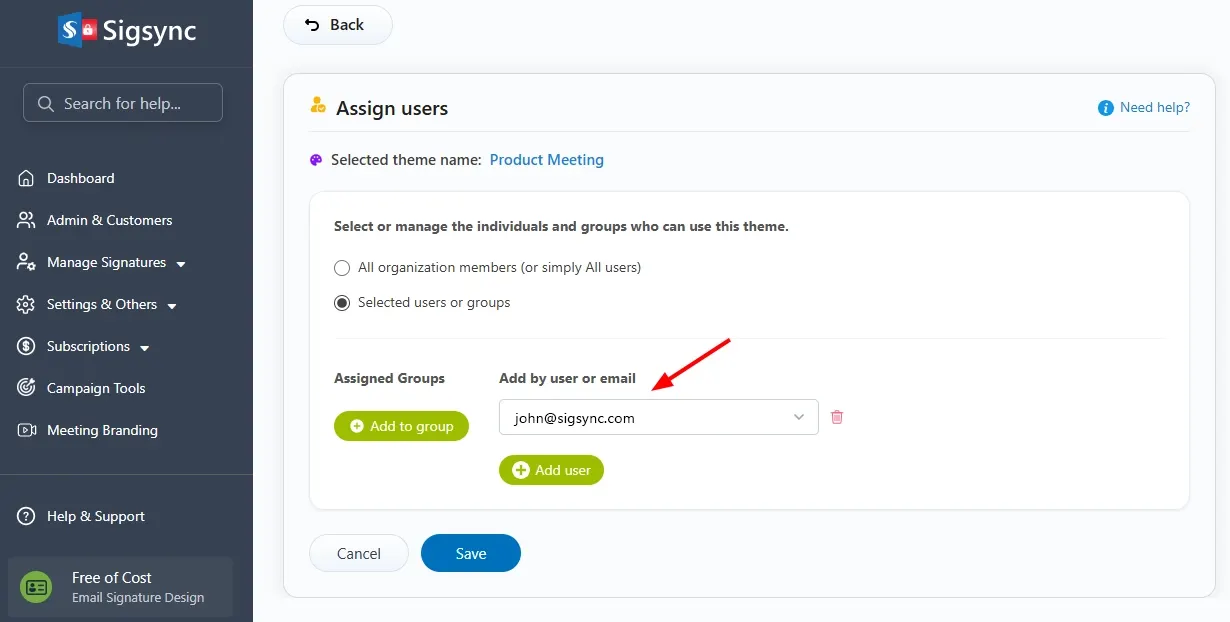
- To allow individual users or domains, select Add User, then search for and select the email address or domain.
- Select Save to apply your changes.
Download Your Branded Background
Once a theme is assigned, you can download your branded background with name badge, then apply it on Zoom, Teams, or Google Meet so it's ready for your next meeting.
To download your branding:
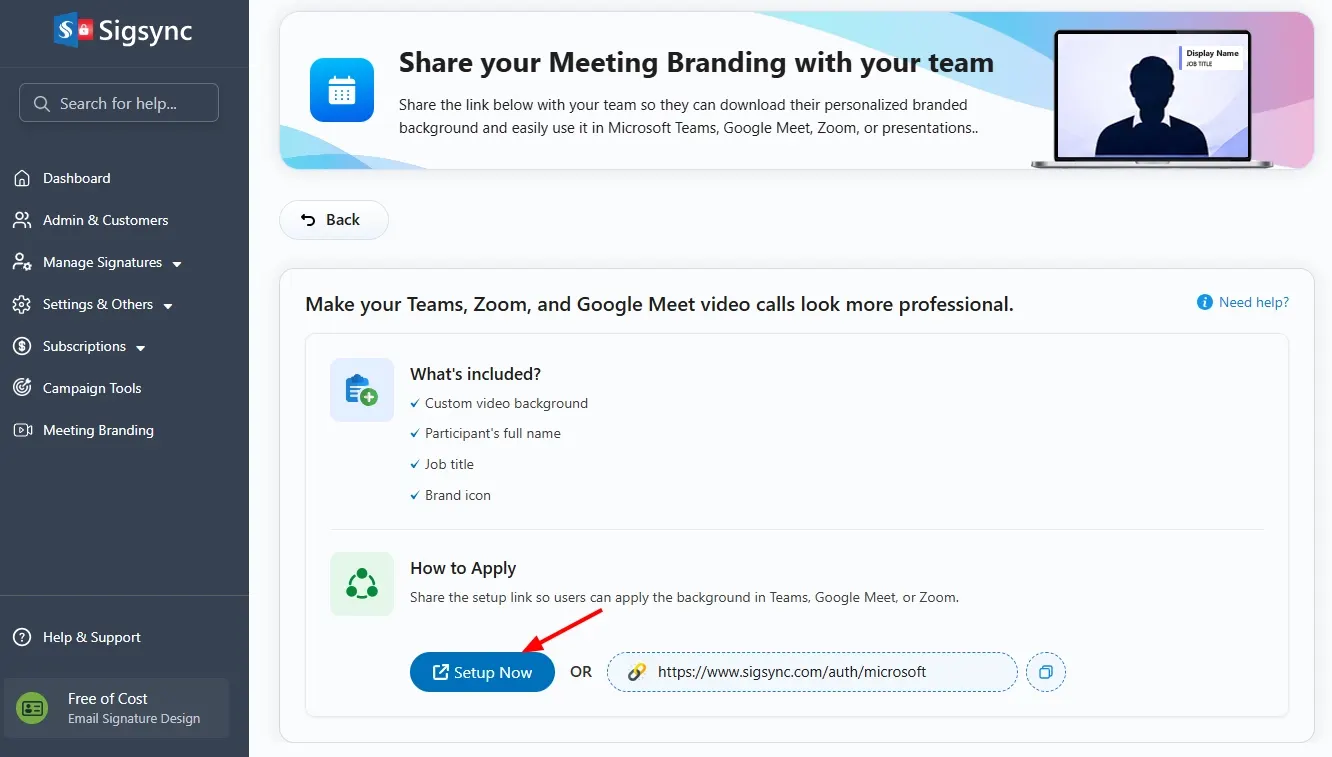
- Navigate to the meeting branding dashboard and click ‘Share and Apply’.
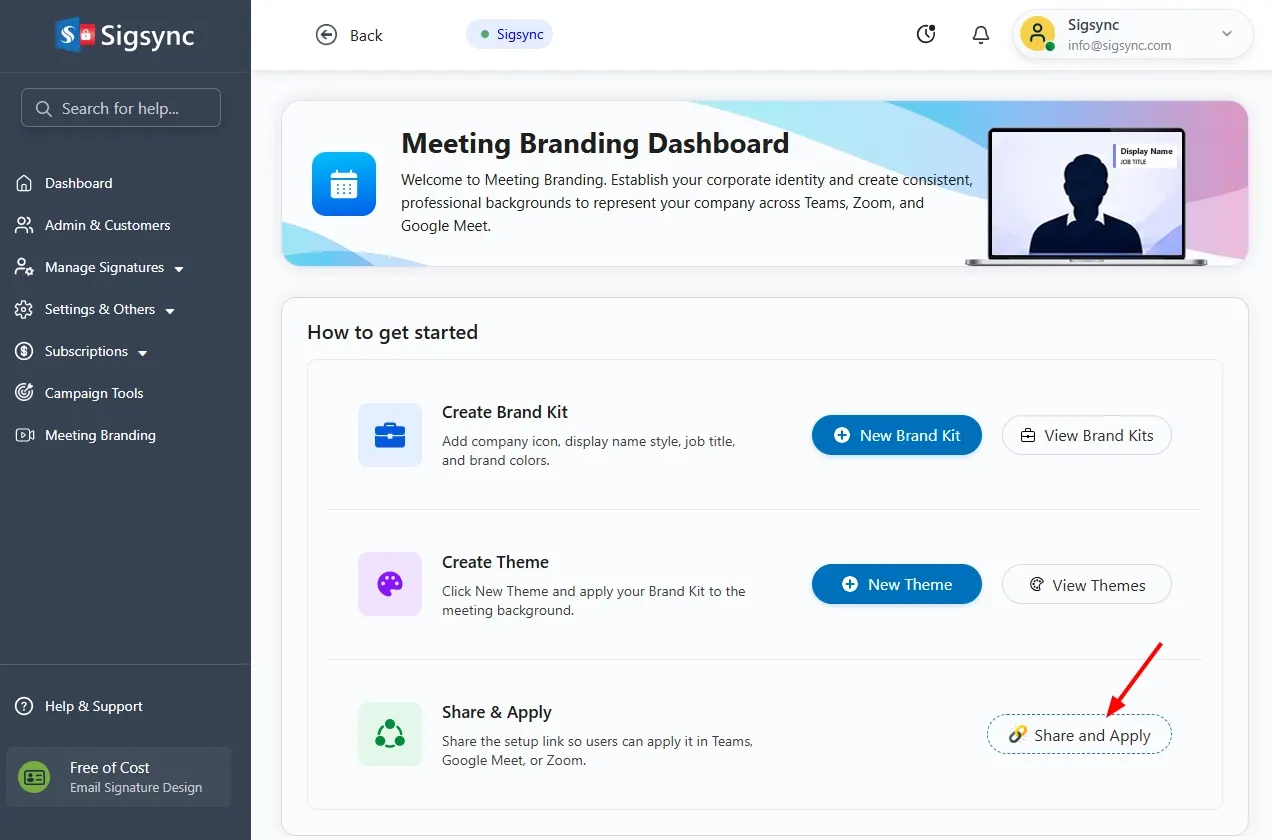
- Click on Setup Now button to download branded branding.
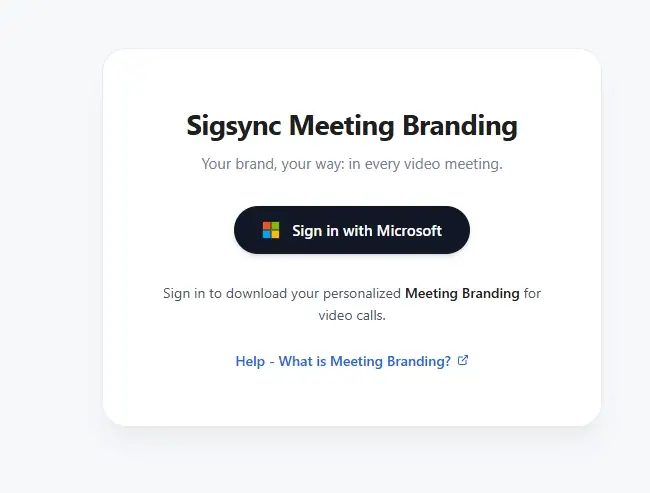
- Sign in with your Microsoft account. This opens the Meeting Branding section.
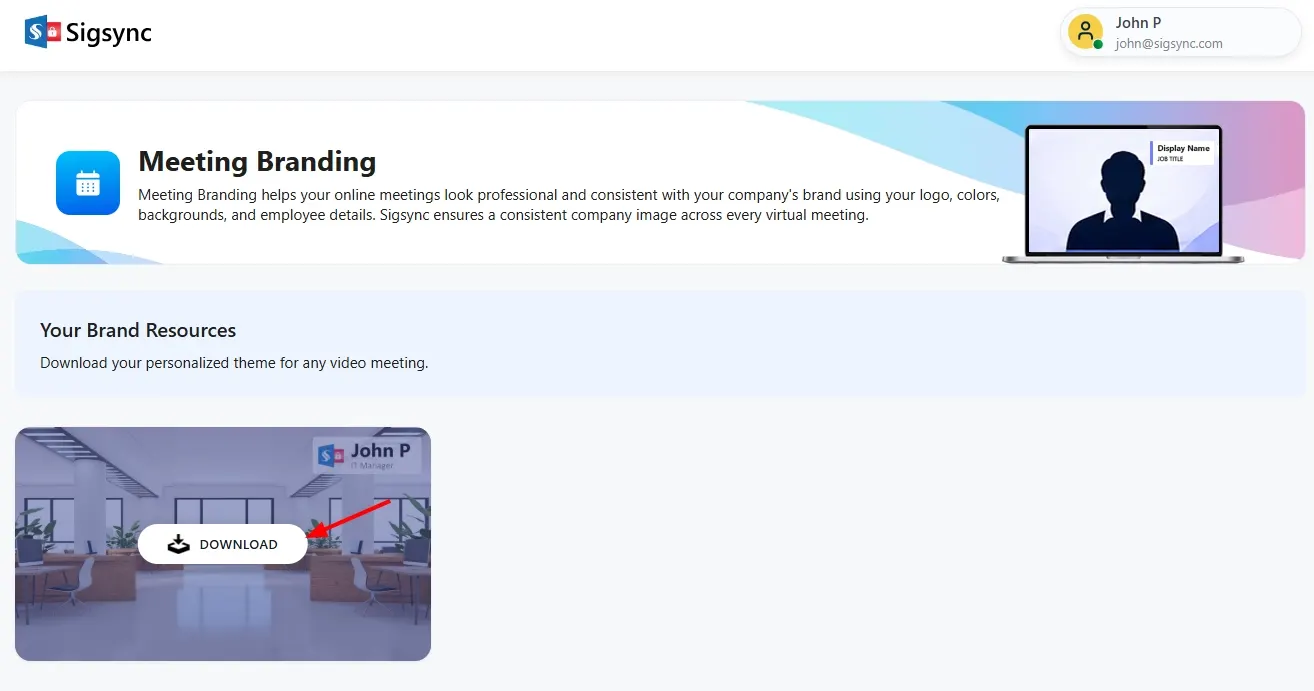
- All the branded backgrounds available to you are shown on screen. Hover over the one you want and click Download to save it, ready to upload into Zoom, Teams, or Google Meet.
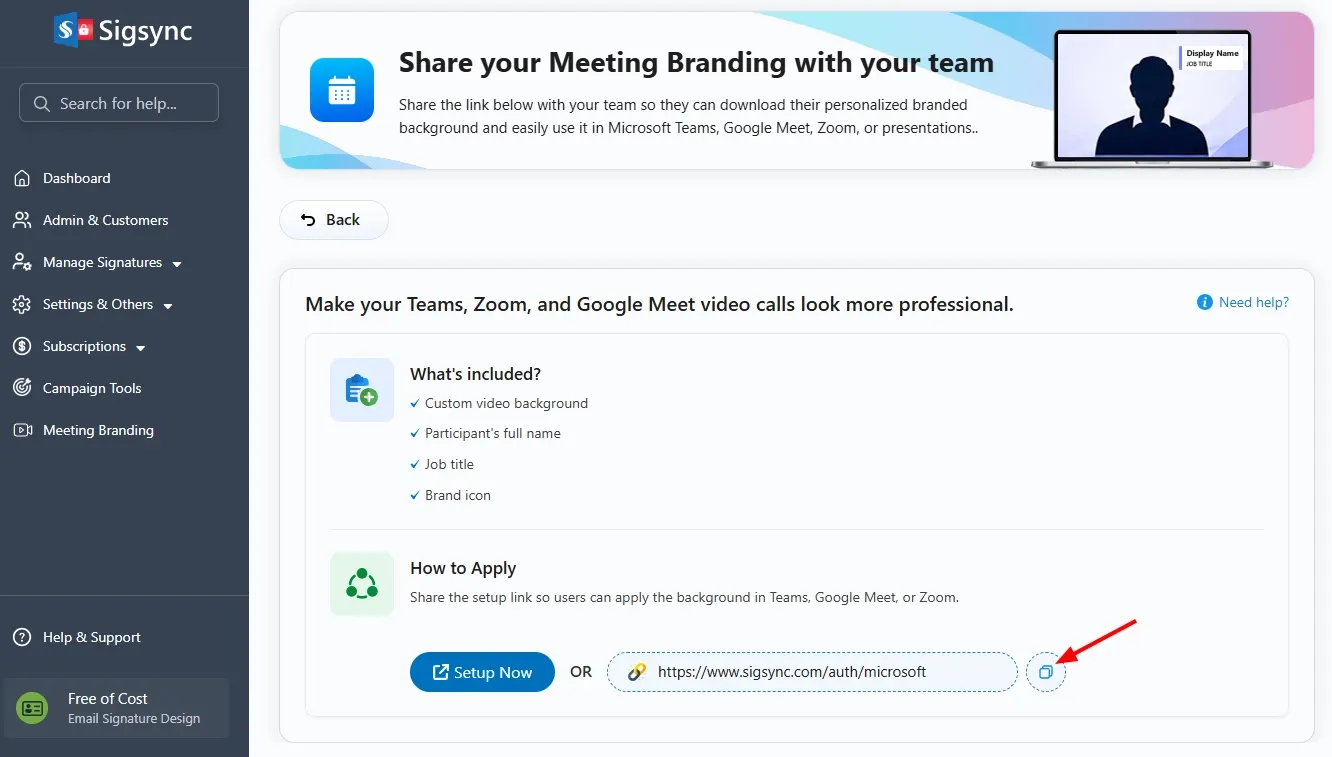
- To share this with a colleague, use the Copy icon next to the link to copy it, then send it to them directly.
Learn how to Apply Meeting Branding on Zoom, Teams & Google Meet
In this manual